Before Upgrading

Steps to take before upgrading your IBM Aspera product.

The installer for Aspera Client automatically checks for a previous version of the product on your system. If a previous version is found, the installer automatically removes it and upgrades your computer to the newer version.

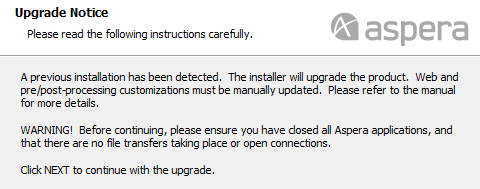
On a Windows system, the installer displays the following message when an older version of the product is detected:

Although the installer performs your upgrade automatically, we highly recommend completing the tasks below before starting the installation/upgrade process. If you do not follow these steps, you risk installation errors or losing your former configuration settings. Skip any steps that do not apply to your specific product version.

Note: You cannot upgrade directly between different Aspera transfer products (such as from Point-to-Point to Desktop Client, or from Point-to-Point to Enterprise Server). To upgrade, you need to back up the configuration, uninstall the product, and perform a fresh install of the new version of the product. .

  1. All Versions - Verify the version of your existing product

    Depending on your current product version, the upgrade preparation procedure may differ. In the Windows Command Prompt ( Start menu > All Programs > Accessories > Command Prompt ), execute this command:

    > ascp -A

    This displays the product name and version number.

    Warning:

    When upgrading from 2.7.X to 3.X on Windows, please be aware that user names are now case sensitive.

  2. All Versions - Confirm your Aspera service account.

    If you have already installed IBM Aspera Enterprise Server, Connect Server, Point-to-Point Client or Desktop Client on your computer, there is already a user account that has been designated to run the services for Aspera products. By default, the user name for the Aspera services account is svcAspera; however, this is not a requirement and you can select a different user to run the services. When you install additional Aspera products or perform an upgrade to an existing Aspera product, you must identify the same account name and password that you set for your first Aspera product installation.

    To confirm which user is designated as your Aspera service account in Windows 2003, Vista, and 7, right-click on My Computer and select Manage > Services and Applications > Services. In Windows 2008, go to the Server Manager and select Configuration > Services. The account designated for each Aspera service is listed. Please make note of this account for the installation of additional Aspera products or product upgrades. If you have forgotten your Aspera service account password or would like to change the designated Aspera service account, please follow the instructions described in Updating Aspera Service Account.

  3. All versions - Stop all FASP transfer-related applications and connections.

    Before upgrading the application, close the following applications and services:

    • ascp connections
    • The Desktop Client application
    • asperasync service
  4. All versions - Back up the files

    Depending on the version of your previous installation and the operating system, back up the files in the specified locations:

    Aspera Version Folder
    2.5+
    Note: If you have installed the product in a different location, change the path accordingly.

    32-bit Windows Default Path:

    • C:\Program Files\Aspera\Client\etc\ (Configuration files, Shared Remote Hosts)
    • C:\Program Files\Aspera\Client\var\(Prepost scripts, Connect Server)
    64-bit Windows Default Path:
    • C:\Program Files (x86)\Aspera\Client\etc\ (Configuration files, Shared Remote Hosts)
    • C:\Program Files (x86)\Aspera\Client\var\ (Prepost scripts, Connect Server)
    Individual User Files' Default Path:
    • <APPDATA>\Aspera\Client\(Individual user's remote hosts and hot folder info.)

    Note: Use this command in a Command Prompt window to find out the current user's <APPDATA> path:
    > echo %APPDATA%
    2.2.x and earlier 32-bit Windows:
    • C:\Program Files\Aspera\FASP\etc\ (Configuration files)
    • C:\Program Files\Aspera\FASP\var\(Prepost scripts, Connect Server)
    • C:\Program Files\Aspera\Aspera Scp\etc\(Remote Hosts an Hot Folders info)
    64-bit Windows:
    • C:\Program Files (x86)\Aspera\FASP\etc\ (Configuration files)
    • C:\Program Files (x86)\Aspera\FASP\var\(Prepost scripts, Connect Server)
    • C:\Program Files (x86)\Aspera\Aspera Scp\etc\ (Remote Hosts and Hot Folders info)