Aspera Connect User Guide
Mac OS X
Version 1.2.2
| Chapter 1 Introduction |
| Chapter 2 Setting Up |
| Chapter 3 Getting Started |
| Appendix 1 Uninstalling Aspera Connect |
Aspera Connect is a web browser file transfer plug-in that allows the browser to take advantage of fasp™
The Aspera Connect can be used to initiate downloads and uploads, display file selection dialogs, and handle drag and drop events. On Mac OS X, Aspera Connect supports Safari and Firefox.
By default, fasp™ transfers use TCP port 22 and UDP port 33001. These ports are typically available in most network environments that allow normal internet connectivity, so there should be no problem continuing the installation process.
If you are attempting to install Connect in a corporate network that restricts internet access to email and web browsing, and you encounter problems during file transfers, you will need to make sure that outbound connections are open to TCP on port 22, and UDP 33001. Please note that if the TCP and UDP ports for fasp™ traffic were changed by the remote host's administrator, your network's firewall rules will need to reflect those changes.
Go to Aspera's website download page and choose the installer for your platform. To install, simply execute the installer and follow the instructions.
When Aspera Connect is installed, please restart your browser before proceeding the configuration.
Before using Aspera Connect, basic configurations are necessary in order to maintain transfer manageability.
To open Aspera Connect preferences, under Aspera Connect go to Menu bar -> Aspera Connect. Click Preferences.

The first thing you see in Preferences is the General tab. You can indicate here whether or not you want to launch Aspera Connect automatically.

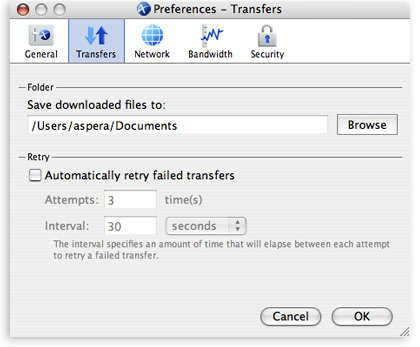
In the Transfers section, you can find the download folder and retry rule settings. Click Browse and select a folder to save the downloaded files. If you want to enable the auto-retry function, check the Automatically retry failed transfers and enter a value in attempts and interval.
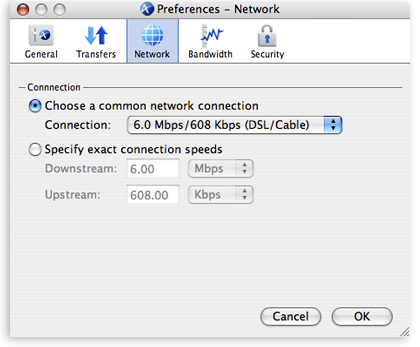
Go to Network to set up your network speed. You may choose a specific connection speed from the list or enter your value.
If the server supports auto bandwidth discovery, the Bandwidth tab allows you to utilize this feature. Please consult the server administrator about whether the server supports bandwidth discovery. To probe the optimal transfer rate between the server and your computer, enter the server's address and click Measure.

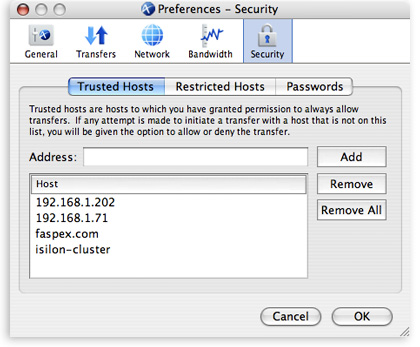
The Security tab allows you to manage all the servers with which you connect. As you connect to a server, you are asked whether you want to allow the connection.
Once you have Aspera Connect browser plug-in installed and configured, first let's try a transfer between your computer and Aspera demo server. Open your browser and go to the following address:
Browse into the folder aspera-test-dir-large, click the Download icon on the right of any item to test the fasp™

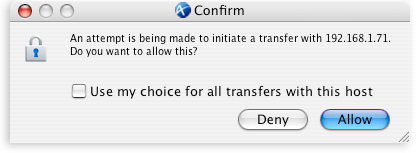
Before the transfer session starts, a dialog box asks you if you want to allow the transfer to continue. Select Allow to confirm. If you check Use my choice for all transfers with this host this dialog box will not show up in the future.
If the test transfer works, you can now test transfer with your designated server. Go to the server's address on your browser, for example IP address like 192.168.1.210 or domain name http://companyname.com/aspera/user. click on the download or upload link to initiate a transfer.
During a transfer session, you may manage the transfer in the Transfer Manager. In Aspera Connect, go to Menu bar -> Window -> Transfer manager. In the Transfer Manager you can see all transfer sessions.
In the Transfer Manager, clicking  stops the transfer session, and clicking
  resumes the stopped transfer. When the session is finished, clicking
  brings up the downloaded file.
To adjust and monitor the transfer speed of a specific transfer session, click on the ![]() (Transfer Monitor button) in Transfer Manager. In Transfer Monitor, Fair mode transfer policy is recommended, you can also choose from the most aggressive Fixed mode to the least aggressive Trickle mode.
(Transfer Monitor button) in Transfer Manager. In Transfer Monitor, Fair mode transfer policy is recommended, you can also choose from the most aggressive Fixed mode to the least aggressive Trickle mode.
To test the maximum transfer speed, adjust the transfer speed or threshold by dragging the arrows directly in the monitor.

There are two methods for uninstalling Aspera Connect.
The basic uninstall process removes this Aspera application only. Use the basic uninstall method if you have other Aspera products that you will continue to use or if you are planning to upgrade in the future and would like to retain current preferences.
The advanced uninstall process removes all Aspera products from the computer. Use the advanced uninstall method if you want to completely remove all Aspera applications and their background files. The advanced uninstall technique is not recommended if you plan to upgrade your version of Aspera Connect at a later time.
To perform the basic uninstall of Aspera Connect, follow these steps:
Step 1
Locate the Aspera Connect application in Applications -> Aspera Connect.
|
Step 2
Drag the Aspera Connect application to the trash.
|
To perform the advanced uninstall of Aspera Connect and other Aspera products, follow these steps:
Step 1 Run the following commands in the Terminal:
# rm -rf ~/Library/Preferences/Aspera |
Step 2
Go to the Applications folder and drag all Aspera applications to the trash.
|