Testing and initiating file transfers with Aspera Connect.
The following steps describe (1) how to perform a download test using Aspera's test server and
(2) how to initiate a common file transfer using Aspera Connect.
-
Open your web browser and log in to Aspera's test transfer server at http://demo.asperasoft.com/aspera/user.
Enter the following credentials when prompted:
- User:
asperaweb
- Password:
demoaspera
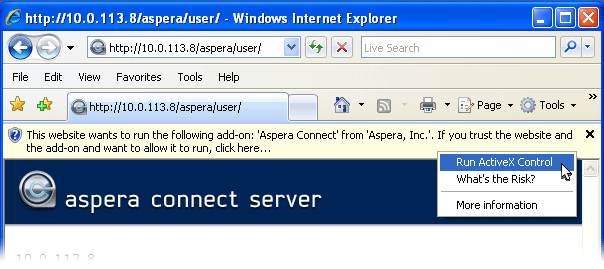
Note: Internet Explorer 7 Security Settings: When opening a Connect
Server or Faspex Server web page using Internet Explorer 7, the
Information Bar will appear and ask for the permission to use the Aspera
Connect add-on. Click the bar and select Run ActiveX
Control, and then click Run in
the Security Warning window.
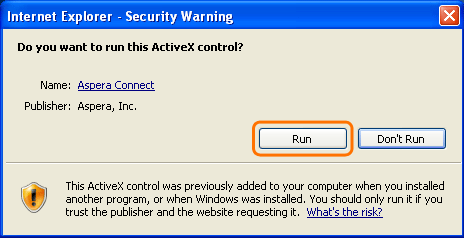
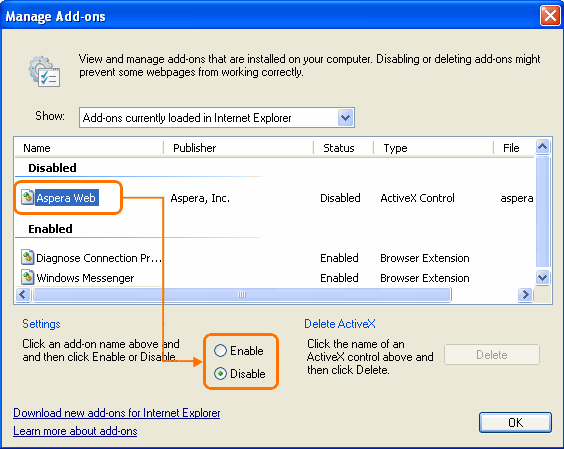
If you accidentally clicked Don't Run, then just
click the gear icon at the bottom of the Aspera server web page to bring
up the Manage Add-Ons window. Select Aspera
Web and set Enable under
Settings.

-
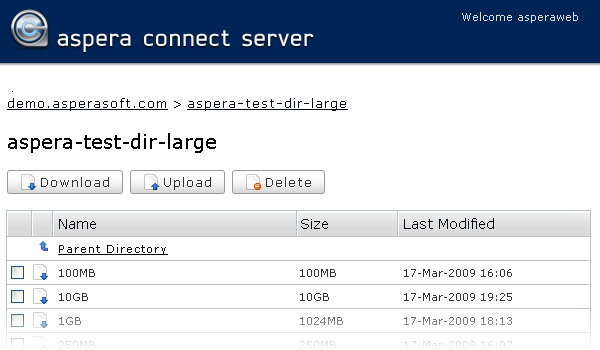
On the Aspera Connect server web page, browse into the folder /aspera-test-dir-large
Click any icon to download the corresponding file or folder. You may also checkmark
multiple boxes and click Download to download more
than one file or folder at a time.
-
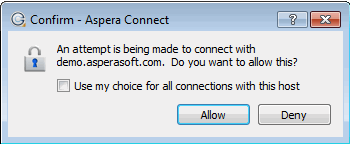
Confirm the transfer.
Select Allow to begin. Enable the Use my choice for all
connections with this host checkbox to skip this dialog in
the future.
Once you confirm that the configuration settings are correct and that Aspera Connect is working properly, you can begin transferring with your organization's Aspera server. Simply point your browser to your server's address (e.g., http://companyname.com/aspera/user) to get started.
Note that when uploading, you should avoid transferring files with the following
characters in the file name:
Characters to avoid: / \ " : ' ? > < & * |


