Instructions for installing IBM Aspera Connect Browser Plug-in on your system.
This topic explains the installation process for IBM Aspera Connect Browser Plug-in on your system. The Connect Browser Plug-In can be installed on your system via the Web installer or downloadable MSI. Please refer to corresponding the sections below.
- You cannot install the Connect Browser Plug-In under the Guest account.
- If you are installing the Connect Browser Plug-In on a Windows 2003 or Windows XP machine, then your system must be upgraded to Service Pack 2 (SP2) before proceeding with the installation process.
- Before performing a system-wide installation (all users of the machine), uninstall any per-user installations. Aspera does not support local and system-wide installations of the Connect Browser Plug-In on the same system. For details, refer to the topic "Uninstalling the Connect Browser Plug-In."
- Quit any open browsers before continuing with the steps below.
The Connect Browser Plug-In Web Installer
Use your browser to navigate to your Aspera Web application (i.e. IBM Aspera faspex Application, IBM Aspera Connect Server or IBM Aspera Shares). Once you have reached the server's webpage, you will see an Install Now button (or Upgrade Now button if you have an older version of the Connect Browser Plug-In installed on your system). Depending on your Operating System and browser, clicking on this button will either launch the automatic installer or redirect you to the the Connect Browser Plug-In download page (for manual installation). Follow the on-screen instructions to complete the installation process. If your browser displays a security prompt/warning, click Allow or Continue to proceed.
Note that for the following cases, a non-admin cannot perform a Web installation because ActiveX controls are not allowed:
- Non-admin XP IE7, IE8
- Non-admin 2003 IE7, IE8
- Non-admin Vista IE7 with UAC off
- Non-admin 2008 IE7 with UAC off
The Connect Browser Plug-In Desktop Installer
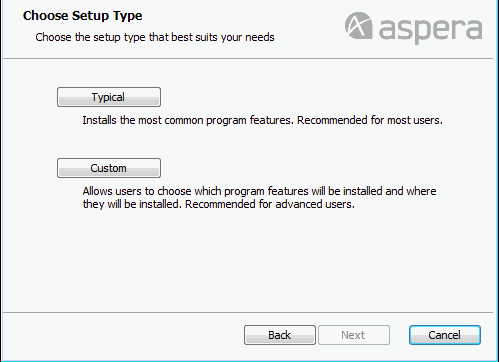
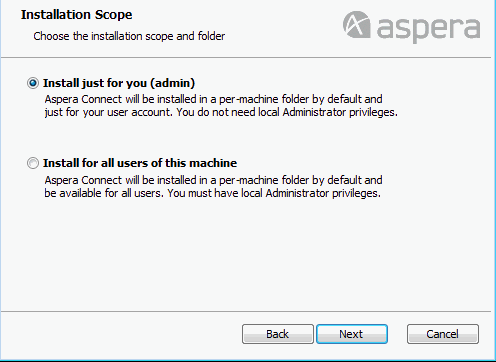
You can download the the Connect Browser Plug-In MSI directly from http://www.asperasoft.com/download_connect/. Once downloaded, run the installer on your machine. You will need to accept the terms and conditions, as well as confirm where the Connect Browser Plug-In should be installed. You can install the application in the standard location by clicking the Typical button.

Or select an alternative location.

Post Installation
Once the Connect Browser Plug-In has finish installing, you can access it in the following location: