Configuring IBM Aspera Connect Browser Plug-in security preferences.
IBM Aspera Connect Browser Plug-in features the following capabilities for minimizing security risks when uploading or downloading files:
- You can add Aspera servers as Trusted Hosts to avoid the recurring security prompt, or add servers to the Restricted Hosts list to require confirmation every time you attempt to initiate a transfer with that host.
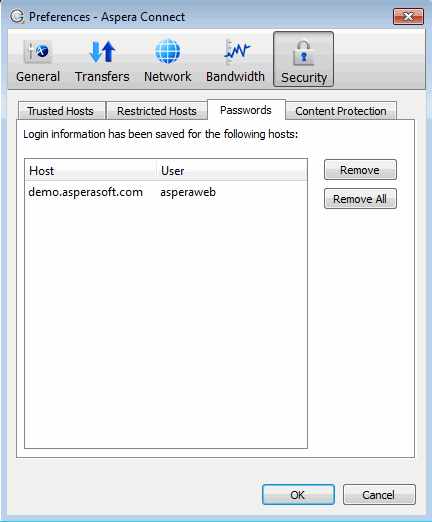
- You have the option of saving your authentication credentials when you connect to a server, as well as removing them from the Passwords tab.
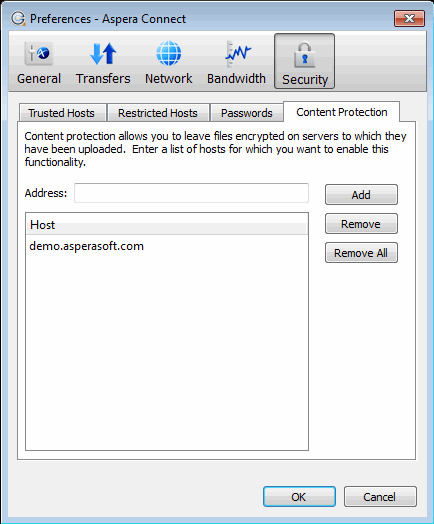
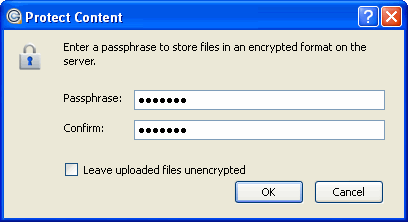
- Content protection is a feature that allows uploaded files be encrypted during a transfer for the purpose of protecting them while stored on a remote server. The uploader sets a password while uploading the file, and the password is required to decrypt the protected file.
The settings above can be configured via the Connect Browser Plug-In Preferences dialog box. To open the Connect Browser Plug-In's Preferences dialog box, launch the Connect Browser Plug-In () and open Preferences ( ).
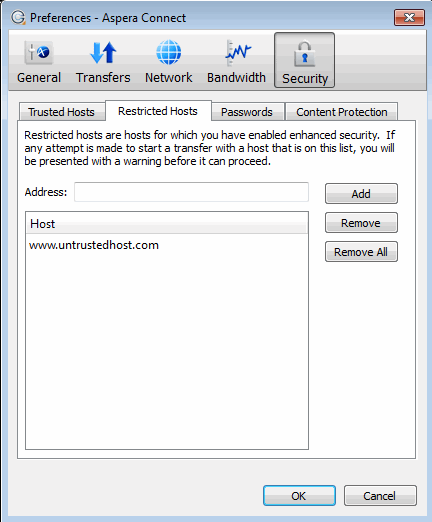
Managing Hosts
When a transfer is initiated and the Use my choice for all transfers with this host option is enabled in the confirmation dialog, the server that you are allowing or denying will be added to the Trusted Hosts or Restricted Hosts list, respectively. To view, add or remove additional trusted hosts, go to . Enter the host's address in the specified text field and click Add.

To view, add or remove restricted hosts, go to . Here, enter the host's address in the specified text field and click Add.
To view, add or remove saved information for a host, go to . Here, you may remove saved credentials.
Content Protection
To add hosts that require uploaded files to be encrypted during a transfer, click the Content Protection tab under the Security option. Enter your Aspera server address in the Address text field and click Add. The server will be added to the host list.
When uploading files to a server that is configured as a content-protected host, a confirmation window will appear and prompt you for a passphrase to encrypt the file. You can enter the passphrase in the text field, or check Leave uploaded files unencrypted (if allowed by the server) to proceed without using this feature. Click OK to start the transfer.
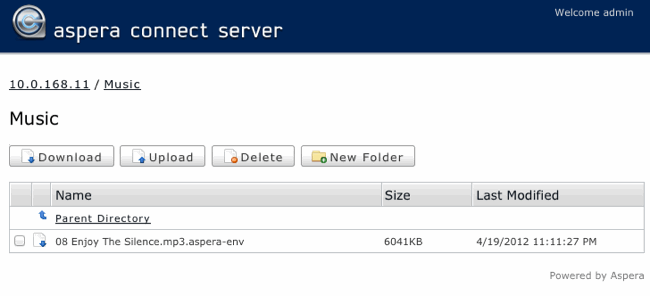
Once content-protected files have been uploaded to your server, they will appear with an aspera-env suffix (Aspera Security Envelope).
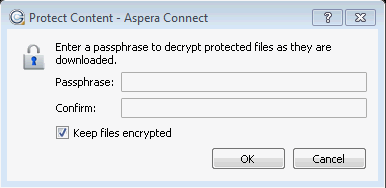
When using the Connect Browser Plug-In to download a content-protected file, you have two decryption options.
- You can input and confirm your passphrase to decrypt the files during the download.
- OR, you can enable the Keep downloaded file encrypted checkbox to download the content-protected files, and decrypt the files after the download has completed. When you select this option, you don't need to input your passphrase into the dialog box; however, you will need to take additional steps to decrypt the files on your local computer. Please refer to the topic "Decryption" for details.
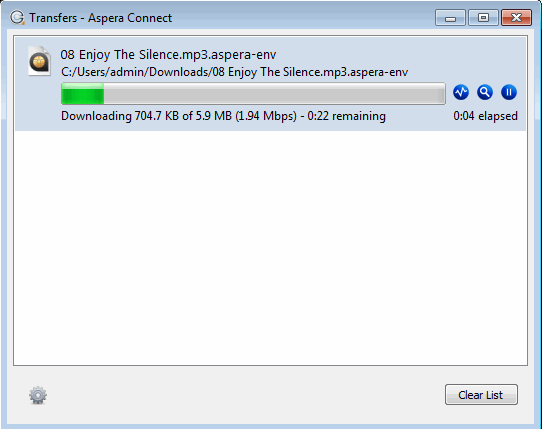
As the content-protected file is being downloaded to your computer, the file icon will change to that of the aspera-env file type in the the Connect Browser Plug-In Transfers window.
Once downloading has completed, check your Connect Browser Plug-In Transfers window. If you inputted your passphrase to decrypt the files during the download (Option 1, above), you will be able to open the unlocked files without taking further action. If you elected to download the content-protected files and decrypt the files after the download has completed, you will receive a status message telling you to Unlock encrypted files, along with a link to the Aspera decryption utility.
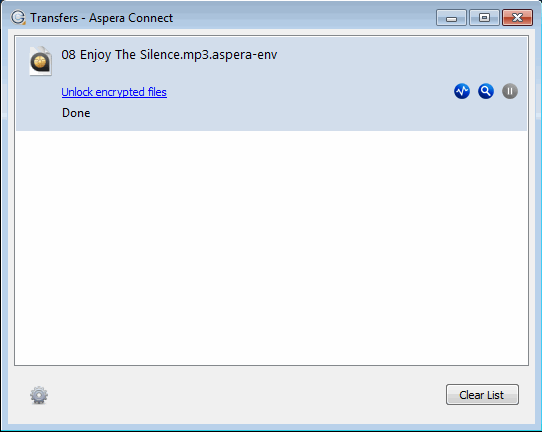
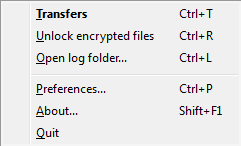
Note that you can also unlock encrypted files from the Connect Browser Plug-In application menu (select the Unlock encrypted files option shown below).
For instructions on using the decryption utility, refer to the topic "Decryption."