Basic Configuration
To change the application's default settings, launch Connect as follows:
- Start > All Programs > Aspera >
 Aspera Connect
 - On Windows 10,
 >
>  > Aspera > Aspera Connect.
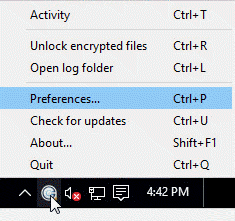
Open Preferences:
From the system tray: Right-click ![]() >
Preferences
>
Preferences
General Preferences
Connect's general application behavior can be configured in the General tab.
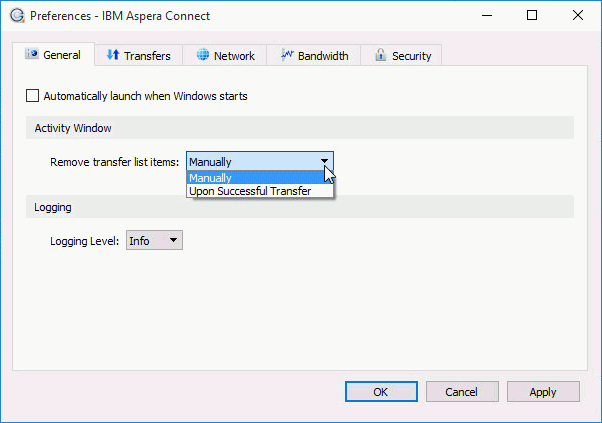
Under the General tab, you can modify the following settings:
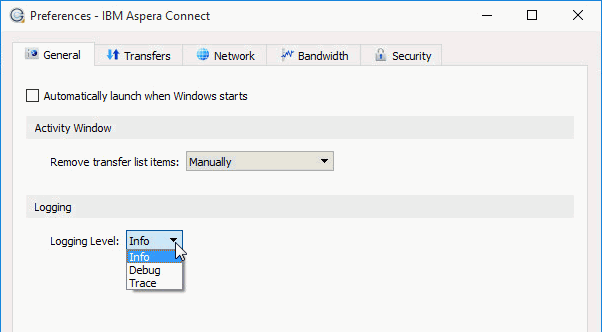
The logging feature is typically used for troubleshooting and when contacting Aspera Support.
Transfer Preferences
Connect's transfer behavior can be configured under Preferences > Transfers.
Downloads
By default, Connect downloads files to the current user's Downloads folder. To change this setting, adjust the following settings:
- Save downloaded files to – Specify the path to the location where downloaded files should be saved.
- Always ask me where to save downloaded files – Choose this option to select a location for each download.
Queue
- Enable queuing – Enable or disable the queuing of transfers.
- Maximum concurrent transfers –This allows a specified number of transfers to run concurrently and places the remainder in a queue.
Retry
You can set a retry rule if a transfer fails. Set the retry rule as follows:
- Automatically retry failed transfers – enable or disable.
- Attempts – specify the number of times Connect should attempt to retry a failed transfer.
- Interval – specify the amount of time that Connect should wait before retrying a transfer (in seconds, minutes, or hours).