Locked-down or enterprise environments without access to the public internet
generally require special steps to acquire and enable Connect web extensions. Depending on
OS platform and browser, there are a number of methods for doing so.
Chrome
Method: Manual deployment Using Drag and Drop
- Download the Connect extension CRX file from Google. To do so, right-click
this link and select Save Link As: Connect extension for Chrome
- Open
chrome://extensions
- Enable developer mode.
- Drag-and-drop the CRX file into the
chrome://extensions
window to install.
Method: Background deployment via preference file
Requires network access to the Chrome update URLs located here:
https://clients2.google.com/service/update2/crx
- For user installs, run the following
script:
#!/usr/bin/env bash
EXT_ROOT="$HOME/Library/Application Support/Google/Chrome/External Extensions"
mkdir -p "$EXT_ROOT"
echo '{ "external_update_url": "https://clients2.google.com/service/update2/crx" }' > "$EXT_ROOT/kpoecbkildamnnchnlgoboipnblgikpn.json"
- For machine installs, run this script using
sudo:
#!/usr/bin/env bash
EXT_ROOT="/Library/Application Support/Google/Chrome/External Extensions"
mkdir -p "$EXT_ROOT"
echo '{ "external_update_url": "https://clients2.google.com/service/update2/crx" }' > "$EXT_ROOT/kpoecbkildamnnchnlgoboipnblgikpn.json"
- Restart Chrome.
- On startup, the extension must be enabled:
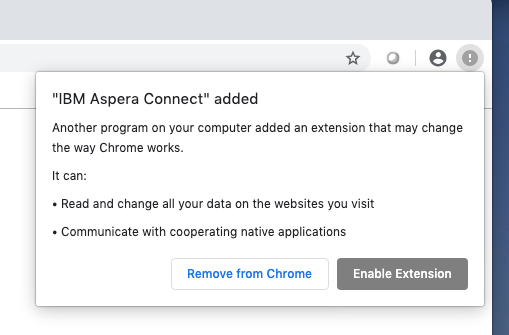
Note: If a user explicitly removes the extension, they are not prompted again and
the extension is not installed.
Firefox
Method: Manual deployment
- Download the Connect extension XPI file from Mozilla. To do so, right-click
this link and select Save Link As: Connect extension for Mozilla
- Open
about:addons
- From the menu, select Install Add-on From File.
Whitelisting the Chrome Extension
By default, all Chrome extensions are whitelisted. However, if your organization
blacklists all extensions by policy, you can override the blacklist and allow the
Connect extension to be installed by adding it to the whitelist.
https://www.chromium.org/administrators/policy-list-3#ExtensionInstallWhitelist
The instructional links below also include information on other extension-related
policy settings that enable you to automatically install Chrome, force-install
Chrome, and so on.
Note: These policies are intended strictly for configuring instances of Google Chrome
internal to your organization. Use of these policies outside of your organization
(for example, in a publicly distributed program) is considered malware and will
likely be labeled as malware by Google and anti-virus vendors.
Provisioning Policy Using Chrome Policy Templates
- Install Chrome policy templates: Detailed instructions
at:
https://support.google.com/chrome/a/answer/187202?hl=en
- Set Chrome extension policies. Detailed instructions at:
https://support.google.com/chrome/a/answer/7517624
- Create file com.google.chrome.plist in the
following location:
/Library/Managed Preferences/com.google.chrome.plist
Insert
the following contents in
it:<?xml version="1.0" encoding="UTF-8"?>
<!DOCTYPE plist PUBLIC "-//Apple//DTD PLIST 1.0//EN" "http://www.apple.com/DTDs/PropertyList-1.0.dtd">
<plist version="1.0">
<dict>
<key>ExtensionInstallWhitelist</key>
<array>
<string>kpoecbkildamnnchnlgoboipnblgikpn</string>
</array>
</dict>
</plist>
- Restart Chrome.
- To verify that the policy has been applied, enter the following in
the address bar:
chrome://policy
If the
policy does not appear, try running the
following:$ sudo killall cfprefsd
Then
restart Chrome.