Locked-down or enterprise environments without access to the public internet
generally require special steps to acquire and enable Connect web extensions. Depending on
OS platform and browser, there are a number of methods for doing so.
Chrome
Method: Manual deployment Using Drag and Drop
- Download the Connect extension CRX file from Google. To do so, right-click
this link and select Save Link As: Connect extension for Chrome
- Open
chrome://extensions
- Enable developer mode.
- Drag-and-drop the CRX file into the
chrome://extensions
window to install.
Method: Background Deployment Using the Windows registry
Requires network access to the Chrome update URLs:
https://clients2.google.com/service/update2/crx
- Download the Connect extension CRX file from Google. To do so, right-click
this link and select Save Link As: Connect extension for Chrome
- Create a .reg file containing the registry script
below. Update the location of the CRX file. Make sure the location is
accessible to all users. Backslashes must be escaped as shown in the
example.
- Merge the registry keys above. Detailed instructions are
here:
https://www.techwalla.com/articles/how-to-merge-registry-files
Windows Registry Editor Version 5.00

[HKEY_LOCAL_MACHINE\SOFTWARE\Google\Chrome\Extensions\kpoecbkildamnnchnlgoboipnblgikpn]
"update_url"="https://clients2.google.com/service/update2/crx"

[HKEY_LOCAL_MACHINE\SOFTWARE\WOW6432Node\Google\Chrome\Extensions\kpoecbkildamnnchnlgoboipnblgikpn]
"update_url"="https://clients2.google.com/service/update2/crx"
- Restart Chrome. Users must approve the new extension on startup.
Firefox
Method: Manual deployment
- Download the Connect extension XPI file from Mozilla. To do so, right-click
this link and select Save Link As: Connect extension for Mozilla
- Open
about:addons
- From the menu, select Install Add-on From File.
Method: Background deployment via Windows registry
- Obtain a copy of the Connect Firefox XPI file. See Method: Manual
deployment above.
- Create a .reg file containing the registry script below. Update the location
of the XPI file. Make sure the location is accessible by all users.
Backslashes must be escaped as shown in the
example:
Windows Registry Editor Version 5.00

[HKEY_LOCAL_MACHINE\SOFTWARE\Mozilla\Firefox\Extensions]
"connect@aspera.ibm.com"="C:\\Users\\aspera\\Desktop\\connect@aspera.ibm.com.xpi"

[HKEY_LOCAL_MACHINE\SOFTWARE\Wow6432Node\Mozilla\Firefox\Extensions]
"connect@aspera.ibm.com"="C:\\Users\\aspera\\Desktop\\connect@aspera.ibm.com.xpi"
- Merge the registry keys above. Detailed instructions can be found
here:
https://www.techwalla.com/articles/how-to-merge-registry-files
- Restart Firefox.
- Open the Firefox add-ons:
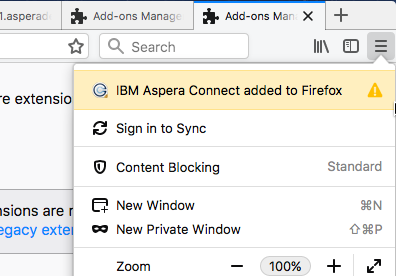
- Enable the extension.
Background deployment using a roaming profile
- Obtain a copy of the Connect Firefox XPI file. See Method: Manual
deployment above.
- Copy the xpi file to:
C:\Users\username\AppData\Roaming\Mozilla\Extensions\{ec8030f7-c20a-464f-9b0e-13a3a9e97384}\
- Restart Firefox.
- Open the Firefox add-ons:
- Enable the extension.
Method: Background deployment via preference file
- Obtain a copy of the Connect Firefox XPI file. See Method: Manual
deployment above.
- For user installs, modify the XPI_FILE variable to point to the XPI file.
Run the following
script:
#!/usr/bin/env bash
XPI_FILE=INSERT_XPI_PATH_HERE
EXT_ROOT="$HOME/Library/Application Support/Mozilla/Extensions/{ec8030f7-c20a-464f-9b0e-13a3a9e97384}"
mkdir -p "$EXT_ROOT"
cp $XPI_FILE "$EXT_ROOT"
- For machine-installs, modify the XPI_FILE variable to point to the XPI file.
Run this script using
sudo:
#!/usr/bin/env bash
XPI_FILE=INSERT_XPI_PATH_HERE
EXT_ROOT="/Library/Application Support/Mozilla/Extensions/{ec8030f7-c20a-464f-9b0e-13a3a9e97384}"
mkdir -p "$EXT_ROOT"
cp $XPI_FILE "$EXT_ROOT"
- Restart Firefox.
- Open the Firefox add-ons:
- Enable the extension.
Whitelisting the Chrome Extension
By default, all Chrome extensions are whitelisted. However, if your organization
blacklists all extensions by policy, you can override the blacklist and allow the
Connect extension to be installed by adding it to the whitelist.
https://www.chromium.org/administrators/policy-list-3#ExtensionInstallWhitelist
The instructional links below also include information on other extension-related
policy settings that enable you to automatically install Chrome, force-install
Chrome, and so on.
Note: These policies are intended strictly for configuring instances of Google Chrome
internal to your organization. Use of these policies outside of your organization
(for example, in a publicly distributed program) is considered malware and will
likely be labeled as malware by Google and anti-virus vendors.
Provisioning Policy Using Chrome Policy Templates: Group
Policy Editor
- Download and install Chrome policy template .adm or .admx files and add the
templates to your Group Policy editor. Detailed instructions can be found
here:
https://support.google.com/chrome/a/answer/187202?hl=en
- Open your Group Policy editor and navigate to the Chrome extensions
settings:
Computer Configuration > Administrative
Templates > Google > Google Chrome > Extensions
On
Windows 7 or 10: Computer Configuration > Administrative
Templates > Classic Administrative Templates > Google > Google
Chrome
- Edit your Chrome extension policy settings. Detailed instructions can be
found
here:
https://support.google.com/chrome/a/answer/7532015?hl=en
Provisioning Policy Using the Windows Registry
Note: The recommended way to configure policy on Windows is
via GPO, although provisioning policy via registry is still supported for
Windows instances that are joined to a Microsoft® Active Directory®
domain.
Find the Windows registry location and set the value to the
Connect extension
ID:
Software\Policies\Google\Chrome\ExtensionInstallWhitelist\1 = "kpoecbkildamnnchnlgoboipnblgikpn"