HTTP Fallback serves as a secondary transfer method when the
Internet connectivity required for Aspera accelerated transfers (i.e., UDP port
33001, by default) is unavailable. When HTTP Fallback is enabled and UDP
connectivity is lost or cannot be established, the transfer will continue over the
HTTP protocol (or HTTPS protocol). The instructions below walk
through the process of setting up HTTP/HTTPS fallback. For additional information on
configuring different modes and testing, please refer to the Aspera KB Article
"HTTP fallback configuration, testing and
troubleshooting."
NOTE ON ENCRYPTION-AT-REST: When a transfer falls back to the HTTP (or HTTPS) protocol, Encryption-at-Rest is no
longer supported. If fallback occurs while downloading, then--despite
entering a passphrase--the files will remain encrypted (i.e., enveloped). If
HTTP Fallback occurs while uploading, then--despite entering a
passphrase--the files will NOT be encrypted (i.e., enveloped).
-
Turn on HTTP/HTTPS Fallback.
These instructions assume that you have already configured your Connect Server's Web UI,
as documented in the topic "Connect Server Web UI Settings." If you have not done
so, please review that topic before proceeding. To turn on HTTP/HTTPS
Fallback, you must edit the <WEB/> section of
aspera.conf. This configuration file can be found in
the following directory:
| OS Version |
File Location |
| 32-bit Windows |
C:\Program Files\Aspera\Enterprise Server\etc\aspera.conf |
| 64-bit Windows |
C:\Program Files (x86)\Aspera\Enterprise
Server\etc\aspera.conf |
If you do not see the <WEB/> section, you will need to copy it from the
file aspera-web-sample.conf, as described in "Connect Server Web UI Settings." Within the
<WEB/> section, locate and confirm the following
entries:
<WEB
   ...
   HttpFallback = "yes"               <!-- Yes to turn on; No to turn off -->
   HttpFallbackPort = "8080"          <!-- Default: 8080 -->
   HttpsFallbackPort = "8443"         <!-- Default: 8443 -->
/>
If you modify aspera.conf, run the following command (from Enterprise
Server's bin directory) to validate your updated
configuration file:
> C:\{Program Files or Program Files (x86)}\Aspera\Enterprise Server\bin\asuserdata -v
-
Configure HTTP/HTTPS
Fallback settings.
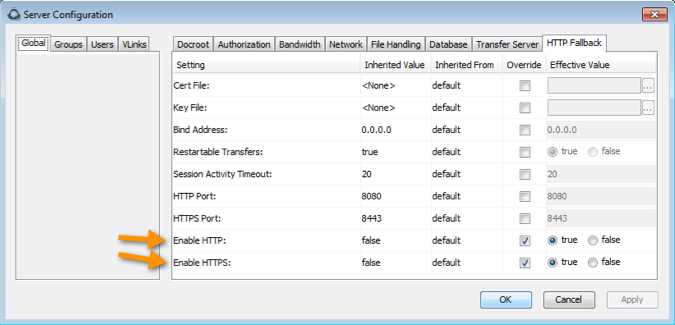
To
edit your settings, launch Connect
Server and go to .
Review the following settings:
- Set Enable HTTP to
true.
- If you want to allow fallback over HTTPS, set
Enable HTTPS to true.
- Verify that the value shown for HTTP Port
matches that which is displayed in the aspera.conf
file, under the <WEB/> section (default: 8080).
Refer to Step 1 for additional information.
- (If applicable) Verify that the value shown for
HTTPS Port matches that which is displayed in the
aspera.conf file, under the
<WEB/> section (default: 8443). Refer to Step
1 for additional information.
-
Review additional HTTP Fallback settings.
Additional HTTP Fallback settings can be found under the
Connect Server GUI's HTTP Fallback tab:
| # |
Field |
Description |
Values |
Default |
| 1 |
Cert File |
The absolute path to an SSL certificate file. If left blank,
the default certificate file that came with your Aspera Enterprise
Server will be used. |
file path |
blank |
| 2 |
Key File |
The absolute path to an SSL key file. If left blank, the
default certificate file that came with your Aspera Enterprise
Server will be used. |
file path |
blank |
| 3 |
Bind Address |
This is the network interface address on which the HTTP
Fallback Server listens. The default value 0.0.0.0 allows the Aspera
HTTP Fallback Server to accept transfer requests on all network
interfaces for this node. Alternatively, a specific network
interface address may be specified. |
valid IPv4 address |
0.0.0.0 |
| 4 |
Restartable Transfers |
Setting this to true allows interrupted transfers to resume at the
point of interruption. |
|
true |
| 5 |
Session Activity Timeout |
Any value greater than 0 sets the amount of time, in seconds, that the HTTP Fallback
Server will wait without any transfer activity before canceling the
transfer. Notice that this option cannot be left at 0, otherwise
interrupted HTTP Fallback sessions will get stuck until server or
asperacentral is restarted. |
positive integer |
- |
| 6 |
HTTP Port |
The port on which the HTTP server listens. Valid port numbers range between 1 and
65535.
|
positive integer |
8080 |
| 7 |
HTTPS Port |
The port on which the HTTPS server listens. Valid port numbers range between 1 and
65535.
|
positive integer |
8443 |
| 8 |
Enable HTTP |
Enables the HTTP Fallback Server that allows failed UDP
transfers to continue over HTTP. |
|
false |
| 9 |
Enable HTTPS |
Enables the HTTPS Fallback Server that allows failed UDP
transfers to continue over HTTPS. |
|
false |
-
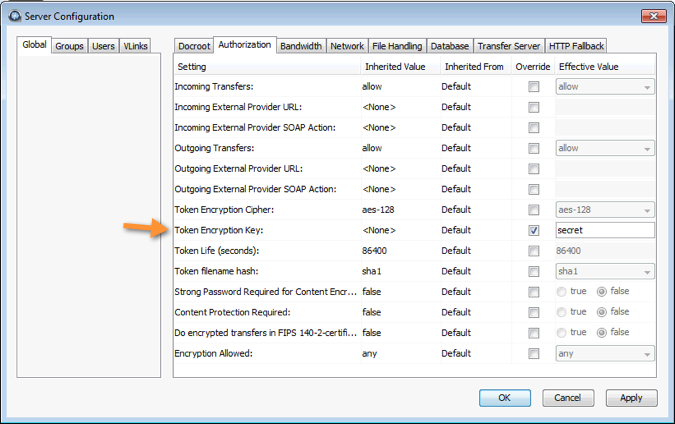
Specify a token encryption key.
IMPORTANT NOTE: The token encryption key is the secret text phrase
that is used to authorize transfers configured to require a token.
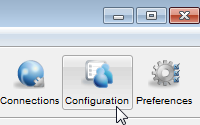
In the application (
), click Configuration and navigate to . Check the option for Token Encryption
Key and enter a key-string of your choice (in the example
below, the string "secret" is used).
IMPORTANT NOTE: After changing your Aspera token settings
(either via aspera.conf or the GUI), you must
restart AsperaHTTPD. Please refer to the last step
in this topic for instructions.
-
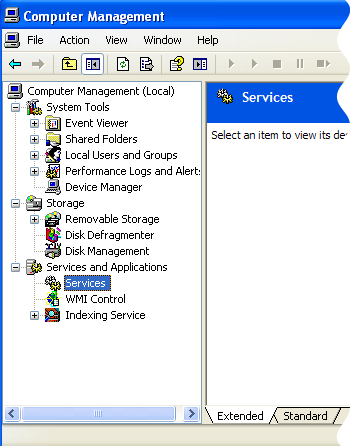
Restart Aspera Central and Aspera HTTPD to apply new
settings.
To restart Aspera
HTTPD and Aspera Central, go to the
Computer Management window, which is accessible
via .