Configure HTTP/HTTPS Fallback via the Connect Server GUI or aspera.conf.
HTTP Fallback serves as a secondary transfer method when the Internet connectivity required for Aspera accelerated transfers (i.e., UDP port 33001, by default) is unavailable. When HTTP Fallback is enabled and UDP connectivity is lost or cannot be established, the transfer will continue over the HTTP protocol (or HTTPS protocol). The instructions below walk through the process of setting up HTTP/HTTPS fallback. For additional information on configuring different modes and testing, please refer to the Aspera KB Article "HTTP fallback configuration, testing and troubleshooting."
-
Configure HTTP/HTTPS
Fallback settings.
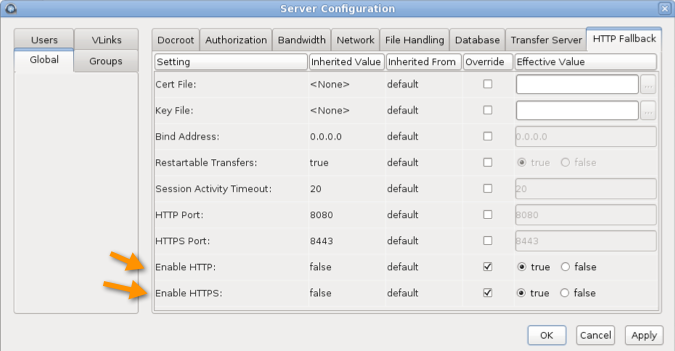
You may configure HTTP/HTTPS Fallback in the Aspera Connect Server GUI or modify aspera.conf. To edit your settings within the GUI, launch Connect Server and go to .
Review the following settings:
- Set Enable HTTP to true.
- If you want to allow fallback over HTTPS, set Enable HTTPS to true.
- Verify that the value shown for HTTP Port matches that which is displayed in the aspera.conf file, under the <WEB/> section (default: 8080). Refer to Step 1 for additional information.
- (If applicable) Verify that the value shown for HTTPS Port matches that which is displayed in the aspera.conf file, under the <WEB/> section (default: 8443). Refer to Step 1 for additional information.
To change your HTTP Fallback settings within aspera.conf, navigate to the following directory:
/opt/aspera/etc/aspera.conf
Update your HTTP Fallback settings within aspera.conf based on the example shown below. Set enable_http and, if you want to allow HTTPS fallback, enable_https to true, as well as specify port numbers for http_port and https_port. Note that the values for http_port and https_port must match the HttpFallbackPort and HttpsFallbackPort values set within the <WEB/> section of aspera.conf (8080 and 8443, respectively). Refer to Step 1 for additional information.
<CONF version="2">
  ...
  <http_server>
    ...
    <enable_http>true</enable_http>          <!-- Enable HTTP -->
    <enable_https>true</enable_https>        <!-- Enable HTTPS -->
    <http_port>8080</http_port>              <!-- HTTP port -->
    <https_port>8443</https_port>            <!-- HTTPS port -->
  ...
  </http_server>
</CONF>
After modifying aspera.conf, run the following command (from Enterprise Server's bin directory) to validate your updated configuration file:
$ /opt/aspera/bin/asuserdata -v
-
Specify a token encryption key.
The token encryption key is the secret text string that is used to authorize transfers configured to require a token.
Note: If HTTP/HTTPS fallback is enabled, a token encryption key is required. If HTTP/HTTPS is configured without the encryption key, initiating a transfer with the download button generates the following error:Error: internal error - unable to start token generation
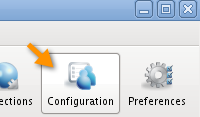
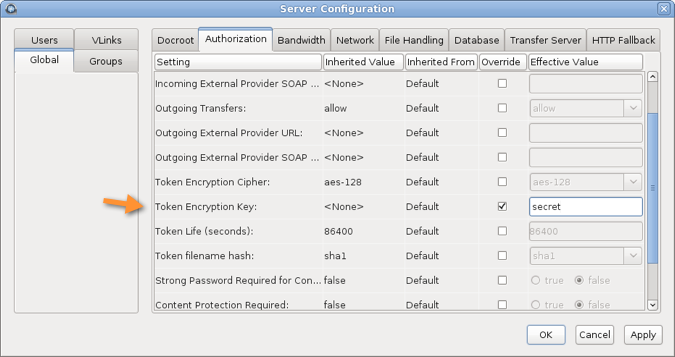
You can specify a token encryption key from the Aspera Enterprise/Connect Server GUI or in aspera.conf. To configure your token encryption key within the GUI, launch your Enterprise/Connect Server application and click Configuration. Go to , check the option Token Encryption Key and enter a key string of your choice (in the example below, the string "secret").
To specify the token encryption key in aspera.conf, open the file with a text editor, and add or update the authorization section's encryption_key (the example below uses the string "secret"; however, it can be any string):
<CONF version="2">
  ...
  <default>
    <authorization>
    ...
    <token>
      <encryption_key>secret</encryption_key>
    </token>
    </authorization>
  </default>
  ...
</CONF>
Important: After changing your Aspera token settings (either via aspera.conf or the GUI), you must restart AsperaHTTPD. For instructions, see the final step in this topic.