Test Aspera Connect client transfers through Web UI.
Follow the steps below to test your client transfers through the Web UI.
-
Clients: Test the connection to the Web UI
To test your connection to the Connect Server Web UI, go to the following address with a client computer's browser:
Scope URL HTTP http://server-ip-or-name/aspera/user HTTPS https://server-ip-or-name/aspera/user Note: Ensure that your client users have cookies enabled within their browsers before attempting to log in. Failure to do so may result in an error message as they attempt to access the Connect Server Web UI. -
Connect Server: Set up a test user account
Note: On the operating system, the system user should have read and write permissions to its docroot.
On top of SSH authentication, Connect Server uses Apache's authentication to authorize Web UI access. To set up a system user for Apache authentication (asp1), use the htpasswd command to set up the user for Web UI.
$ htpasswd /opt/aspera/etc/webpasswd asp1Note: Use the -c option only if this is the first time running htpasswd to create the webpasswd file. Do not use the -c option otherwise. -
Connect Server: Configure a user for fasp file transfer (GUI)
Note: To configure the user from the command line, see the next step.
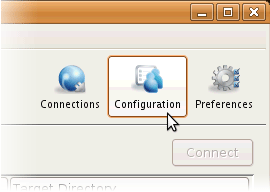
Prepare a system user and add the user into your Connect Server, with the docroot specified. Run asperascp (as a root user) to launch the application, and click Configuration.

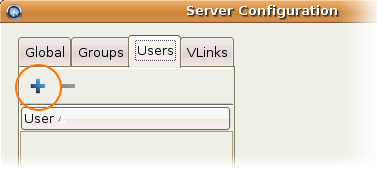
In the Server Configuration dialog, select the Users tab and click
 . Enter the system user's name (asp1).
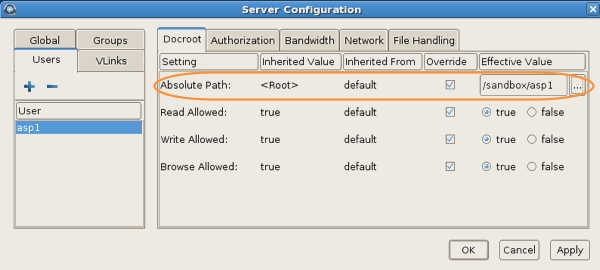
Select the user's Docroot tab, check Absolute Path and enter or select an existing path as the user's docroot (for example, /sandbox/asp1). Make sure that all other options have the value true. Click OK or Apply when finished.

-
Connect Server:
Configure a user for fasp file transfer (Terminal)
Note: Skip this step if you have configured the user from the GUI.
Open the Aspera configuration file (aspera.conf) and set up the user's docroot information:
/opt/aspera/etc/aspera.conf
The following example uses these settings. If you use the substitutable string $(name), the application automatically replaces it with the login user name:
Item Value String for generating token secRet Default docroot /sandbox/$(name) <CONF version="2"> <default> <authorization> <value>allow</value> <!-- Allow token authentication for HTTP --> <token> <encryption_key>secRet</encryption_key> <!-- String for token --> </token> </authorization> <file_system> <access><paths><path> <absolute>/sandbox/$(name)</absolute> <!-- Default docroot --> </path></paths></access> </file_system> </default> ... </CONF>Note: The aspera.conf sample file can be used as a setup reference. The sample file is provided in the following location:/opt/aspera/etc/samples/aspera.web-sample.conf
-
Client: Test the Web UI with the client machine
Note: Cookies must be enabled in a client's browser!
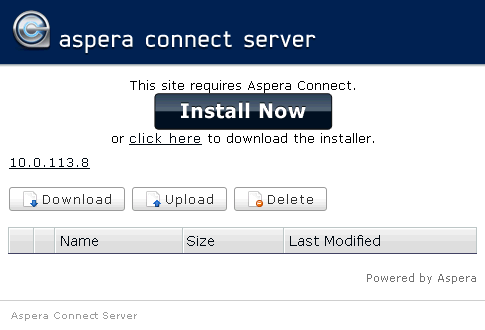
Prepare a client computer with the supported OS and browser to test connecting to the Web UI. See the Introduction for supported platform and browser. Browsing the Web UI from the client machine, you should see the Aspera Connect browser plugin installation instruction on the web page. Click either Install Now or Download Aspera Connect and follow the instructions.

In the Web UI, click Upload and select one or more files to send to Connect Server. When finished, select the uploaded files on the Web UI, and click Download.
Note:When adding files to the Web UI, do not use the following characters in the filenames:/ \ " : ' ? > < & * |
For further information about the Aspera Connect browser plugin, see the Aspera Connect User Guide.
If you are having difficulties establishing fasp transfers using the Web UI, see Clients Can't Establish Connection.