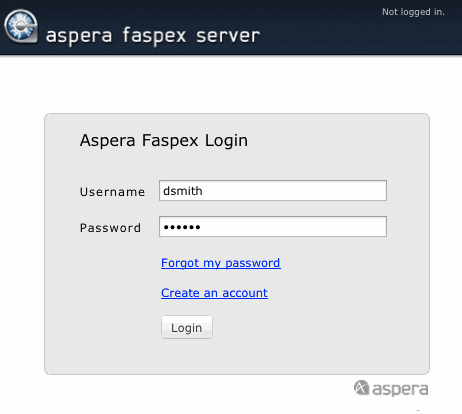
Access your Aspera®Faspex™ server
-
Navigate to your Aspera Faspex Server website in a browser window and input
your login credentials.
To access your Aspera Faspex Server's web interface within a browser window, go to the domain or IP address that you set up during the installation process. For example:
- https://<your-server-ip-or-name>/aspera/faspex
- https://faspex.<your-domain>.com
Here, input your Aspera Faspex Server username and password, and click the Login button to continue.

-
(If enabled) Click the "Create an Account" link to request access to the
Aspera Faspex server.
If your Administrator allows users to self-register on this Aspera Faspex Server, then you will see a Create an Account link on the login page. After clicking on this link, complete the following form and click the Create Account button:

Once you receive your account confirmation, log into the Aspera Faspex Server (as described in Step 1, above).
-
If prompted to do so (after logging in), install the Aspera Connect™ browser plugin.
You must have the Aspera Connect browser plugin installed to access the Aspera Faspex Server web interface. If Aspera Connect is not detected on your system, you will be prompted to install it.

Typically, clicking Install Now automatically installs the Aspera Connect browser plugin. When installation has completed, refresh your browser window to check whether or not Aspera Connect has installed successfully. If it has not installed successfully, then click the Download the installer link to access the Aspera Connect download page (http://asperasoft.com/connect). From here, you can download the Connect installer for your specific operating system.
Note:As a Faspex user, you have the option to suppress the Aspera Connect installation from your Faspex Preferences page.