-
Specify recipients in the the following fields:
Option Description To Enter the package recipients on the To line. A recipient can be a Faspex account name, the email address of an external user (if this is permitted for your account), a workgroup name (workgroup names begin with an asterisk (*)), or a name of a distribution list
 Note: Valid delimiters are commas (,) and semi-colons (;).
To view your contact list, click the
 button. In addition to Faspex users, the contact list will show
your workgroups and distribution lists. If you are permitted to
send packages to external email addresses, and you have sent
files to a new address, Faspex also saves the address into your
contact list. To remove it from your list, go to .
button. In addition to Faspex users, the contact list will show
your workgroups and distribution lists. If you are permitted to
send packages to external email addresses, and you have sent
files to a new address, Faspex also saves the address into your
contact list. To remove it from your list, go to .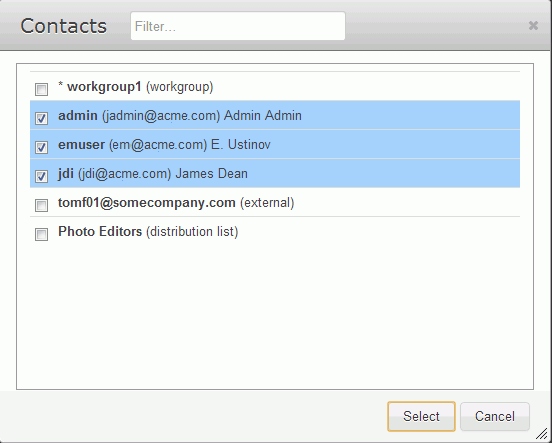
To (private) You can send package as a BCC (blind carbon-copy) to other users by entering Aspera Faspex account names, external email addresses (if allowed), or distribution lists in this field. To hide this field, click the Hide Private Recipients link. 
CC (upload/download) You can notify others when packages are uploaded and/or downloaded by enabling these fields and entering Faspex account names or email addresses. You cannot enter workgroups or distribution lists in this field. To hide this field, click Hide CC. 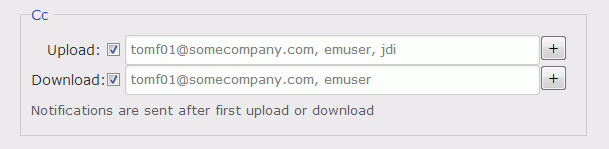
The following options must be enabled by a Faspex administrator before they can be configured.
Depending on your Package Storage settings, file packages sent from Faspex are either stored on the server for a specified duration or until they are manually deleted. You can find your sent packages in the Sent section in the Faspex menu.