This topic describes the process of logging into your Aspera AMI for the first time.
-
Obtain your Aspera On-Demand Console login credentials.
Once you have launched the Aspera AMI, locate it under Instances in the navigation sidebar. From here, you can obtain the following On-Demand Server information:
- Login password, which is the string in the Instance field.
- Address, which can be derived from the Public DNS address.

From the example above, the Aspera On-Demand Console can be accessed using the following information:
Field Information Address/URL - https://ec2-77-77-77-77.compute.../aspera/console
- https://77.77.77.77/aspera/console
Username admin Default Password i-aff6aaaa -
Enter the Aspera On-Demand Console URL in your web browser and log in.
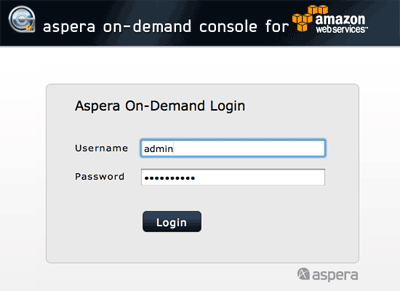
Input the URL from the previous step into your web browser. When accessing the URL, your browser may notify you of an untrusted connection. When this occurs, follow the on-screen instructions to accept the security certificate. On the login screen, enter your username and password.
IMPORTANT NOTE: You must install the Adobe Flash Player on your computer before using the On-Demand Console. You may download the Flash Player from the link: http://get.adobe.com/flashplayer.
-
Update your account information.
Once logged in, go to Preferences within the Console menu and then select the User tab to update your admin account information.

Click Update when finished.
IMPORTANT NOTE: If you backup and restore the On-Demand Server (explained in Step 7), your password information will also be stored. If you backup and restore the On-Demand Server without updating your password, then the original password (i.e., the original Instance ID) will also be stored, which may not match the new Instance ID.
-
Create a transfer user account.
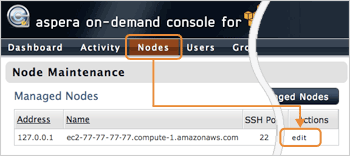
A transfer user account must be created in order to start fasp file transfers on the Aspera On-Demand Server. Within the On-Demand Console, navigate to Nodes > edit for the 127.0.0.1 entry.
On the Node Maintenance page, go to the Accounts > Add User .
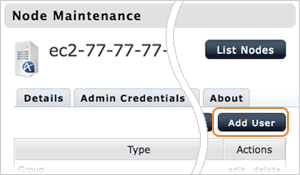
On the Creating New User page, enter the login information and click Create. For example, create a user with the following information:
- Login: asp1
- Password: secRet
-
Log into your Aspera AMI over SSH.
To log into the Aspera AMI instance over SSH, connect to your instance's IP address with your admin credentials. In this example, the Aspera AMI can be accessed over SSH using the following information:
Field Information Address/URL - https://ec2-77-77-77-77.compute.../aspera/console
- https://77.77.77.77/aspera/console
Port number 33001 Username root Private key file ~/.ssh/asp1.pem Using this information, the following command may be run to log in to the Aspera AMI over SSH:
$ ssh root@77.77.77.77 -p 33001 -i ~/.ssh/asp1.pem
-
Backup and restore the On-Demand Server configuration.
The AMI instance does not store data when terminated, thus, it is advised that you backup the configuration before shutting down. To do so, log in the Aspera On-Demand Console and go to Config > Save/Restore . Click Download Current Configuration and save the file.
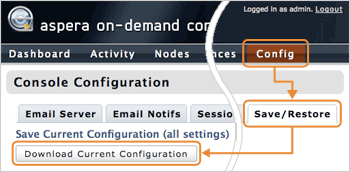
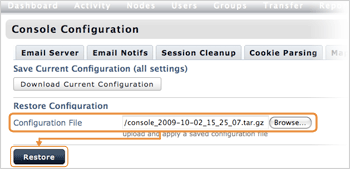
To restore the configuration on a new instance, log in the Aspera On-Demand Console and go to Config > Save/Restore > Browse in the Configuration File to select the backup file. Click Restore to load the settings.
