Create a transfer template that stores all the transfer settings and can easily be reused.
When accessed with the proper permissions, Aspera Console can initiate transfers between nodes. A smart transfer is based on a reusable transfer template that you create, which includes all your transfer settings. To create a smart transfer template, select from the Console menu and follow the steps below.
-
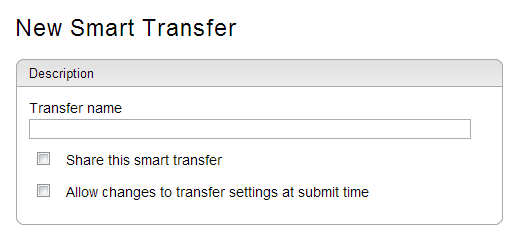
Enter a description for your smart transfer template
Enter a transfer name and enable/disable the following checkboxes:
- Share this smart transfer: Enable (check) to share this Smart Transfer with any user who matches the transfer path(s).
- Allow changes to transfer settings at submit time: If enabled
(checked), you will be able to make an impromptu change to your transfer
settings when the transfer request is submitted. Note:
This command does not alter the configuration of your smart transfer template.
-
Set up your source endpoint and folders
In the Smart Transfer Diagram (right side of the page), ensure the Source box is selected (red). When selected, the Source dialog appears on the left side of the page.

In the Source dialog, fill out the form as follows:
Field Description Connect Choose the source endpoint and enter login credentials when selecting a node. Choose Source Directory Click the button to choose the transfer's source directory. The source path is displayed once you have selected your source directory. Note: When specifying a filter, the asterisk (*) is not a wildcard. Any string you enter as a filter is treated as a "search within". In other words, the string "foo" will match "123foo", "foo456", and "123foo456".Source Path Populates once you have selected the source directory. Specify base for source path(s) By default, the entire contents of the source directory is transferred. The source directory itself is included in the transfer, but no higher-level directories in its path are transferred. You can modify which directory levels are transferred by enabling Specify base for source path(s). This lets you specify a portion of the source path to remove from the transfer, thereby allowing any remaining folders in the path to be included in the transfer.
For example, the source path selected for a smart transfer is /clips/out/ready and it contains the following folders and files:/clips/out/ready/file1 /clips/out/ready/folderA/file2 ... file9
By default, the transfer will consist of the ready directory and its entire contents: ready/file1 and ready/folderA/file2 ... file9 with no further path information.If the destination directory is specified as /incoming, your transfer will appear as follows on the destination computer:
docroot/incoming/ready/file1
docroot/incoming/ready/folderA/file2 ... file9
However, by using Specify base for source paths(s), the ready folder itself can be excluded. By specifying /clips/out/ready, only file1 and folderA/* will be transferred.
The same feature can also be used to include more path depth than the default. If the source-base path is specified as /clips, then out/ready and everything below it will be transferred. Similarly, if the source-base path is specified as / only, the entire source path clips/out/ready and everything below it will be transferred.
Note: If any files or folders that are selected for transfer fall outside the specified source-path base, they are omitted from the transfer. For example, if the source-base path is specified as /clips/out/ready/folderA, then file1 is not transferred at all because it is not in folderA. Only file2 ... file9 are transferred (and with no path).Items to transfer Select one of the following file-transfer rules from the drop-down list: - Allow initiator to select items when starting manually
- Always transfer the entire directory
-
Review or modify your More Options defaults for this transfer
The More Options panel at the bottom of the page displays default settings for this smart transfer template.
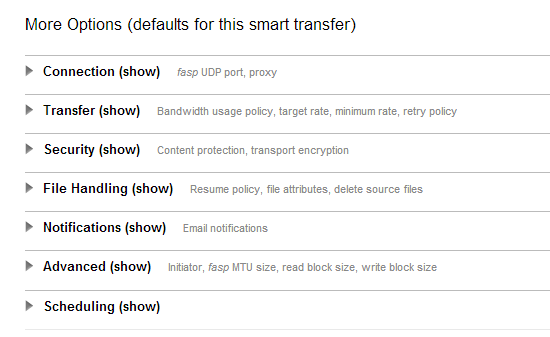 Connection
Fasp Port (UDP) Specify the UDP port for fasp file transfers. Fasp proxy Enable transferring through a fasp proxy server, and specify the proxy host address, port, username, and password. TransferTarget rate Specify the transfer target rate. Minimum rate Set the transfer minimum rate Bandwidth policy Choose a transfer policy among fixed/high/fair/low. Retry policy Check the option to enable the retry policy, as well as specify the number of attempts and the duration. SecurityContent protection Check the option to enable the content protection that encrypts the files on destination, using the entered password. Transport encryption Select aes-128 to transfer with this encryption method. File HandlingResume policy Specify a resume policy and the overwrite rule when the file exists on the destination. File attributes Check the option to preserve the file permissions on the destination. Symlinks Specify how to deal with symbolic links: follow, copy, copy and force, or skip. Leave this option blank if the source is on Windows. For all others, leaving it blank is the same as choosing "follow". Source deletion Check the option to delete the transferred files from the source computer. Exclude filter Enter file-name pattern to exclude from the transfer. Two symbols can be used in the pattern: * represents zero to many characters in a string, for example "*.tmp" matches ".tmp" and "abcde.tmp". ? represents one character, for example "t?p" matches "tmp" but not "temp". NotificationsEmail address To send status notifications for transfer events (start, success, or error), enter an email address and click Add. When the email address appears in the table, specify which email template to use for each transfer event. AdvancedInitiator Check this option to initiate transfers from the destination node (if possible). Console normally initiates transfers from the source node unless the source is an unmanaged node. Read block size Check the option and enter the read block size in bytes. Write block size Check the option and enter the write block size in bytes. Scheduling
For instructions on setting up a schedule for your smart transfer, see the next step.
Important:When you have more than one destination, you can override the default smart transfer settings (with the exception of scheduling) shown in the More Options panel for each individual destination.
-
(Optional) Schedule your Smart Transfer
Enable (check) the Automatically start on a recurring schedule checkbox and complete the fields below to set up a Smart Transfer schedule.
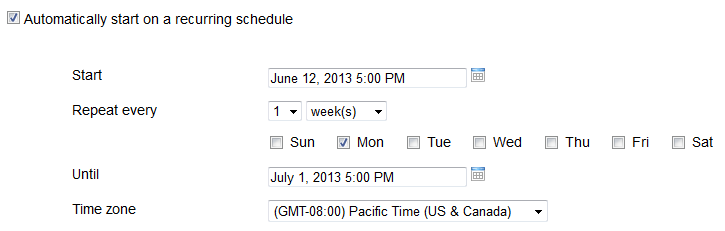
Field Description Start Click the calendar icon to select a date and time that serves as the starting basis for your reccuring smart transfers. Based on the "Start" entry, Console will calculate the run time for the next occurrence (that matches the repeat rules). For example, if your start date is Friday, April 8, but your transfer is scheduled to run on Saturdays, then the first transfer will occur on Saturday, April 9. Repeat every Select the number of minutes, hours, days, weeks, or months to repeat this transfer. When weeks is selected, you can enable the requisite days of the week. When months is selected, you can specify whether to perform the transfer on a specific day of the month or on the "nth ___day" of the month (e.g. 1st Sunday). Until Click the calendar icon to select a "do not go beyond" date and time. Your smart transfer will not repeat beyond this entry. Time zone Select your timezone from the drop-down list. -
Set up your destinations (note a destination box in the Smart Transfer
Diagram must be selected)
To choose the destination endpoint, ensure that a Destination box is selected within the Smart Transfer Diagram on the right side of the page. Note that you can create additional destination endpoints by clicking the + button. To remove a destination, click x inside the diagram box.
In the Smart Transfer Diagram (right side of the page), ensure the Destination box is selected (red). When selected, the Destination dialog appears on the left side of the page. You can create additional destination endpoints by clicking the + button. To remove a destination, click the x button inside the diagram box.
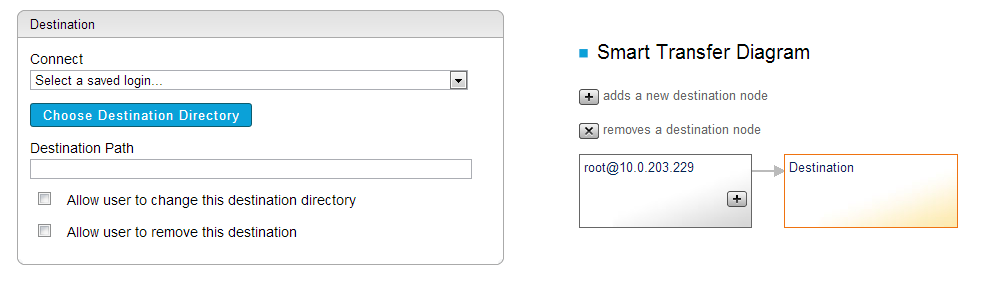
In the Destination dialog, fill out the form as follows:
Field Description Connect Select the destination endpoint. Enter the login credentials when selecting a node. Choose Destination Directory Choose a destination directory for the transfer. Destination Path Populates once you have selected the destination directory. Allow user to change this destination directory If enabled (checked), a logged in user will be allowed to modify the directory that you have selected on the destination machine. Allow user to remove this destination If enabled (checked), a logged in user will be allowed to delete the selected destination from the Smart Transfer Template. Set transfer options individually for this destination (shown for 2+ destinations) If enabled (checked), you can override the default smart transfer settings (with the exception of scheduling) shown in the More Options panel for each individual destination. -
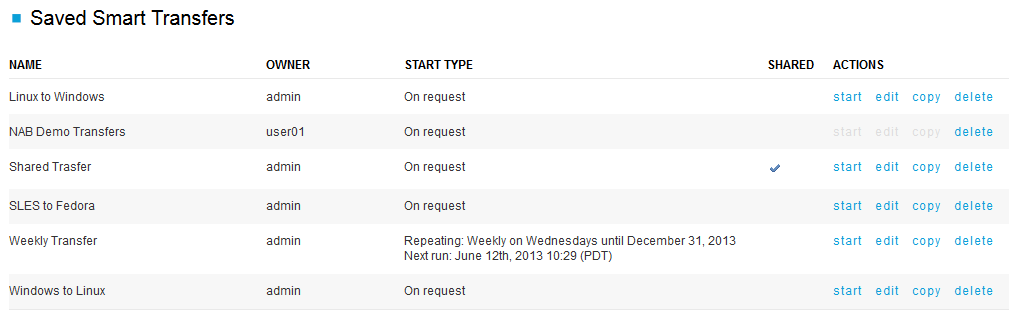
Save and run your smart transfer
Click the Save button when finished. Once a smart transfer template has been saved, it will be accessible from the Transfer screen. Here, you can click start to initiate or edit and delete to edit or delete the smart transfer template. You can also copy a smart transfer template by clicking the copy link.