IBM Aspera Application Platform / Server On Demand (APOD / SOD) can be used to initiate transfers
between nodes when the Console user has the permission to start transfers. Console
provides two types of transfer methods: simple transfers and smart transfers. Simple
transfers are one-time transfer sessions that require entering all transfer
information. Smart transfers are reusable templates with saved transfer
settings.
-
Go to Transfer.
Note: If you do not see the Transfer tab,
you may not have transfer permissions enabled for your account. For more
information, contact your administrator.
-
Click Simple Transfer.
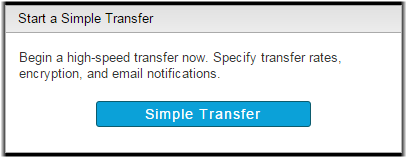
Note: If you do not see the Simple
Transfer button, you may not have permissions start simple
transfers. For more information, contact your administrator.
-
Enter the transfer name and optional comments. The name and comments can be
helpful if you want to search for this transfer later.
- Optional:
Add new tags or modify existing tags.
Click the

button to add
a new tag. Enter the tag name and the tag value. Click the

button to delete
an existing tag. Select the

button to
prevent a user from changing or deleting the locked tag when starting this
transfer.

-
In the Source section, click the
Connect drop-down menu and select the source node,
cluster, or saved endpoint.
- Node: A node is listed as the node name (by default, its IP address) and
IP address. Select the Endpoint type from the
drop-down menu and enter your credentials or select your SSH key.
- Cluster: A cluster is listed as the domain name. Select the
Endpoint type from the drop-down menu and enter
your credentials.
- Endpoint: A saved endpoint is listed as
login@address and is associated
with login credentials for the username or access key. Selecting a saved
endpoint does not prompt you for credentials.
-
Select content to transfer by clicking Browse, selecting
the content, and clicking Add.
Note: When browsing the node, you can narrow your search by applying
a filter. When specifying a filter, the asterisk (*) is not a wildcard. Any
string you enter as a filter is treated as a "search within". In other
words, the string "foo" matches "123foo", "foo456", and "123foo456".
By default, the parent folders of the selected files and folders are not
transferred. If a source item is a file, then only the file is
transferred. If a source item is a folder, then the folder and its entire
contents are transferred. For example, if the source path is
aspera/tmp/sent_files, the only folder that will be
transferred to the destination is the sent_files
folder. Neither /aspera nor /tmp
appear at the destination location.
To transfer only the contents of a selected folder, select Specify
base for source path(s) and enter the filepath to the
folder. For example, if the source folder is
aspera/tmp/sent_files and you specify that same
path as the base for source paths, the contents of
/sent_files is transferred to the destination
directory as separate items that are not contained in a
/sent_files folder.
-
In the Destination section, click the
Connect drop-down menu and select the source node,
cluster, or saved endpoint.
- Node: A node is listed as the node name (by default, its IP address) and
IP address. Select the Endpoint type from the
drop-down menu and enter your credentials or select your SSH key.
- Cluster: A cluster is listed as the domain name. Select the
Endpoint type from the drop-down menu and enter
your credentials.
- Endpoint: A saved endpoint is listed as
login@address and is associated
with login credentials for the username or access key. Selecting a saved
endpoint does not prompt you for credentials.
-
ClickBrowse, select the destination directory, and click
Add.
- Optional:
Configure settings in the More Options section.
Click the toggle arrow next to each section to view settings.
| Section |
Description |
| Connection |
Configure fasp settings. |
| Transfer |
Configure transfer rates and policies. |
| Security |
Encrypt the transfer. |
| File Handling |
Configure source file attributes, archive source files after
transfer, and set filters for source files. |
| Notifications |
Configure email notification options. |
| Advanced |
Configure transfer initiator, fasp MTU, and read and
write block sizes on source and destination nodes. |
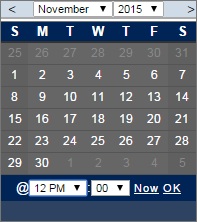
| Transfer Time |
Schedule your transfer to run Now or
Later. If you choose
Later, click the  button and choose the date and time you want the transfer to
run.
button and choose the date and time you want the transfer to
run.
|
-
Click Transfer to start the transfer (or
Schedule if you set a transfer time).
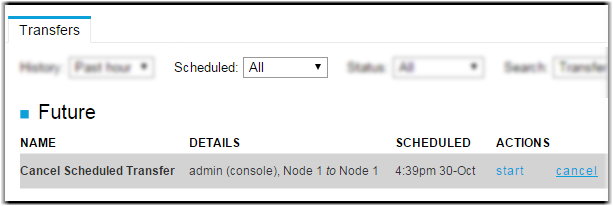
Note: You can cancel scheduled simple transfers by going to
Activity > Transfers. Click the
Scheduled drop-down menu and select
All. In the row for the transfer, click
Cancel.