Basic Report Example: Faspex Metadata
The following example demonstrates the process of creating a new, basic report (following the instructions described in the topic Creating a Basic Report) for Faspex metadata. In our example, we will generate a report that displays the metadata that is entered into a "Create New Package" form within Faspex, which is accomplished by creating a new, custom field called "Event" within Console.
The example report, once generated, will display the purpose (or "Event") of the Faspex package, as well as file-level detail, transfer-level detail (where a transfer groups together transfer sessions into a single item), and which Faspex user sent the package.
-
Configure your basic report to display contact, file-level, and transfer-level
details, organized by Faspex metadata (the "event").
On the Create New Report Type page (for basic reports), enter the following information:
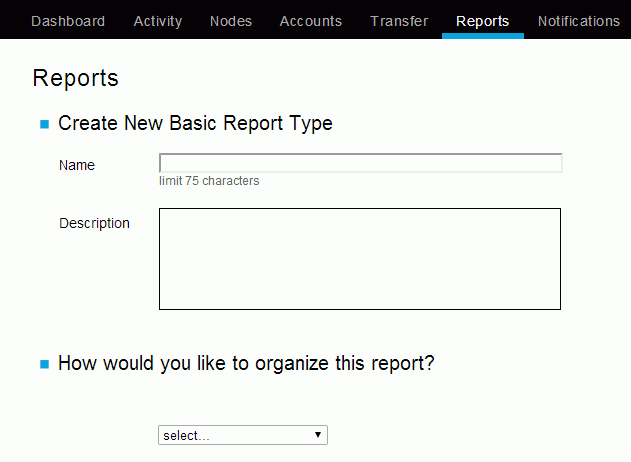
Field Description Name Faspex meta data report Description Based on the custom field "event." Includes metadata, contact, file-level, and transfer-level details. How would you like to organize this report? Select "Event" (which is a custom field), "Contact," "Transfer" and "File" as the fields by which to organize this report. In doing so, the report will be grouped by the following: - Event (Based on a transfer-level rule that states if the conditions match the regular expression, then set the "event" custom field value to the Faspex metadata value.)
- Contact (Contact assigned by Console. This can be a Console user name, a Faspex Server user name, SSH account, or customized value obtained from a transfer cookie. Examples: "admin (console)", "aspera (ssh)", "michael (faspex)".)
- Transfer (Human-readable name assigned to a transfer. A transfer represents one or multiple executions of ascp (i.e., one or multiple attempts to transfer).)
- File (File's name)
Columns to include Select the following basic fields to include as columns: - started at
- stopped at
- bytes transferred
- status
- average rate
- cookie
Note: When you select a field, its definition will appear in the box below.Sort Select the following fields to sort data inside your groups: - Sort your metadata groups by event/metadata name
- Sort your contact groups by contact name
- Sort your transfer groups by transfer name
- Sort your file groups by file name
Select ascending order for all fields.
Filters Filter the report so that only fields with metadata appear (that is, event is not NULL) and only data from Faspex Users is displayed (that is, transfer contact contains the value faspex). -
View your Web report.
After clicking the Run Report button, the page will update to display the report queuing and then running. Once generated, the Web version of your basic report will appear as shown below.
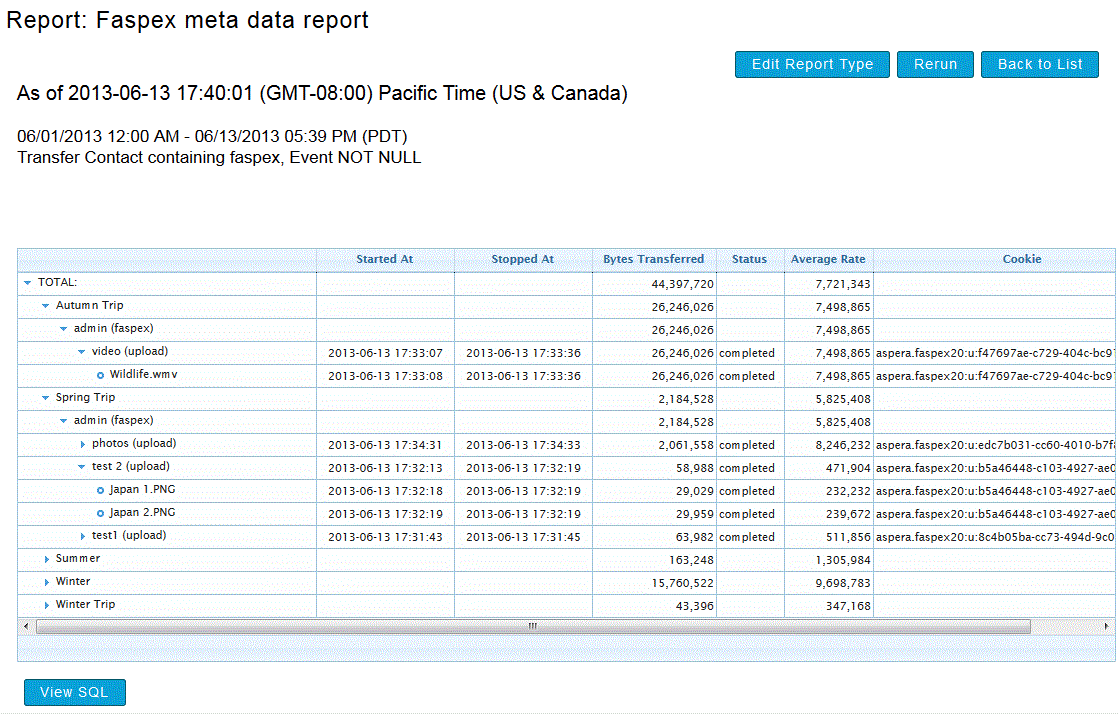
As you can see, the report's data is grouped and sorted in the following manner:
- Metadata
- Faspex Users that selected the corresponding event/metadata
- Transfers (per Faspex User), which are sorted by the time they started
- File name (per Transfer)
In addition, all data columns appear as selected on the Create Basic Report Type page.