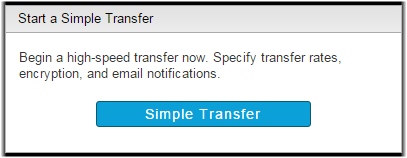
Starting a Simple Transfer
- Go to Transfer.
-
Click Simple Transfer.
- Enter the transfer name and optional comments. The name and comments can be helpful if you want to search for this transfer later.
- Optional:
Add new tags or modify existing tags.
Click the
button to add a new tag. Enter the tag name and the tag value. Click the
button to delete an existing tag. Select the
button to prevent a user from changing or deleting the locked tag when starting this transfer. For more information about tags, see Working with Tags.
-
In the Source section, click the
Connect drop-down menu and select the source node,
cluster, or saved endpoint.
- Node: A node is listed as the node name (by default, its IP address) and IP address. Select the Endpoint type from the drop-down menu and enter your credentials or select your SSH key.
- Cluster: A cluster is listed as the domain name. Select the Endpoint type from the drop-down menu and enter your credentials.
- Endpoint: A saved endpoint is listed as login@address and is associated with login credentials for the username or access key. Selecting a saved endpoint does not prompt you for credentials.
- Any: Choosing Any allows the user to create a new endpoint instead of choosing from the list.
-
Select content to transfer by clicking Browse, selecting
the content, and clicking Add.
Note: When browsing the node, you can narrow your search by applying a filter. When specifying a filter, the asterisk (*) is not a wildcard. Any string you enter as a filter is treated as a "search within". In other words, the string "foo" matches "123foo", "foo456", and "123foo456".
By default, the parent folders of the selected files and folders are not transferred. If a source item is a file, then only the file is transferred. If a source item is a folder, then the folder and its entire contents are transferred. For example, if the source path is aspera/tmp/sent_files, the only folder that will be transferred to the destination is the sent_files folder. Neither /aspera nor /tmp appear at the destination location.
To transfer only the contents of a selected folder, select Specify base for source path(s) and enter the filepath to the folder. For example, if the source folder is aspera/tmp/sent_files and you specify that same path as the base for source paths, the contents of /sent_files is transferred to the destination directory as separate items that are not contained in a /sent_files folder.
-
In the Destination section, click the
Connect drop-down menu and select the source node,
cluster, or saved endpoint.
- Node: A node is listed as the node name (by default, its IP address) and IP address. Select the Endpoint type from the drop-down menu and enter your credentials or select your SSH key.
- Cluster: A cluster is listed as the domain name. Select the Endpoint type from the drop-down menu and enter your credentials.
- Endpoint: A saved endpoint is listed as login@address and is associated with login credentials for the username or access key. Selecting a saved endpoint does not prompt you for credentials.
- Any: Choosing Any allows the user to create a new endpoint instead of choosing from the list.
- ClickBrowse, select the destination directory, and click Add.
- Optional:
Configure settings in the More Options section.
Click the toggle arrow next to each section to view settings.
Section Description Connection Configure fasp settings. Transfer Configure transfer rates and policies. Security Encrypt the transfer. File Handling Configure source file attributes, archive source files after transfer, and set filters for source files. Notifications Configure email notification options. For more information on email notifications, see Configuring Email Notifications. Advanced Configure transfer initiator, fasp MTU, and read and write block sizes on source and destination nodes. Transfer Time Schedule your transfer to run Now or Later. If you choose Later, click the button and choose the date and time you want the transfer to run.
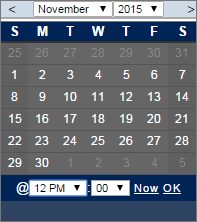
For information on these options, see Simple Transfer Options. -
Click Transfer to start the transfer (or
Schedule if you set a transfer time).
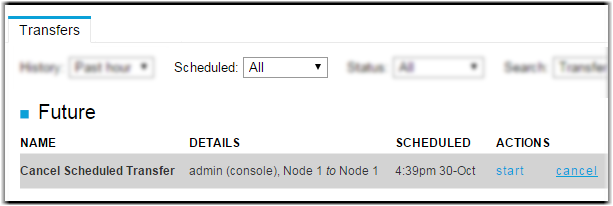
Note: You can cancel scheduled simple transfers by going to Activity > Transfers. Click the Scheduled drop-down menu and select All. In the row for the transfer, click Cancel.