When transfer users or groups are
configured to require token authorization, only transfers initiated with a valid token
(transfer token, basic token, or bearer token) are allowed to transfer to or from the
server. Token authorization can be set independently for incoming transfers and outgoing
transfers.
-
Choose or create the transfer user on the server.
The user should not have a password. If the system does not allow this, create
a very large password.
-
Set the IBM Aspera Connect public SSH key as an authorized key for
the transfer user and ensure that they own the file.
-
Create the .ssh directory in the user's home
folder.
# mkdir /home/aspera_user_1/.ssh/
-
Copy the Connect public SSH key into
.ssh and rename it
authorized_keys (or append the public key to
authorized_keys if the file already
exists).
# cp /opt/aspera/var/aspera_tokenauth_id_rsa.pub /home/aspera_user_1/.ssh/authorized_keys
-
Ensure that .ssh and
.ssh/authorized_keys are owned by the user.
# chown -R aspera_user_1:aspera_user_1 /home/aspera_user_1/.ssh
# chmod 600 /home/aspera_user_1/.ssh/authorized_keys
# chmod 700 /home/aspera_user_1

# chmod 700 /home/aspera_user_1/.ssh
-
Launch HST Server
and click
Configuration.
-
Click Users and choose a user to configure.
Alternatively, click Groups and
choose a group to configure, or click Global to
configure options for all users.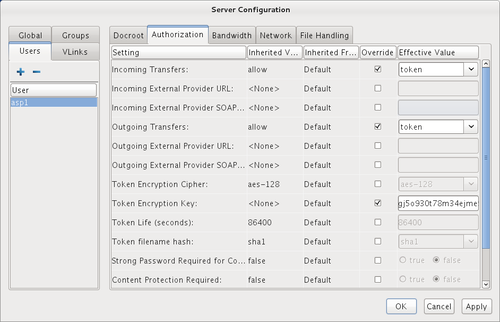
-
Click Authorization.
-
Set token authorization for incoming and outgoing transfers.
Select the override boxes for Incoming Transfers and
Outgoing Transfers. Under Effective
Value, select token from the drop-down
menu.
-
Set the token encryption key.
Select the override box for Token Encryption Key and
enter the token encryption key. The encryption key should be a string of random
characters (at least 20 recommended).
-
Click Apply to save the changes, or click
OK to save the changes and close the dialog.