This topic explains how to log into Console On Demand.
Note: Entitlements are enabled per machine instance, not per app. For Console On Demand and Shares On Demand, the entitlement portion of the procedure (steps 1 - 3) is slightly different. However, completing it for one--either Console or Shares--enables the entitlement for both, and steps 1 - 3 do not need to be repeated. Note that once the entitlement has been enabled from either app, it may take a few minutes for the other app to recognize the change.
-
Obtain your Aspera On Demand login credentials.
Once you have launched the Aspera AMI, locate it under Instances in the navigation sidebar. From here, you can obtain the following On Demand server information:
- Login password, which is the string in the Instance field.
- Address, which can be derived from the Public DNS address.
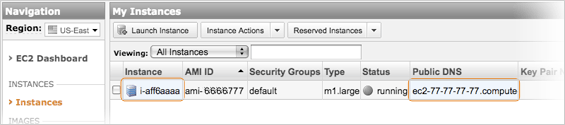
From the example above, the Console On Demand can be accessed using the following information:
Field Information Address/URL - https://ec2-77-77-77-77.compute.../aspera/console
- https://77.77.77.77/aspera/console
Username admin Default Password i-aff6aaaa -
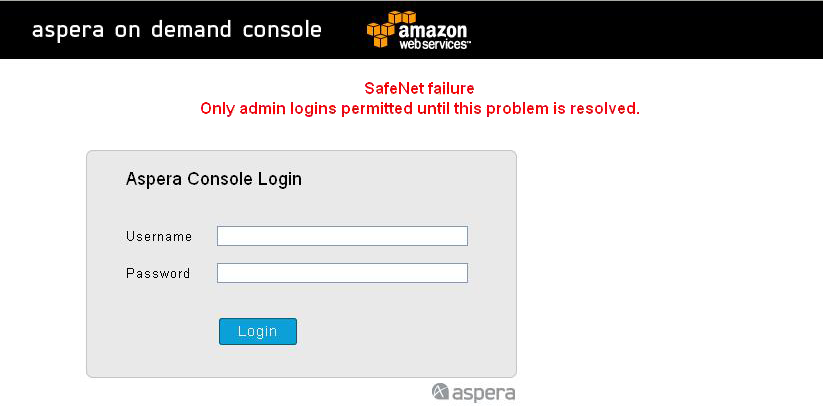
Enter the On Demand server URL in your web browser and log in.
Enter the URL from the previous step into your web browser. When you access the URL, your browser may notify you of an untrusted connection. If this occurs, follow the on-screen instructions to accept the security certificate.
On the login screen, enter your admin name and password.
-
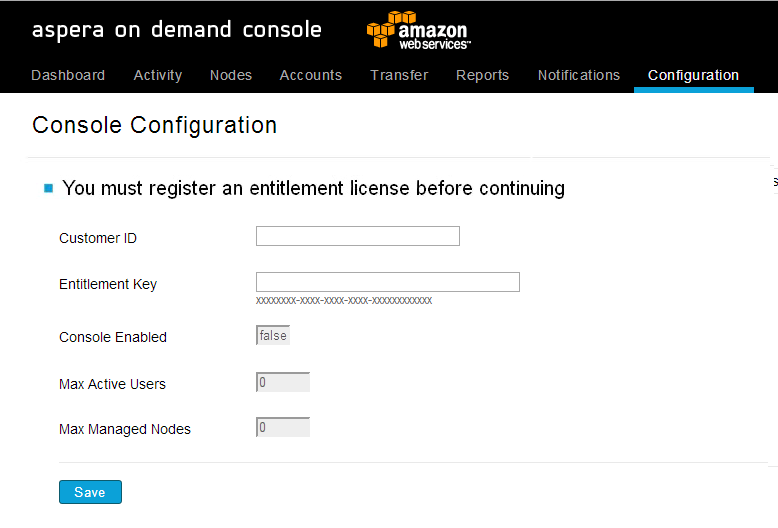
Enter your entitlement license.
The Entitlement License page opens. Enter your customer ID and entitlement
key, and click Save. Until you provide a valid license,
you will be unable to use Console On Demand. (If you need to review or update the entitlement
information at a later time, you can reach this page from Configuration > License.)
-
Update your account information.
Once you are logged in and the app is enabled with a valid entitlement, click the admin user name in the Console banner and select Preferences.
Then select the User Info tab to update your admin account information:
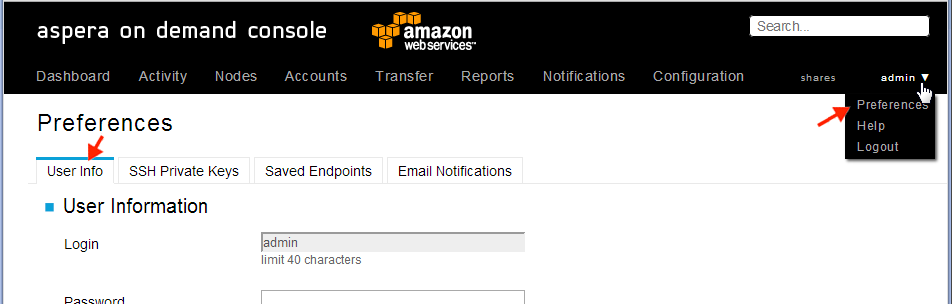
Click Update when finished.
Note: If you back up and restore the On Demand server (as described in Step 7), your password information will also be stored. If you back up and restore the On Demand server without updating your password, then the original password (i.e., the original Instance ID) will also be stored, which may not match the new Instance ID.
-
Create a transfer user account.
A transfer user account is needed to start fasp file transfers on the Aspera On Demand server. In Console, go to Nodes > edit for the 127.0.0.1 entry.
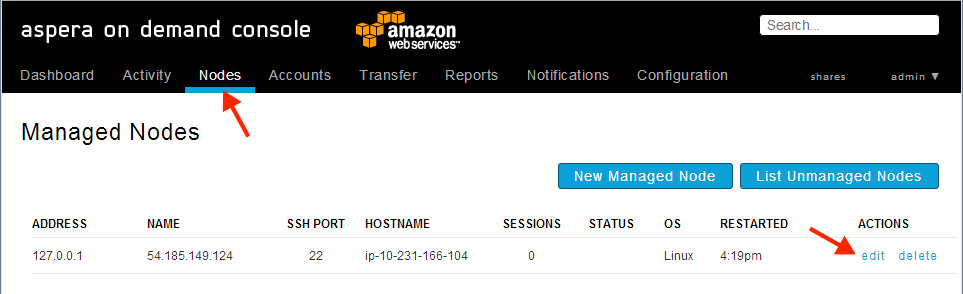
Open the Accounts tab. On the Node Accounts page, either create a new user (Add User) or edit the account configuration for the existing xfer or xfer2 user as described below.
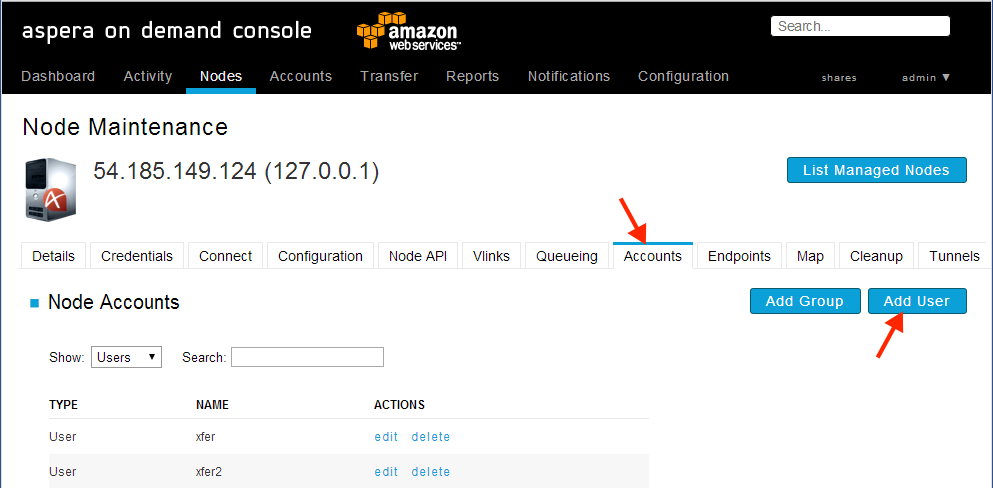
Using xfer or xfer2: These two pre-configured accounts are provided for your use. Both are assigned to have a document root on the server in the /mnt/ephemeral/data/$username folder.
Note: The xfer and xfer2 accounts are designed as transfer accounts to be used with a web application, and therefore have been configured to require a valid token. If you want to transfer with the xfer or xfer2 account using a standard Aspera client, you will need to disable token authorization. This can be done using the account configuration settings in Console On Demand (Nodes > Edit > Accounts).
Creating a new transfer account: On the Node Maintenance page, open the Accounts tab and click the Add User button. The Creating New User page opens.
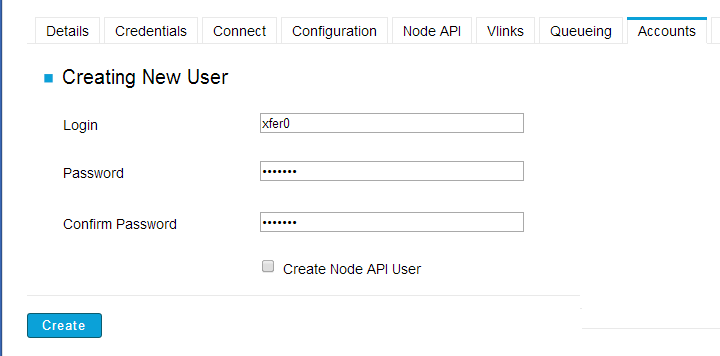
Enter the login information and click Create.
-
Back up and restore the On Demand server configuration.
The AMI instance does not store data when terminated; therefore,we advise that you back up the configuration before shutting down.
Note: A full backup of the On Demand server configuration requires backing up Shares On Demand as well as Console On Demand. The procedure below is for Console On Demand. For information on backing up Shares On Demand, see the Shares On Demand Admin Guide.Backup: Log into Aspera On Demand Console and go to Configuration and open the Save/Restore tab. Click Download Current Configuration and save the file.
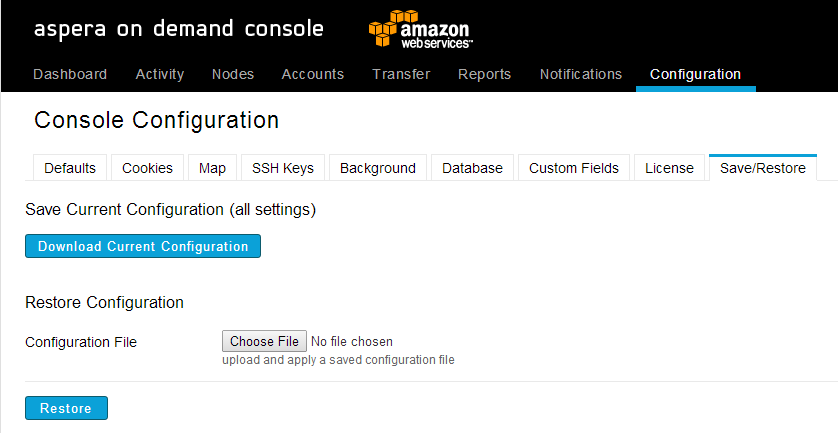
Restore: From the same page, under Restore Configuration, click Choose File and select the backup file. Click Restore to load the settings.