Installing Orchestrator
I. Download the Installer
- Go to the Aspera website:
-
Using your login credentials, download both installers:
- version - Linux RPM x86_64 (Aspera Orchestrator)
- versionCom - Linux RPM x86_64 (Aspera Common Components)
After download, the installers appear with the following formats (aspera-common is the Aspera Common Components):aspera-orchestrator-version-0.x86_64.rpm aspera-common-version-0.x86_64.rpm - Save the installers to the machine where you are installing Orchestrator.
II. Run the Installer
-
Install the Aspera Common Components.
Go to the location where the installation files are saved and run the following command as root:
# rpm -ivh aspera-common-version-0.x86_64.rpm Preparing... ################################# [100%] Updating / installing... 1:aspera-common-version-0 ################################# [100%] -
Install Orchestrator.
CAUTION:If you are installing the MySQL database on a remote server (not on the same machine with Orchestrator), follow the procedure in Running MySQL on a Separate Machine before installing Orchestrator.
# rpm -ivh aspera-orchestrator-version-0x86_64.rpm Preparing...########################################### [100%] . . . To complete the setup of Orchestrator, run "asctl orchestrator:setup" -
When prompted to complete the Orchestrator setup, run the following
command:
# asctl orchestrator:setup -
A setup prompt appears:
Streamlined or detailed setup (s/d)? (current: s)Enter "s" for streamlined setup or "d" for detailed setup.
Selecting detailed setup gives you a greater ability to customize services and processes in Orchestrator. You may need this setup if you require an advanced configuration; for example, if your system utilizes non-standard ports or not all components are running on a single server.
-
A Ruby version selection prompt appears:
Orchestrator
  Use Ruby 2.3.0 (y/n)? (current: y)
Enter "y" to use Ruby 2.3.0 in the installation.
Note: If you select "n" at this prompt, Orchestrator will use Ruby 1.8.7 for the installation. You will still have access to all Orchestrator features; however, you will not experience the improved engine performance supported by Ruby 2.3.0. -
Follow the system prompts.
- If you entered "s" to select streamlined setup, you will see prompts
that correspond to the entries in the following table.
System Prompt Default Details Enter a new MySQL root password. Note: Save this for future reference.MySQL will need to start/restart during configuration. Continue (y/n)? "y" Enter "y" to proceed with the setup process. If you enter "n", the system will exit setup. What hostname or IP address should Apache use to identify itself (in the SSL Certificate)? 10.0.174.44 Enter the hostname or IP address for Apache. - If you entered "d" to select detailed setup, you will see prompts
that correspond to the entries in the following table.
System Prompt Default Details What base port should the Mongrel servers start at? 3000 Enter the base port for the mongrel servers. How many Mongrel process should be launched? 3 Enter the number of mongrel processes; this is related to server capacity. What web root do you want to use? /aspera/orchestrator Enter the web root. MySQL will run on this machine (y/n)? "y" - To run MySQL on this machine, enter "y".
- If you configured MySQL to run on a separate
machine, according to the procedure in Running MySQL on a Separate Machine, enter "n". Note: A "no" response will generate an alternate set of prompts. To continue setup, see the table below this one, "Additional Options for Remote MySQL Machine".
What port would you like MySQL to listen on? 4406 If you entered "y" for the prompt above, enter the MySQL port. Enter a new MySQL root password. none Enter the MySQL root password. Note: Be sure to save this for later use. - The following table describes additional options for the remote
MySQL machine. if applicable:
System Prompt Default Details What is the database server's host name or IP address? Enter the IP address of the machine where the remote MySQL database is installed. What port is the remote MySQL listening on? Enter the port configured on the remote machine. What user should we use to connect to the database? root Enter root. What password should we use to connect to the database? Enter the MySQL root password that was created for the remote MySQL database. - Proceed with the rest of the setup options:
MySQL will need to start/restart during configuration. Continue (y/n)? "y" Enter "y" to continue with the configuration process. If you enter "n", the system will exit setup. Enter IP address of network interface for Apache to listen on. 0.0.0.0 Enter the hostname or IP address of your Orchestrator server. What hostname or IP address should Apache use to identify itself (in the SSL Certificate)? 10.0.174.44 Enter the hostname or IP address for Apache. What port would you like to run Apache http on? 80 Enter port for Apache HTTP. What port would you like to run Apache https on? 443 Enter port for Apache HTTPS. Would you like to generate a self-signed SSL certificate, or install your own ([g]enerate,[c]opy) (current: g)? generate (g) - To generate a self-signed SSL certificate, enter "g"
- To install your own, enter "c"
Note: The key and certificate will be generated in the following directory: /opt/aspera/common/apache/conf.
The settings that you selected are generated in system output. The following is an example:
Key and certificate will be generated in this directory: /opt/aspera/common/apache/conf ===================== Settings ===================== MySQL Enabled: true Port: 4406 Apache Enabled: true Hostname: 10.0.203.84 Bind Address: 10.0.203.84 HTTP Port: 80 HTTPS Port: 443 Orchestrator Enabled: true Mongrel count: 3 Mongrel base port: 3000 Web root: /aspera/orchestrator MySQL is local: true - If you entered "s" to select streamlined setup, you will see prompts
that correspond to the entries in the following table.
-
If the settings are correct, enter "y" to accept them and
continue; otherwise, enter "n" to re-enter the settings. (Pressing
"x" will exit the installation process.
Are these settings correct? (y/n/x with x for exit) y
MySQL
  Enabling MySQL...                                            done
  Installing startup script...                                 done
  Setting up db space watcher...                               done
  Creating 'mysql'...                                          done
  Granting temporary shell access...                           done
  Setting database dir...                                      done
  Creating required directories...                             done
  Setting permissions...                                       done
  Creating database...                                         done

    .   .   .

Apache
  Pre-execution checks...                                      done
  Enabling Apache...                                           done
  Installing startup script...                                 done
  Creating system user...                                      done

   .   .   .

Orchestrator
Enabling orchestrator...
Near the end of the process, you will see the following:
Task Name Status ================================================================== MySQL Enabling MySQL OK Installing startup script OK Setting up db space watcher OK Creating 'mysql' OK . . . Apache Pre-execution checks OK Enabling Apache OK Installing startup script OK Creating system user OK Orchestrator Enabling orchestrator OK -
Once setup has completed, enter "y" at the system request to
restart Apache. Entering "n" will exit setup.
Apache needs to be restarted, restart it now (y/n)? (default:y) y -
Enter "y" at the system request to restart MySQL. Entering
"n" will exit setup.
MySQL needs to be restarted, restart it now (y/n)? (default:y) yUpon completion of the setup process, the following message appears:
Reminders:
 - Apache needs ports 80 and 443 open in firewalls.
Make a note of this for future reference.
-
To start the Orchestrator processes, run the following command:
asctl orchestrator:startDepending on your system, you may see the following output that has the status NOT running:
Orchestrator Status:
  -> Orchestrator Manager running with pid: 3447
  -> Orchestrator Engine NOT running
  -> Mongrel serving orchestrator on port 5000 is NOT running
  -> Mongrel serving orchestrator on port 5001 is NOT running
  -> Mongrel serving orchestrator on port 5002 is NOT running
  -> Mongrel serving orchestrator on port 5003 is NOT running
  -> Mongrel serving orchestrator on port 5004 is NOT running
  -> Orchestrator Monitor NOT running
  -> Asynchronous Worker Process 0 is NOT running
  -> Asynchronous Worker Process 1 is NOT running
  -> Synchronous Worker Process 2 is NOT running
  -> Synchronous Worker Process 3 is NOT running
  -> Synchronous Worker Process 4 is NOT running
  -> Synchronous Worker Process 5 is NOT running
This is an indication that at this point in the installation, the Orchestrator processes need additional time to start. Wait approximately one minute, then check the status by entering the following command:
# asctl all:statusYou should now see confirmation that Apache and MySQL are running, and a status message similar to the following that confirms the processes are now running:
Apache:               running
MySQL:                running

Orchestrator Status:
  -> Orchestrator Manager running with pid: 3447
  -> Orchestrator Engine NOT running
  -> Mongrel serving orchestrator on port 5000 is running with pid: 3465
  -> Mongrel serving orchestrator on port 5001 is running with pid: 3467
  -> Mongrel serving orchestrator on port 5002 is running with pid: 3469
  -> Mongrel serving orchestrator on port 5003 is running with pid: 3471
  -> Mongrel serving orchestrator on port 5004 is running with pid: 3473
  -> Orchestrator Monitor running with pid: 3463
  -> Asynchronous Worker Process 0 is running with pid: 3480
  -> Asynchronous Worker Process 1 is running with pid: 3482
  -> Synchronous Worker Process 2 is running with pid: 3484
  -> Synchronous Worker Process 3 is running with pid: 3486
  -> Synchronous Worker Process 4 is running with pid: 3488
  -> Synchronous Worker Process 5 is running with pid: 3478
III. Complete the Installation in the Orchestrator UI
-
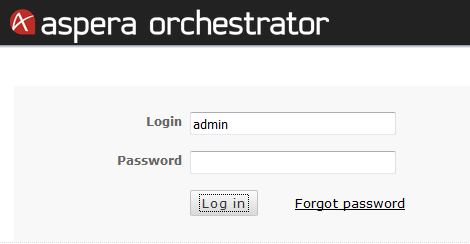
Open the Orchestrator user interface.
In a web browser, go to the following URL, where orchestrator_ip_address is the IP address or fully qualified name of the machine on which Orchestrator is installed.
https://orchestrator_ip_addressNote: Depending on your current certificates, you may get a security warning popup. If so, click Advanced and add a security exception for the Orchestrator website. -
In the Login field, enter admin; leave the Password field
blank.
-
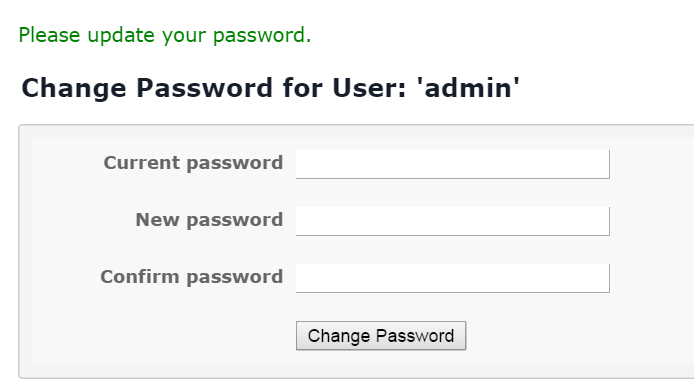
Create a password for the admin user.
In the Change Password dialog, leave the Current password field blank and enter your new password, then enter it again in the Confirm password field.
-
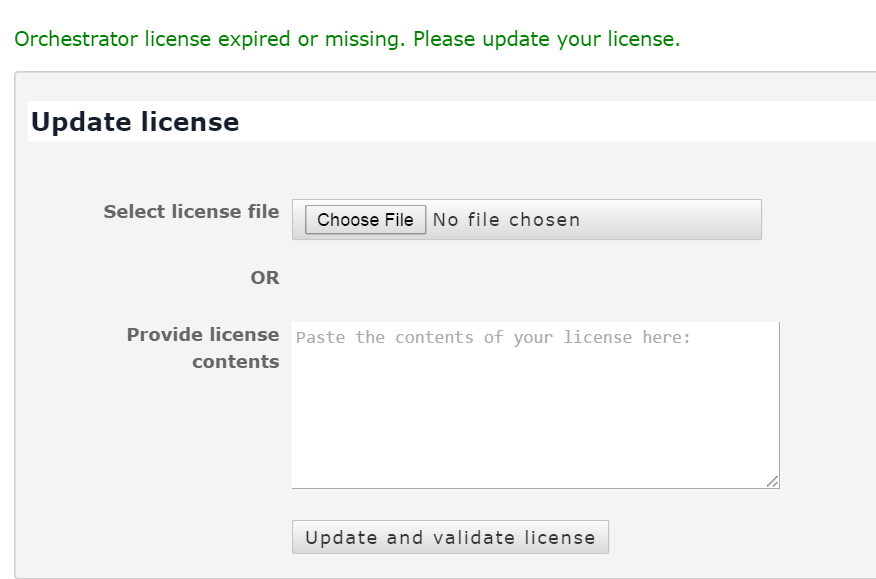
Apply the license file.
-
In the Update License dialog (Engine > Update
License), click Browse to
import your license file, or paste the contents of your license file
into the text box.
-
Click Update and validate license.
The message New license applied and validated successfully appears.
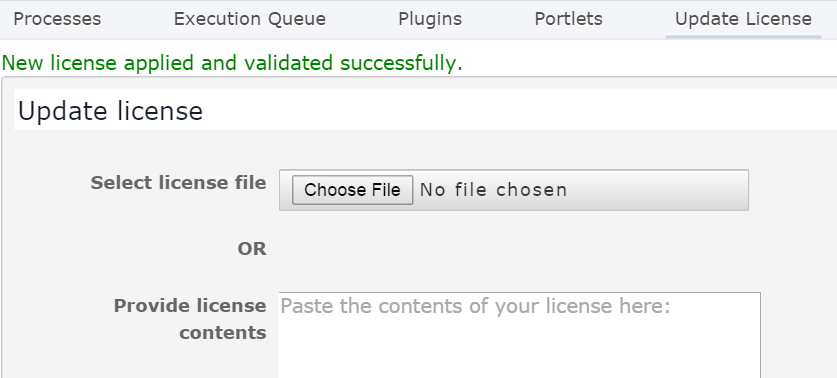
Note: The Orchestrator UI displays the currently installed version and license expiration date in the footer of every page.
-
In the Update License dialog (Engine > Update
License), click Browse to
import your license file, or paste the contents of your license file
into the text box.
-
Confirm that all processes are running.
Click Engine > Processes and review the Status column to confirm that all processes are running. For any process with a Stopped status, click Start to resume.