- Adding a DS account
- Configuring DS users and groups
Aspera® Shares™ supports the Lightweight Directory Access Protocol (LDAP), and you can configure it to connect to a directory service. The following directory service databases are supported:
- Active Directory (AD)
- Apple Open Directory
- Fedora Directory Server
- Open LDAP
Aspera Shares already has a default, local database. When you add local users, they will automatically be added to . For information on setting up local users, see Adding Local Users.
-
Complete the form that appears with your specific directory service's settings
and click Create ldap config.
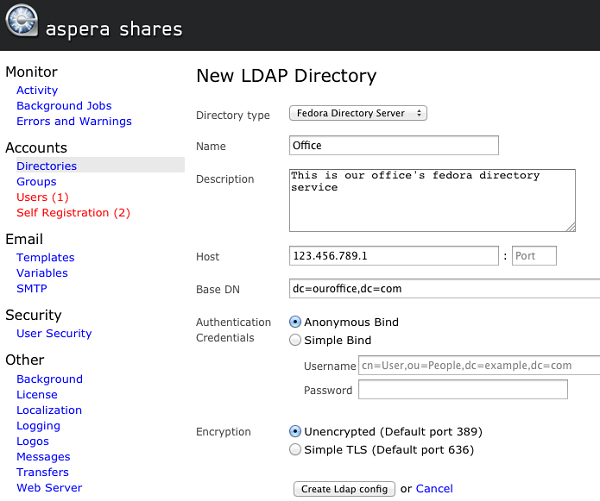
Option Description Directory Type
Select a directory service type from one of the following options:
- Active Directory (AD)
- Apple Open Directory
- Fedora Directory Server
- Open LDAP
Name
Type a name for this directory service.
Description
Type a description for this directory service.
Host
The directory's address and port number. By default, unsecured LDAP uses port 389, unsecured global catalog uses port 3268, and global catalog over SSL uses port 3269.
Base DN
The search treebase, for example, dc=myCompany,dc=com for myCompany.com.
Authentication Credentials
- Anonymous Bind
- Simple Bind
If Simple Bind is selected, you must type your directory service user name, which is typically a Distinguished Name (DN), for example, CN=Administrator,CN=Users,DC=myCompany,DC=com)and directory service password.
Encryption
- Unencrypted (Default port 389)
- Simple TLS (Default port 636)
Note: Aspera recommends selecting Simple TLS to secure your server. By default, LDAP traffic is transmitted unsecured. You can make LDAP traffic confidential and secure by enabling TLS.After adding a DS to Shares, you can configure specific settings for your DS users and groups.
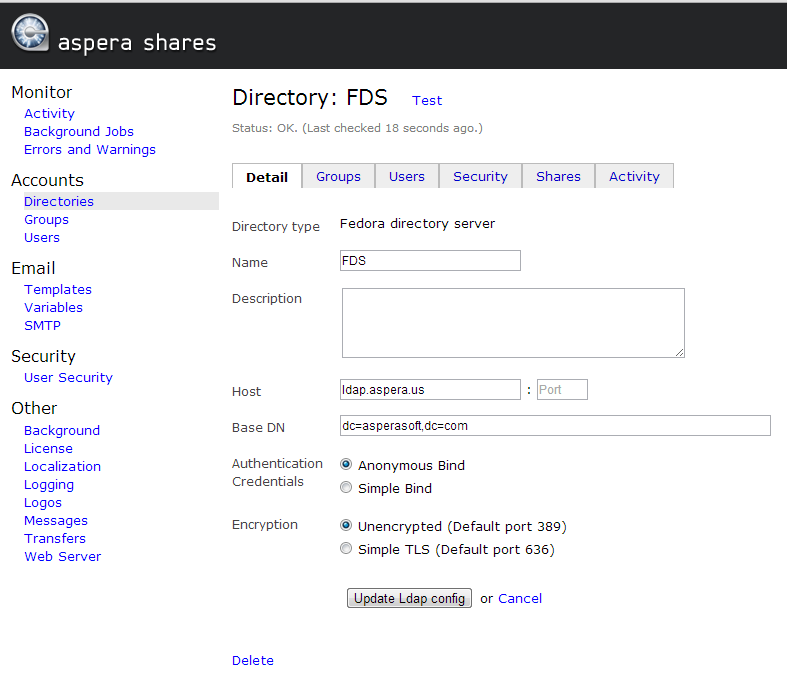
-
In the Detail tab, update the information that you
entered for the DS account when you set it up.
-
In the Users tab, edit the DS users' permissions. Your
DS users are listed on this page, unless the number of records exceeds limit for
displaying a list in Aspera Shares. If no list appears, you can search for users
by name by entering a minimum of two characters.
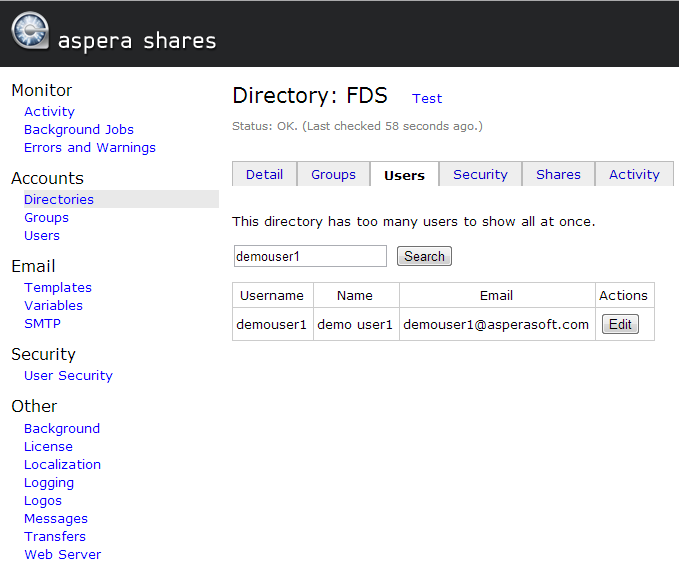
To set specific permissions for an individual DS user, click the corresponding Edit button. For details on editing a DS user, see Setting Permissions for Individual DS Users.
-
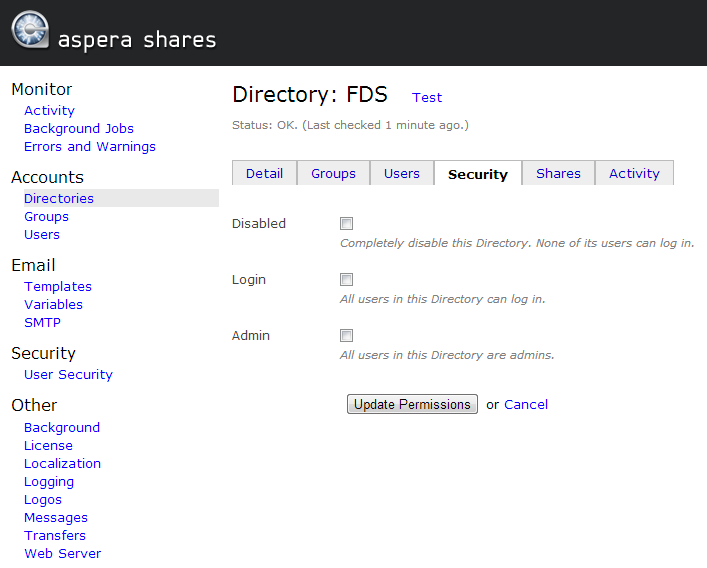
In the Security tab, configure specific security
settings for the entire directory.
- If you select Disabled, no users from this directory can log into Aspera Shares. This also prevents you from giving individual DS users and DS groups access to log in.
- If you select Login, all users from this directory can log into Aspera Shares. If left clear, you may give individual DS users and DS groups access to log in.
- If you select Admin, all users in this directory have administrative permissions. If left clear, you may give individual DS users and DS groups administrative access.
To configure DS users' security settings from their individual account pages, see Setting Permissions for Individual DS Users.
-
In the Shares tab, authorize specific shares for this
directory.

Clicking Add Share displays a list of nodes and shares that are currently configured in Aspera Shares.

Click Authorize to authorize a share. You can modify the directory's permissions for browsing, transferring, and performing file operations within it. The default permission is browse. To edit these permissions or disallow the directory's access to the share, click edit.

Select permissions that directory users have for the authorized share. For example, everyone in this directory is allowed to browse the share. However, they cannot download, upload, perform any file operations, or receive notifications about content availability within the share. After modifying the settings, click Update. You may disallow access to this share by clicking Delete.
Note: If you authorize a share for an entire directory, any group within that directory will inherit the same access permissions. -
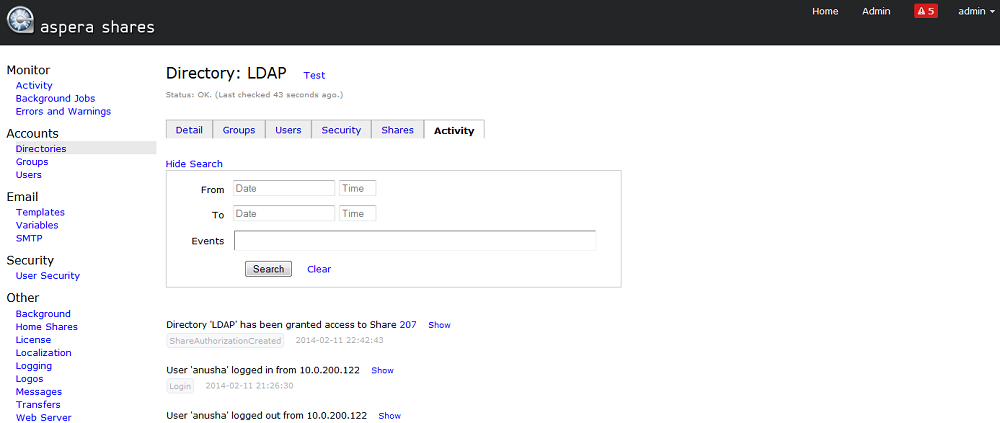
In the Activity tab, view and search for activities
within the Activity directory. Search for a specific activity
by typing search text into the Events text box. You can also
search for activities by specifying a data and time range.