For details on upgrading IBM Aspera Shares see
Upgrading Shares
-
Download Shares from http://downloads.asperasoft.com/en/downloads/34. You
need your Aspera credentials for downloading the software.
-
To unpack, run the following command as root, where
version is the package version:
[root] $ rpm -Uvh aspera-shares-version.rpm
The following is an example of what you can expect to see:
  [root] $ rpm -Uvh aspera-shares-1.9.1.100746-1.x86_64.rpm
Preparing...                ########################################### [100%]
   1:aspera-shares          ########################################### [100%]

To use a remote MySQL server and disable the local MySQL server,
add the connection information to this file:

    /opt/aspera/shares/etc/my.cnf.setup

To complete the installation, please run this script as the root user:

    [root]$ /opt/aspera/shares/u/setup/bin/install
-
Run the install script:
 $ /opt/aspera/shares/u/setup/bin/install
Starting aspera-shares ...
Started
Testing 20 times if MySQL is accepting connections ...
Waiting for MySQL server to answer.
mysqld is alive
Writing /etc/init.d/aspera-shares ...
Running chkconfig to add the service to the runlevels ...
Generating a private key and self-signed certificate ...
To install your own private key and certificate authority-signed certificate, replace these files
  /opt/aspera/shares/etc/nginx/cert.key
  /opt/aspera/shares/etc/nginx/cert.pem
Creating the shares database ...
Loading the shares database schema ...
Initializing the shares database ...

To create an admin user, run this command:

    /opt/aspera/shares/u/shares/bin/run rake aspera:admin NAME="admin" PASSWORD="jFOBTzkgoJBk836cVW3zFXTX7XvOJSg" EMAIL="aspera@example.com"

Creating the stats collector database ...
Generating stats collector keys ...
Done
The password is randomly generated, and you can copy and paste it to create
the admin user.
Note: If you forget to make a note of the password at installation time, you can
reset it by running the following command from the
Shares server root
shell:
/opt/aspera/shares/u/shares/bin/run rake aspera:admin NAME="admin"
PASSWORD="jFOBTzkgoJBk836cVW3zFXTX7XvOJSg" EMAIL="aspera@example.com"
-
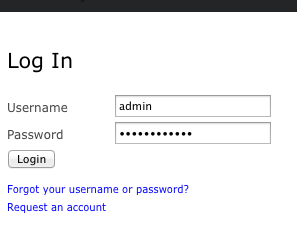
On the computer where Shares is installed, launch a
web browser and navigate to
http://shares_ip_address. The Shares login page appears. Log in using the administrator
username and password you created during the installation process:
-
On the Change Password page that appears, provide a new password:
-
The Shares login page appears again. Log in with
your new password.
-
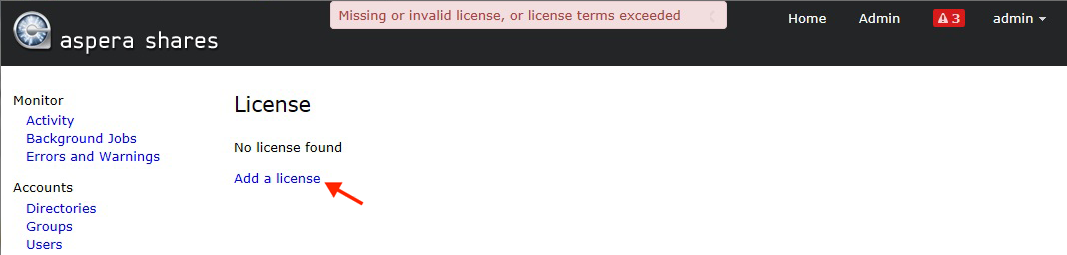
The License page appears.
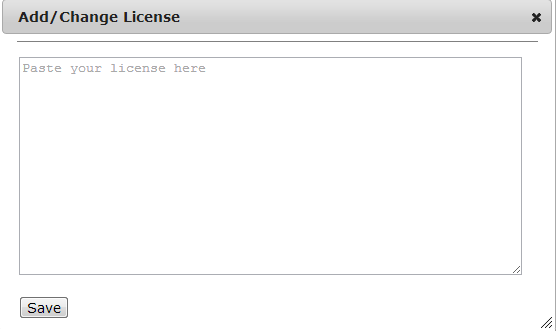
-
In the Add/Change License dialog that appears, paste your license key, and
click Save.
-
Configure the server's hostname or IP address to send emails from Shares to users by selecting
-
Type the Shares server's hostname or IP address
into the Host field. It is used as part of the URL in
system emails to users.

By default the port is set to 443, and SSL/TLS is selected.
-
Secure IBM Aspera Enterprise Server by doing the following: