Configuring a Remote Transfer-Server Node

Follow the steps below to set up a remote transfer-server node for IBM Aspera Shares.

Important: Note that all steps must be performed on the remote machine (transfer server), as the Administrator.
  1. Set up the Node API.
    The Node API must be set up in the IBM Aspera Enterprise Server for Shares to communicate with the remote machine. Refer to the Node API Setup section in the Managing the Node API section of the IBM Aspera Enterprise Server Administrator's Guide for instructions on how to set up the Node API in Enterprise Server.
  2. Create the system user "shares".

    This is the user who authenticates the actual ascp transfer, and must be an operating system account. To create a new system user "shares" on your Windows system, go to Control Panel > User Accounts. After adding the "shares" user, change the user's password.

  3. Create and configure the "shares" package directory.

    Create the following directory:

    C:\shares_packages
  4. Configure aspera.conf.

    Add the shares package directory as a docroot in aspera.conf. The aspera.conf file can be found in the following location:

    OS Version File Location
    32-bit Windows C:\Program Files\Aspera\Enterprise Server\etc\aspera.conf
    64-bit Windows C:\Program Files (x86)\Aspera\Enterprise Server\etc\aspera.conf

    Below is a typical Shares aspera.conf file. Yours may differ, particularly if you have installed other Aspera products. Modify the following, as necessary:

    • In the file below, look for the <absolute> tag to see how the docroot has been defined in this installation, and adjust yours accordingly.
    • Look for the <server_name> tag below, and ensure that SERVER_IP_OR_NAME has been replaced with the name or IP address of your server.
    • In the <central_server> section, set <persistent_store> to enable as shown below. Shares 3.5+ requires persistent storage to be enabled. By default, <persistent_store> is disabled (not set).
    <?xml version='1.0' encoding='UTF-8'?>
    <CONF version="2"> 
    
    <central_server>
      <address>127.0.0.1</address>
      <port>40001</port>
      <compact_on_startup>enable</compact_on_startup>
      <persistent_store>enable</persistent_store>
      <persistent_store_on_error>ignore</persistent_store_on_error>
      <persistent_store_max_age>86400</persistent_store_max_age>
      <event_buffer_overrun>block</event_buffer_overrun>
    </central_server>
    <default>
      <file_system>
        <pre_calculate_job_size>yes</pre_calculate_job_size>
      </file_system>
    </default>
    <aaa>
      <realms>
        <realm>
          <users>
            <user>
              <name>shares</name>
              <file_system>
                <access>
                  <paths>
                    <path>
                      <absolute>C:\shares_packages</absolute>
                      <show_as>/</show_as>
                      <dir_allowed>true</dir_allowed>
                    </path>
                  </paths>
                </access>
                <directory_create_mode>770</directory_create_mode>
                <file_create_mode>660</file_create_mode>
              </file_system>
              <authorization>
                <transfer>
                  <in>
                    <value>token</value>
                  </in>
                  <out>
                    <value>token</value>
                  </out>
                </transfer>
                <token>
                  <encryption_key>af208360-dbdd-4033-a35b-2370941f37e9</encryption_key>
                </token>
              </authorization>
            </user>
          </users>
        </realm>
      </realms>
    </aaa>
    <http_server>
      <http_port>8080</http_port>
      <enable_http>1</enable_http>
      <https_port>8443</https_port>
      <enable_https>1</enable_https>
    </http_server>
    <server>
      <server_name>SERVER_IP_OR_NAME</server_name>
    </server>
    </CONF>

    After modifying aspera.conf, restart Aspera Central and Aspera NodeD services.

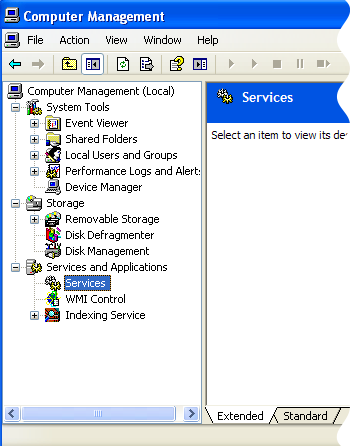
    You can restart these services from the Windows Computer Management window, accessible from Manage > Services and Applications > Services.


  5. Add the shares user to your Aspera server.

    Launch the Enterprise Server application (Start menu > All Programs > Aspera > Enterprise Server > Enterprise Server) and click Configuration.

    Within Server Configuration, select the Users tab and click the button.

  6. Verify you have installed a valid Shares license on your transfer server.

    If you need to update your transfer server license (by following the instructions in the Updating Product License section of the Enterprise Server Admin Guide), you must reload the asperanoded service afterwards. Restart the Aspera NodeD service from the Services window. Open Star Menu > Control Panel > Administrative Tools > Services.

  7. Set up the node user with the following commands.
    > asnodeadmin.exe -a -u username -p password -x system_user

    Restart the Aspera NodeD service from the Services window. Open Star Menu > Control Panel > Administrative Tools > Services.

  8. Install the IBM Aspera Connect Browser Plug-In key.

    First, locate your Connect Browser Plug-In key as follows:

    OS Version File Location
    32-bit Windows
    C:\Program Files\Aspera\Enterprise Server\var\aspera_id_dsa.pub
    64-bit Windows
    C:\Program Files (x86)\Aspera\Enterprise Server\var\aspera_id_dsa.pub
    Then, run the following commands in a terminal window to create a .ssh folder (if it does not already exist) in the shares user's home directory:
    > cd "C:\Documents and Settings\shares"
    > md .ssh
    Use a text editor to create (or edit) the following file, without the file extension:
    C:\Documents and Settings\shares\.ssh\authorized_keys
    Add the shares user's key string into this file and save it.
    Note: Some text editors add a .txt extension to the filename automatically. Be sure to remove the extension if it was added to the filename.
  9. Set up token authorization.
    Refer to the Setting Up Token Authorization topic in the Aspera Enterprise Server Administrator's Guide.