Configuring SAML

Before following the instructions below, keep the following information on hand:
  1. In IBM Aspera Shares, go to Admin > Accounts > Directories. Click Edit for the SAML Identity Provider.
  2. For the SAML IdP entry, click Edit.
    The Detail tab appears with the following form:
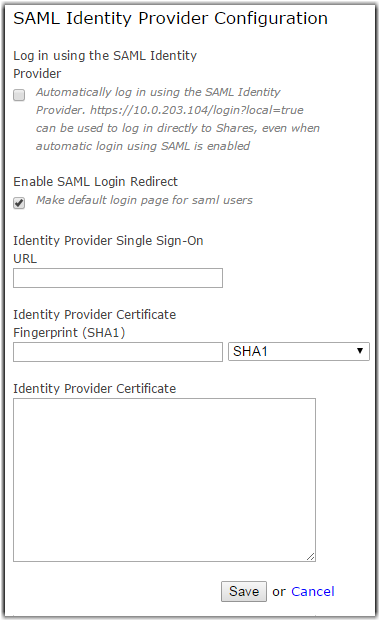
  3. Select the check box Log in using the SAML Identity Provider.
  4. Optional: Enable SAML login redirection.
    If enabled, entering the default Shares URL will direct users to the SAML login page. If disabled, the Shares URL will direct users to the local login page.

  5. Enter the SAML entry-point address provided by the IdP in the IdP Single Sign-On URL text box.
  6. Enter the Identity Provider Certificate Fingerprint.
  7. Enter the Identity Provider Certificate.
  8. Click Save.

    A Shares administrator can bypass the SAML login and sign in with the regular login form by adding the local=true parameter to the login URL, for example:

    https://10.0.0.1/aspera/sharesconsole/login?local=true