The Virtual Catcher workflows can be found by clicking Workflows. This section is an overview of how the workflows function.
AVC
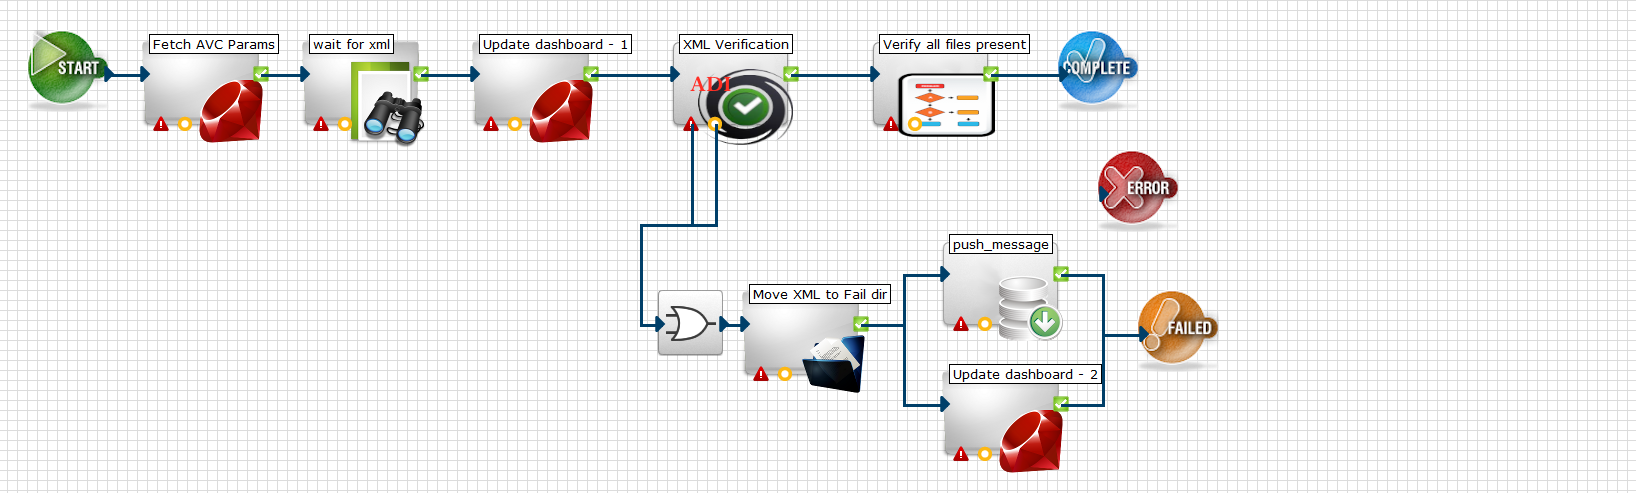
The AVC workflow waits for the XML to confirm the list of sent files. As the files are received, it updates the Dashboard, and then performs verification (at the XML Verification step) to ensure that the files conform to the ADI standard. Once the system verifies that all files are present, it calls the IsComplete workflow.
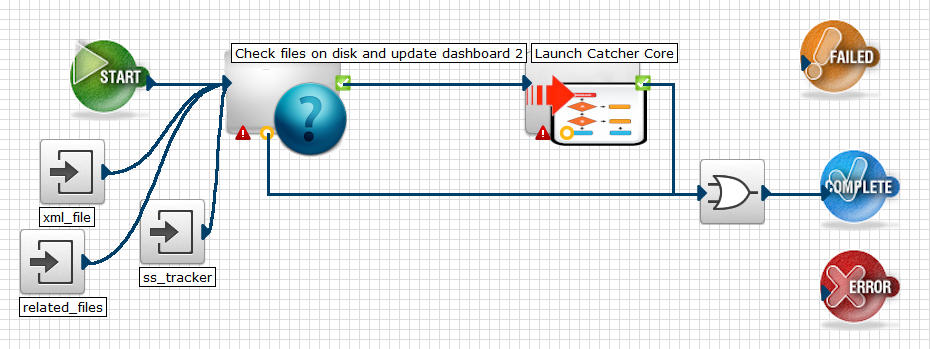
Catcher
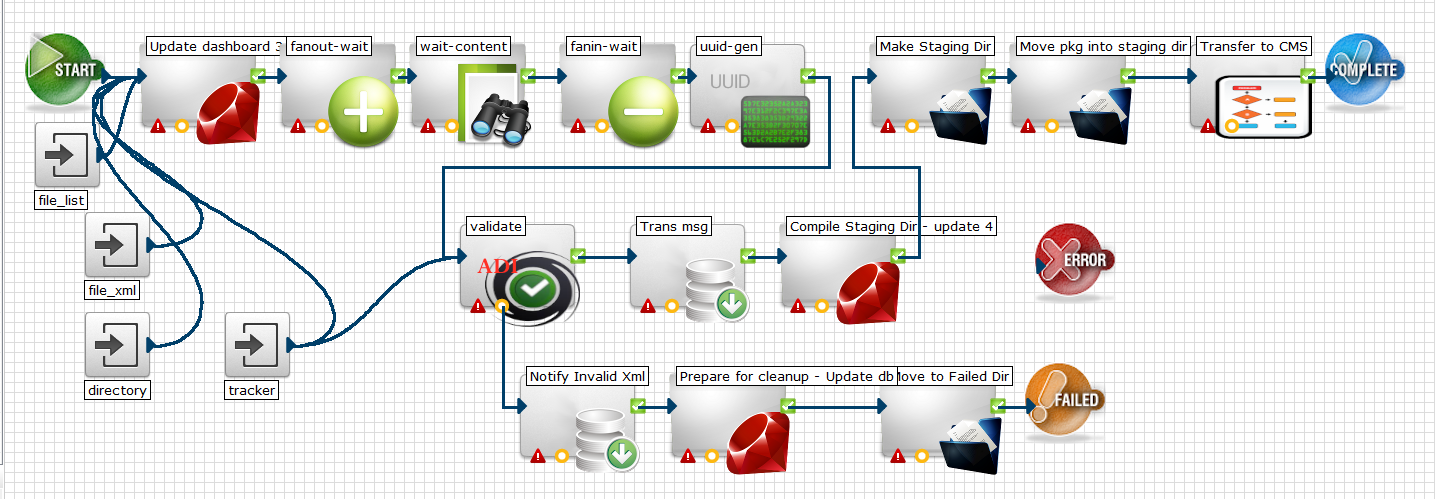
When the package comes in, the Catcher workflow updates the dashboard and waits as the files come in. When all files in the XML have come in and have passed ADI validation, it moves them to the staging directory. From the staging directory, the files are transferred to the CMS. If the files do not pass ADI validation, a notification is sent and the files are sent to the Failed Directory.
Check partial assets for completion
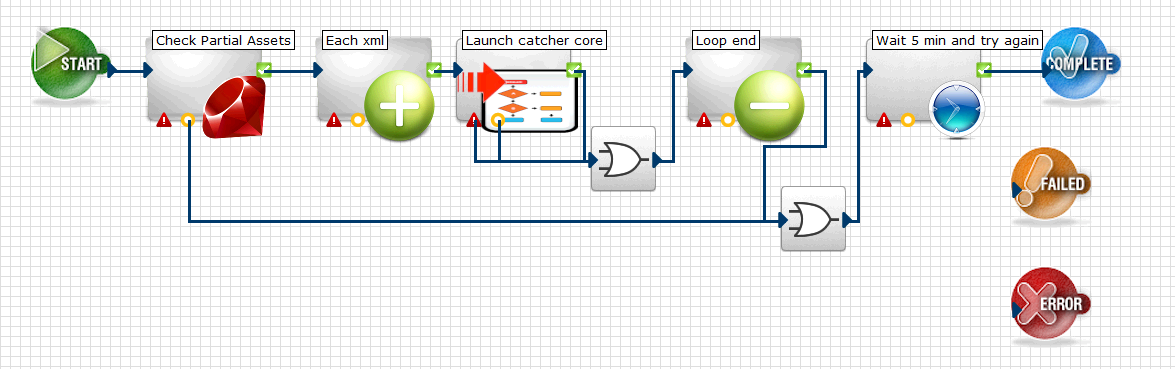
This workflow monitors the system for partial assets every 5 minutes. Once the partial assets are found, it calls the Catcher workflow to move the files into the staging directory and proceed with file ingest.
File System Cleanup
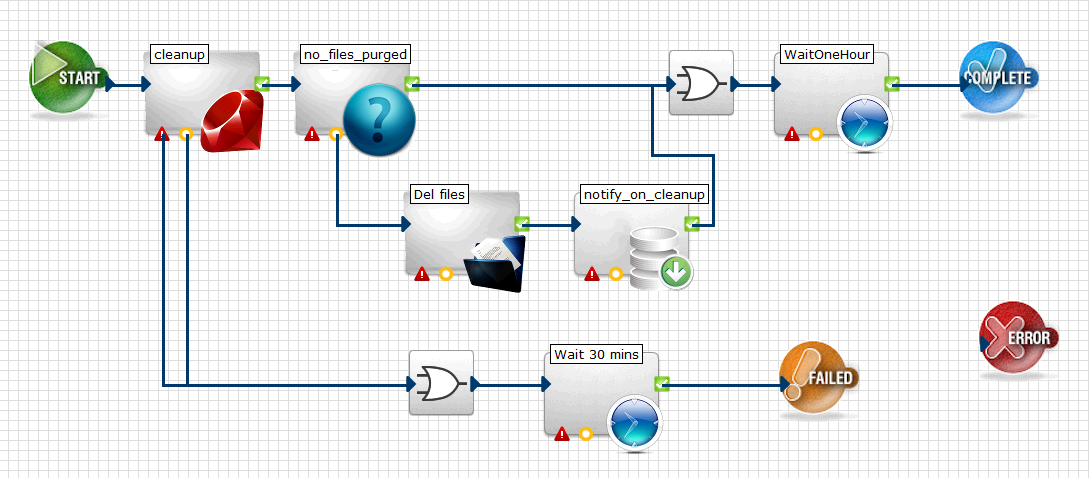
File System Cleanup checks the receiving disk for available space. If there is insufficient space to receive the incoming package, this workflow checks the package for older files that have already been received and empty packages that it can "clean up" (remove) to create more space.
IsComplete
IsComplete is a sub-workflow of the ToCMS workflow. It sends an update to the dashboard when all files have been received.
Notification Queue
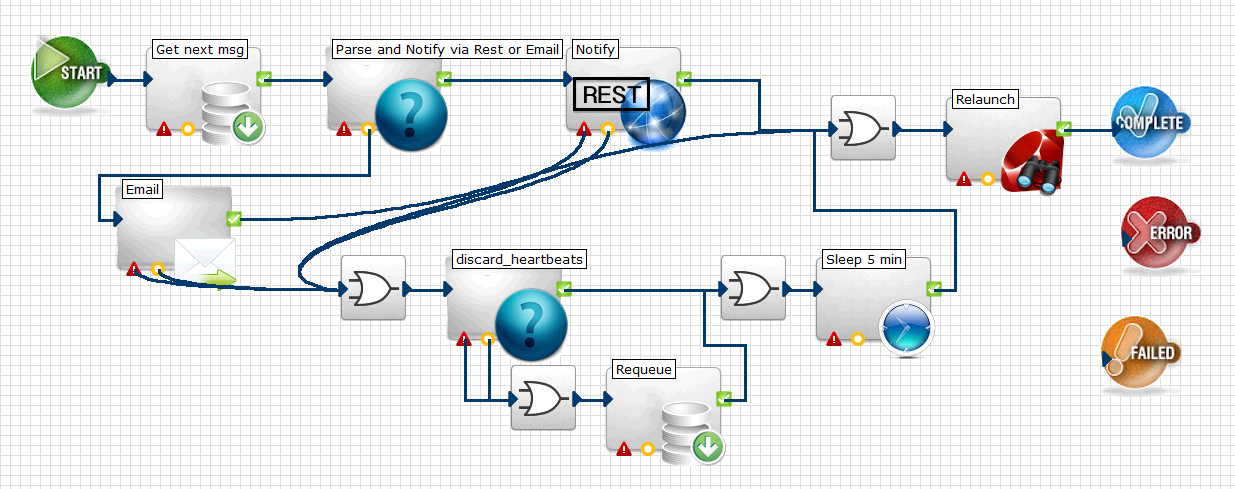
The Notification Queue gets each entry from the Queue that indicates success or failure and sends an email or API call, depending on which notification mechanism has been selected in the configuration settings. See Configuration Options for more information.
ToCMS
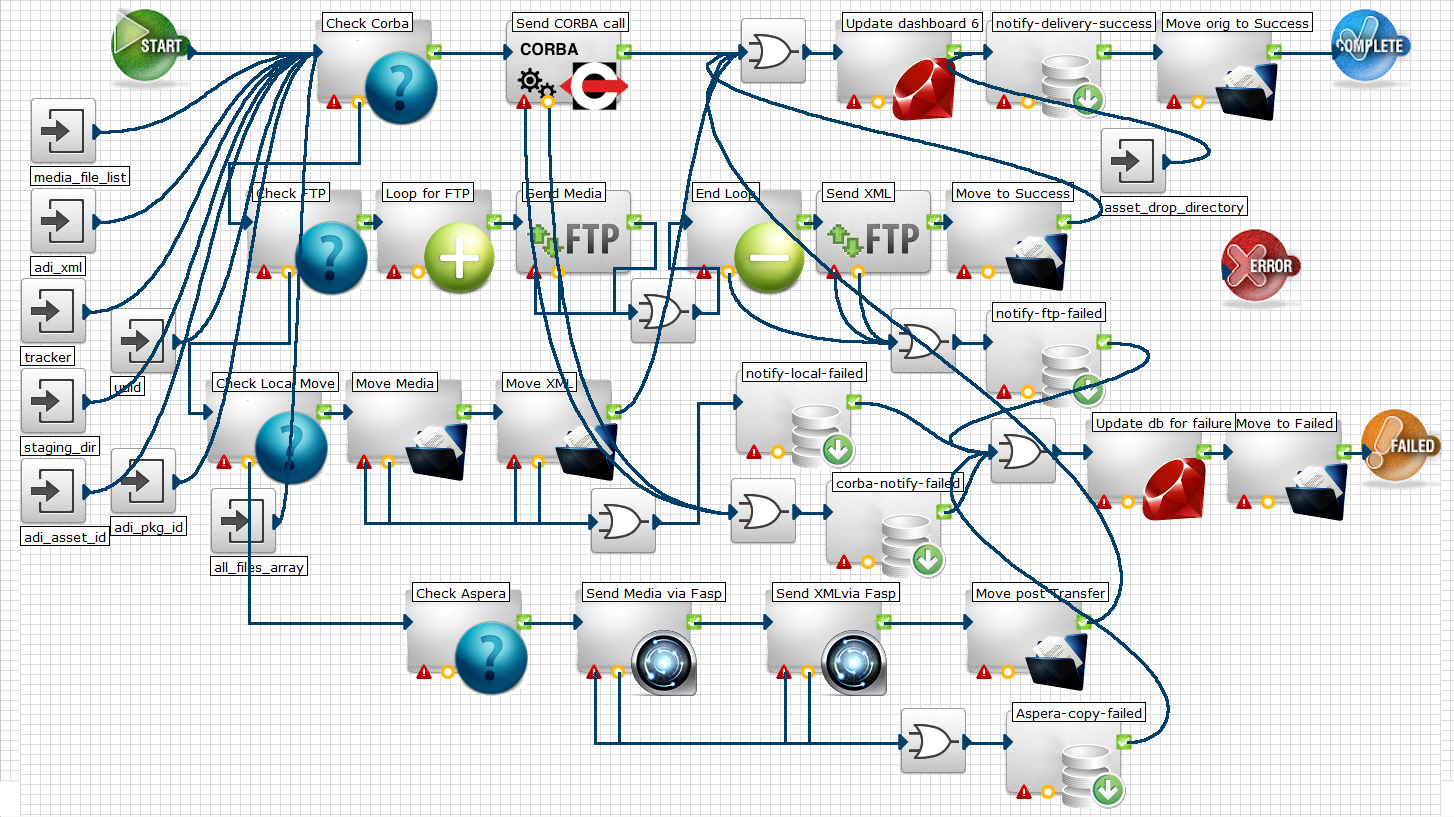
The four rows in the ToCMS workflow above represent the different delivery mode parameters that can be selected in the Virtual Catcher configuration settings (Initiate Corba Pull, FTP Push, Local Copy, and Aspera Copy, respectively). See Configuration Options for more information.