Public key authentication (SSH Key) is a more secure alternative to password authentication that allows users to avoid entering or storing a password, or sending it over the network. Public key authentication uses the client computer to generate the key-pair (a public key and a private key). The public key is then provided to the remote computer's administrator to be installed on that machine. If you wish to use your Aspera Server's transfer client functionality with public key authentication, follow the steps below.
You can use the application GUI to generate key-pairs and to import existing key-pairs. You can also generate key-pairs using the command-line; for instructions, see Creating SSH Keys (Terminal).
-
Create a key pair using the GUI
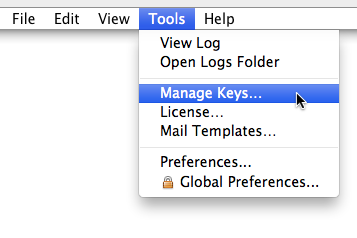
Start the application by launching . From the menu bar, select .
In the SSH Keys dialog, click
 to bring up the New SSH Key Pair window.
![Click [Add] button in the SSH Keys window.](../images/osx/pubkey.png)
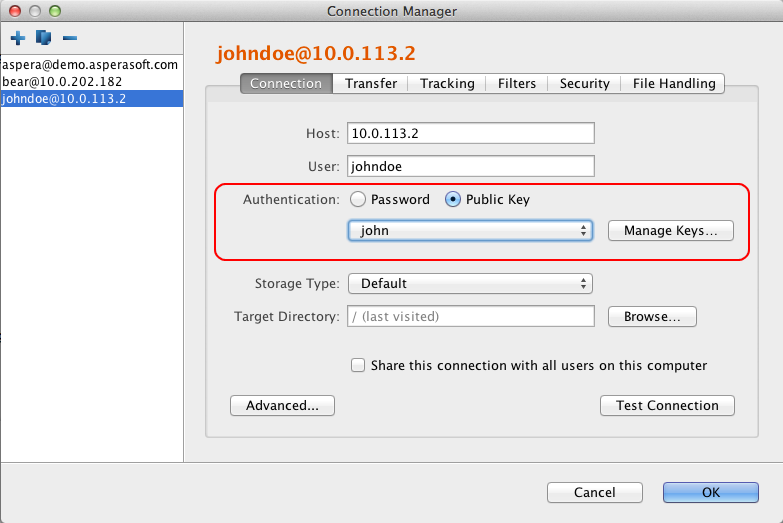
The SSH Keys dialog is also available from the Connections tab in the Connections Manager. When you select Public Key for authentication, the Manage Keys button appears; clicking it opens the SSH Keys dialog.
In the New SSH Key Pair window, enter the requested information. When finished, click OK:
Field Description Identity Give a name to your key pair, such as your user name. Passphrase (Optional) Set a passphrase on your SSH key, which will be prompted for whenever it needs to use the key. If you don't want the user to be prompted for passphrase when logging in, leave this field blank. Type Choose between RSA (default) and DSA keys. Access When sharing a connection with a public key authentication, or a connection that is used with a Hot Folder, that key should have this option checked. -
Distribute the public key
Then, you will need to provide the public key file (e.g. id_rsa.pub) to your server administrator, so that it can be set up for your server connection. To copy or export the public key, select the key in the Public Key Manager window, click Copy Public Key to Clipboard, and paste the string into an email and address it to the server administrator, or click Export to File and save the public key as a file. The instructions for installing the public key on the server can be found in the Setting Up a User's Public Key; however, keep in mind that the server could be installed on an operating system that is different from the one where your client is installed.

-
Set up connections using public key authentication
When your public key has been installed on the remote host by its server administrator, click the Connections to bring up the Connection Manager.
Under the Connection tab, select Public Key from the Authentication pull-down menu and select the key that is installed on this host.
Note: When you are sharing a connection with public key authentication (Share this connection with all users on this computer checkbox is checked), the SSH key should be shared as well.
To import keys created outside the GUI, go to Tools > Manage
Keys to open the SSH Keys dialog. Clicking the  button in
the upper-left corner of the dialog opens a file browser. You can import either a
private key or a public key. If the corresponding public/private key is found in the
same directory, both are copied to the user's .ssh directory. If you import a
private key and no corresponding public key is found, the public key is generated,
and both are copied to the user's .ssh directory. If the GUI finds a key with
the same identity, it generates an error message and does not allow the key to be
overwritten.
button in
the upper-left corner of the dialog opens a file browser. You can import either a
private key or a public key. If the corresponding public/private key is found in the
same directory, both are copied to the user's .ssh directory. If you import a
private key and no corresponding public key is found, the public key is generated,
and both are copied to the user's .ssh directory. If the GUI finds a key with
the same identity, it generates an error message and does not allow the key to be
overwritten.
Imported key pairs can be shared with other users. In the SSH Keys dialog, selecting
a key and clicking the  button opens the Edit SSH Key Pair dialog. Check the
Access box to allow shared connections to use this key. Shared keys are
moved to the Enterprise Server etc directory.
button opens the Edit SSH Key Pair dialog. Check the
Access box to allow shared connections to use this key. Shared keys are
moved to the Enterprise Server etc directory.