Creating SSH Keys in the GUI
Public key authentication (SSH Key) is a more secure alternative to password authentication that allows users to avoid entering or storing a password, or sending it over the network. Public key authentication uses the client computer to generate the key pair (a public key and a private key). The public key is then provided to the remote computer's administrator to be installed on that machine. To use your Aspera product's transfer-client functionality with public key authentication, follow the steps below.
You can use the application GUI to generate key pairs and to import existing key pairs. You can also generate key pairs using the command line; for instructions, see Creating SSH Keys (Command Line).
-
In the menu bar, click Tools > Manage Keys.
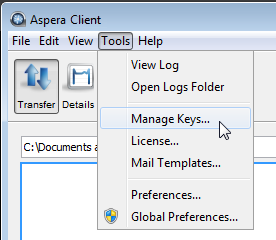
-
In the SSH Keys dialog, click
 to create a new key pair.
![Click [Add] in the SSH Keys window.](../images/win/pubkey.png)
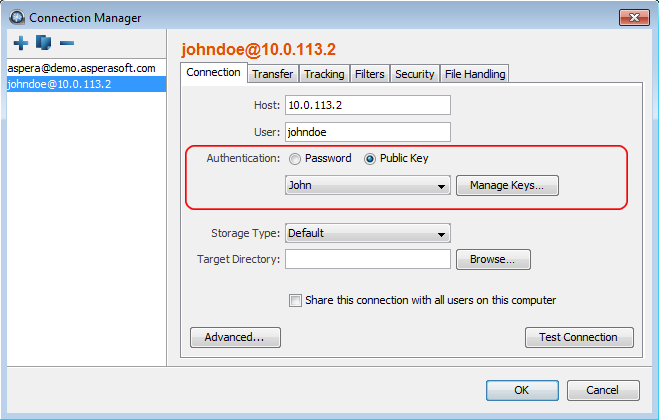
The SSH Keys dialog is also available from the Connection tab in the Connection Manager. When you select Public Key for authentication, the Manage Keys button appears; clicking it opens the SSH Keys dialog.
-
In the New SSH Key Pair window, enter the requested
information.
Field Description Identity Name your key pair, such as with your user name. Passphrase (Optional) Set a passphrase on your SSH key, which will be prompted for whenever it needs to use the key. If you don't want the user to be prompted for passphrase when logging in, leave this field blank. Type Select RSA (default) or DSA key. Aspera strongly recommends using the more secure RSA-type key. Access When sharing a connection with public key authentication, or a connection that is has a Hot Folder (on Windows machines), this option must be checked. 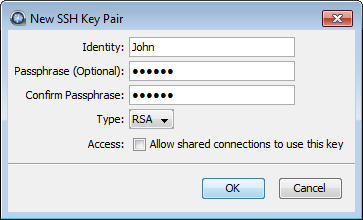
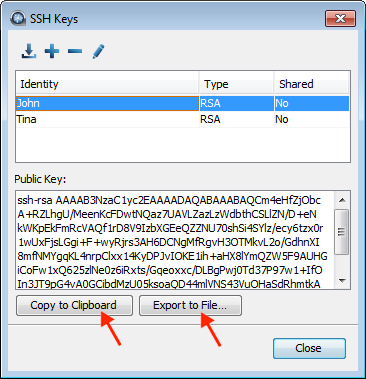
Click OK when finished. The public key is displayed in the window and you may copy it to a clipboard or export it to a file that is easy to locate. The key is automatically saved as a file named identity.pub in the following location (in the example below, the public key filename is id_rsa.pub):
user_home_dir\.ssh\id_rsa.pub
-
Distribute the public key.
Provide the public key file to your server administrator so that it can be set up for your server connection.
To copy or export the public key, select the key in the SSH Keys window, click Copy Public Key to Clipboard, and paste the string into an email to send to the server administrator, or click Export to File and save the public key as a file.
-
Set up connections using public key authentication.
When your public key has been installed on the remote host by its server administrator, click Connections to open the Connection Manager.
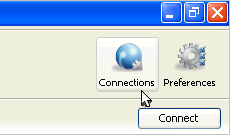
Select the connection for which you want to set up the key. In its Connection tab, select the Public Key Authentication option and select the key from the drop-down menu.
Importing keys:
To import keys created outside the GUI, go to Tools > Manage
Keys to open the SSH Keys dialog. Click the
 button in the upper-left corner of the dialog to open a file browser. You can import
the key pair by selecting either the private key or the public key; this will copy
both keys into the user's .ssh directory. You cannot import a key pair if a
key pair with the same identity already exists in the .ssh directory.
button in the upper-left corner of the dialog to open a file browser. You can import
the key pair by selecting either the private key or the public key; this will copy
both keys into the user's .ssh directory. You cannot import a key pair if a
key pair with the same identity already exists in the .ssh directory.
Imported key pairs can be shared with other users. In the SSH Keys dialog, select a key and
click the  button to open the Edit SSH Key
Pair dialog. Select Access to allow shared
connections to use this key. Shared keys are moved to the Enterprise Server
etc directory.
button to open the Edit SSH Key
Pair dialog. Select Access to allow shared
connections to use this key. Shared keys are moved to the Enterprise Server
etc directory.