Configuring HTTP and HTTPS Fallback
HTTP fallback serves as a secondary transfer method when the Internet connectivity required for Aspera FASP transfers (UDP port 33001, by default) is unavailable. When HTTP fallback is enabled and UDP connectivity is lost or cannot be established, the transfer will continue over the HTTP (or HTTPS) protocol. These instructions describe how to enable and configure HTTP/HTTPS fallback.
Prerequisites:
- Configure your HST Server web UI, as described in Configuring Your Web UI Settings. For additional information on configuring different modes and testing, see the Aspera KB Article "HTTP fallback configuration, testing and troubleshooting."
- Your Aspera HTTP daemon (asperahttpd) is running with sufficient privileges so that it can modify file ownership.
Limitations:
- Folders that are symbolic links cannot be downloaded directly by using HTTP fallback. Folders that are symbolic links are processed correctly when their parent folder is the source.
- HTTP fallback can only follow symbolic links. Settings in aspera.conf or in the command line are ignored.
- HTTP fallback attempts to transfer at the target rate but is limited by TCP.
- HTTP fallback does not support pre-post processing or inline validation.
Process:
-
Configure HTTP/HTTPS
fallback settings.
You can configure HTTP/HTTPS fallback from the HST Server GUI or by editing aspera.conf.
Configuring HTTP/HTTPS fallback from the GUI:
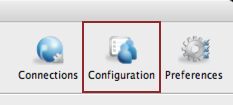
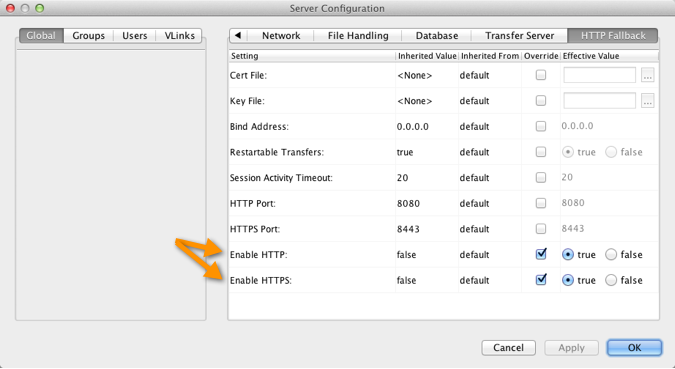
Launch the transfer server and go to Configuration > Global > HTTP Fallback.
Review the following settings:
- In the Enable HTTP row, select Override and set to true.
- If you want to allow fallback over HTTPS, in the Enable HTTPS row, select Override and set to true.
- Verify that the value for HTTP
Port matches the value in
aspera.conf, under the
<WEB/>section (default: 8080). Refer to Step 1 for additional information. - (If applicable) Verify that the value for
HTTPS Port matches the value in
aspera.conf, under the
<WEB/>section (default: 8443). Refer to Step 1 for additional information.
Configuring HTTP/HTTPS fallback by editing aspera.conf:
Run the following commands:
- To view the current HTTP settings in
aspera.conf:
$ /opt/aspera/bin/asuserdata -b -t - To enable HTTP
fallback:
$ asconfigurator -x "set_http_server_data;enable_http,true" - To enable HTTPS fallback, if
using:
$ asconfigurator -x "set_http_server_data;enable_https,true" - To set the HTTP port (default 8080, must match the value
in the
<WEB>section of aspera.conf):$ asconfigurator -x "set_http_server_data;http_port,8080" - To set the HTTPS port (default 8443, must match the
value in the
<WEB>section of aspera.conf):$ asconfigurator -x "set_http_server_data;https_port,8443"
These commands edit or create the following lines in aspera.conf:
<CONF version="2">
  ...
  <http_server>
    ...
    <enable_http>true</enable_http>          <!-- Enable HTTP -->
    <enable_https>true</enable_https>        <!-- Enable HTTPS -->
    <http_port>8080</http_port>              <!-- HTTP port -->
    <https_port>8443</https_port>            <!-- HTTPS port -->
    ...
  </http_server>
</CONF>
To manually inspect and edit aspera.conf, open it from the following directory:
/opt/aspera/etc/aspera.conf/Library/Aspera/etc/aspera.conf
-
Set a token encryption key.
If HTTP/HTTPS fallback is enabled, a token encryption key is required. If HTTP/HTTPS is configured without the encryption key, initiating a transfer with the download button generates the following error:
Error: internal error - unable to start token generationThe token encryption key is the secret text string used for authorizing transfers configured to require a token. Aspera recommends setting a key string at least 20 random characters long.
You can specify a token encryption key from the Connect Server GUI or by editing
aspera.conf.Set a token key from the GUI:
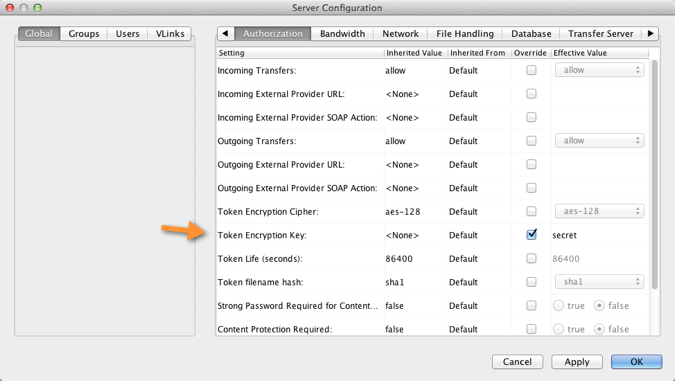
Launch Connect Server and click Configuration. Click Global > Authorization, select the option Token Encryption Key and enter a key string of random characters (at least 20 recommended).
Set a token key in aspera.conf:
To set the token encryption key in aspera.conf, run the following command:$ asconfigurator -x "set_node_data;token_encryption_key,secret_string"The key should be a string of random characters, at least 20 recommended. This adds or updates the <encryption_key> value in the <authorization> section:
<CONF version="2">
  ...
  <default>
    <authorization>
    ...
    <token>
      <encryption_key>secret_string</encryption_key>
    </token>
    </authorization>
  </default>
  ...
</CONF>
Important: After changing your Aspera token settings—either in aspera.conf or the GUI—you must restart asperahttpd. For instructions, see the last step in these instructions.