-
Create the system user "faspex".
This is the user who authenticates the actual ascp transfe. This user must be an operating system account. To create a new system user "faspex" on your Windows system, go to Start > Control Panel > User Accounts. Click Manage another account. Click Create a new account. Name the user "faspex". Select Standard user.
-
Create and configure the faspex package directory.
Create the following directory:
> cd C:\
> mkdir faspex_packages
-
Configure aspera.conf.
Add the faspex package directory as a docroot in aspera.conf. The aspera.conf file can be found in the following location:
OS Version File Location 32-bit Windows C:\Program Files\Aspera\Enterprise Server\etc\aspera.conf 64-bit Windows C:\Program Files (x86)\Aspera\Enterprise Server\etc\aspera.conf Below is a typical Faspex aspera.conf file. Yours may differ, particularly if you have installed other Aspera products. Modify the following, as necessary:
- In the file below, look for the absolute tag to see how the docroot has been defined in this installation, and adjust yours accordingly.
- Look for the server_name tag below, and ensure that SERVER_IP_OR_NAME has been replaced with the name or IP address of your server.
- In the central_server section, set persistent_store to enable.
<?xml version='1.0' encoding='UTF-8'?> <CONF version="2"> <central_server> <address>127.0.0.1</address> <port>40001</port> <compact_on_startup>enable</compact_on_startup> <persistent_store>enable</persistent_store> <persistent_store_on_error>ignore</persistent_store_on_error> <persistent_store_max_age>86400</persistent_store_max_age> <event_buffer_overrun>block</event_buffer_overrun> </central_server> <default> <file_system> <pre_calculate_job_size>yes</pre_calculate_job_size> </file_system> </default> <aaa> <realms> <realm> <users> <user> <name>faspex</name> <file_system> <access> <paths> <path> <absolute>C:\faspex_packages</absolute> <show_as>/</show_as> <dir_allowed>true</dir_allowed> </path> </paths> </access> <directory_create_mode>770</directory_create_mode> <file_create_mode>660</file_create_mode> </file_system> <authorization> <transfer> <in> <value>token</value> </in> <out> <value>token</value> </out> </transfer> <token> <encryption_key>af208360-dbdd-4033-a35b-2370941f37e9</encryption_key> </token> </authorization> </user> </users> </realm> </realms> </aaa> <http_server> <http_port>8080</http_port> <enable_http>1</enable_http> <https_port>8443</https_port> <enable_https>1</enable_https> </http_server> <server> <server_name>SERVER_IP_OR_NAME</server_name> </server> </CONF> -
After modifying aspera.conf, restart Aspera Central and Aspera
NodeD services.
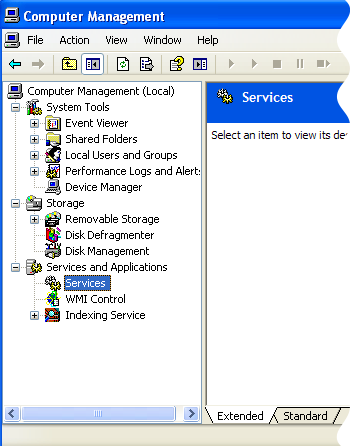
You can restart these services from the Windows Computer Management window, accessible from Manage > Services and Applications > Services. Right-click the service and select Restart from the menu.
-
Run the following command to validate your aspera.conf file:
> C:\{Program Files or Program Files (x86)}\Aspera\Enterprise Server\bin\asuserdata -v -
Add the faspex user to your Aspera server.
Launch the IBM Aspera Enterprise Server application. Start menu > All Programs > Aspera > Enterprise Server > Enterprise Server) and click Configuration.
Click the Users tab and click the
 button.
-
Add a node user associated with the system user.
Faspex authenticates to the node machine using a Node API username and password. The following command creates a Node API user and password and associates it with the system user you created.
> cd C:\Program Files (x86)\Aspera\Enterprise Server\bin
> asnodeadmin.exe -a -u node_api_username -p node_api_passwd -x faspex
Adding, modifying, or deleting a node-user triggers automatic reloading of the user database and the node's configuration and license files. For more information on the Node API, see your transfer server's administrator guide. -
Verify that you correctly added the node user.
> asnodeadmin.exe -lThe output should look like the following:user system/transfer user acls ==================== ======================= ==================== node_user faspex_user -
Verify you have installed a valid license on your transfer server.
If you need to update your transfer server license (by following the instructions in the Updating Product License section of the Enterprise Server Admin Guide), you must restart the asperanoded service afterwards.
Go to Start Menu > Control Panel > Administrative Tools > Services. Right-click the Aspera NodeD service and select Restart. -
Install the IBM Aspera Connect Browser Plug-in key.
First, locate your Connect key as follows:
OS Version File Location 32-bit Windows C:\Program Files\Aspera\Enterprise Server\var\aspera_id_dsa.pub
64-bit Windows C:\Program Files (x86)\Aspera\Enterprise Server\var\aspera_id_dsa.pub
Then, run the following commands in a terminal window to create a .ssh folder (if it does not already exist) in the faspex user's home directory:> cd "C:\Documents and Settings\faspex" > mkdir .ssh
Use a text editor to create (or edit) the following file, without the file extension:C:\Documents and Settings\faspex\.ssh\authorized_keys
Add the faspex user's key string into this file and save it.Note: Some text editors add a .txt extension to the filename automatically. Be sure to remove the extension if it was added to the filename.