Logging In

This topic explains how to log in to IBM Aspera Shares on Demand.
Note: Entitlements are enabled per machine instance, not per app. For IBM Aspera Console Application on Demand and IBM Aspera Shares on Demand, the entitlement portion of the procedure (steps 1-3) is slightly different. However, completing it for one--either Console or Shares--enables the entitlement for both, and steps 1-3 do not need to be repeated. Note that once the entitlement has been enabled from either app, it may take a few minutes for the other app to recognize the change.
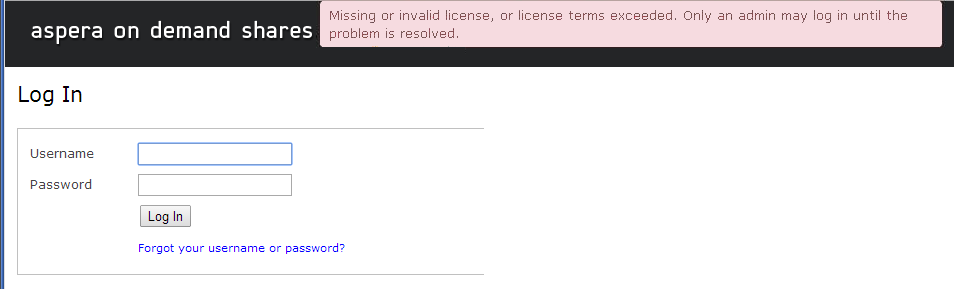
  1. Enter the On Demand server URL in your web browser and log in.

    Enter the URL from the previous step into your web browser. When you access the URL, your browser may notify you of an untrusted connection. If this occurs, follow the on-screen instructions to accept the security certificate.

    On the login screen, enter your user name and password.


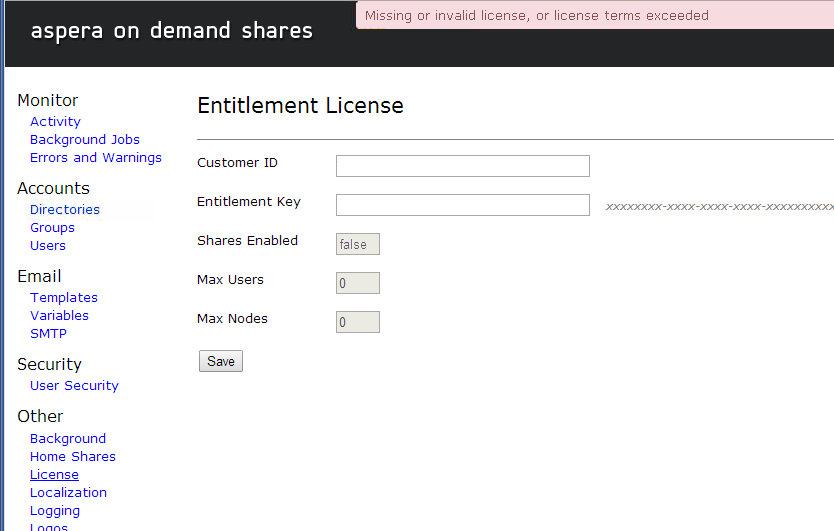
  2. Enter your entitlement license.
    The Entitlement License page opens. Enter your customer ID and entitlement key, and click Save. Until you provide a valid license, you will be unable to use Shares On Demand. (If you need to review or update the entitlement information at a later time, you can reach this page from Admin > License.)

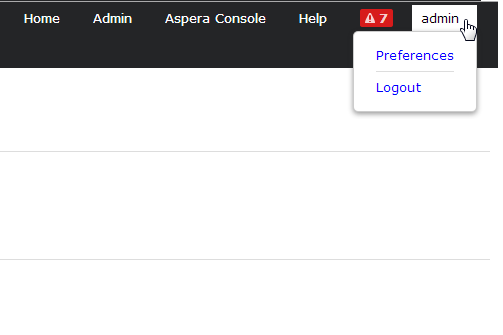
  3. Update your account information.

    Once you are logged in and the app is enabled with a valid entitlement, click the admin user name in the Shares banner and select Preferences.

    Then click the Edit links to update your admin account information:


  4. Create a transfer user account.
    Ensure that a transfer user account has been created on the On Demand server. For information on how to create a transfer user account, see the Aspera APOD/SOD Admin Guide: Logging In.
  5. Back up and restore Shares On Demand.

    Backup: To back up Shares, including its database, run the following script as root. The script stops Shares services, backs up all necessary files, and restarts Shares:

    # /opt/aspera/shares/u/setup/bin/backup your_backup_dir 

    For example:

    # /opt/aspera/shares/u/setup/bin/backup /tmp
    Creating backup directory /tmp/20130627025459 ...
    Checking status of aspera-shares ...
    Status is running
    mysqld is alive
    Backing up the Shares database and config files ...
    Backing up the SSL certificates ...
    Done 

    Make a note of the ID of the created backup directory. (In this example: 20130627025459.)

    Restore: To restore Shares, run the following script as root. The script stops Shares services, restores Shares data, and restarts Shares.

    # /opt/aspera/shares/u/setup/bin/restore your_backup_dir/backup_id 

    For example, using the ID of the saved directory in the above backup example:

    # /opt/aspera/shares/u/setup/bin/restore /tmp/20130627025459
    Checking status of aspera-shares ...
    Status is running
    mysqld is alive
    Restoring the Shares database and config files ...
    Migrating the Shares database ...
    Initializing the Shares database ...
    Configuring the stats collector to poll all nodes ...
    Restoring the SSL certificates ...
    Done