Creating a New Faspex User

These instructions demonstrate how to create local user accounts. For information on adding directory service users or groups, see Working with Directory Services (DS).
Tip: IBM Aspera Faspex On Demand is automatically configured with two transfer users: "faspex" and "faspex_source".
  1. Go to the Accounts tab and select New User.
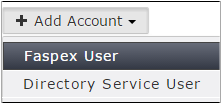
    Note: If directory service is enabled, the New User button is replaced by the Add Account dropdown menu. From this menu, select Faspex User to create a new local user.

  2. Enter a username for the account.
    Important: Usernames cannot contain semi-colons.
  3. Enter and confirm a new password.
    By default, Faspex enforces the creation of strong passwords. Faspex defines strong passwords as passwords that are at least six characters long, with at least one letter, one number, and one symbol. You can disable strong passwords by going to Server > Security and deselecting Use strong passwords.
    Tip: You can also redefine strong passwords by modifying the faspex.yml configuration file. For more information, see Configuring Faspex with faspex.yml.
  4. Enter a valid email address that Faspex will use for email notifications.
    Faspex email notification templates are configurable. For more information on configuring email notification templates, see Configuring Email Notification Templates.
  5. Optional: Edit Additional Permissions.
    Click the Edit Additional Permissions link at the bottom of the form to access additional user settings. These settings include the following:
    • Account Details
    • Permissions
    • Package Deletion
    • Advanced Transfer Settings
    • Welcome E-mail
    For more information on specific settings, see Configure User Settings.
  6. When finished with the configuration, click Create Account.
Tip: You can also make certain fields required within the New User Account form. For more information, see Customizing New User Account Form.