A walkthrough of the setup process.
-
Select features and install path (Custom setup type)
If you selected the custom setup type, you will see the two additional steps during installation, as follows:
Check the features to install. If you wish to configure your own SSH Server for FASP transfers, deselect the SSH Server (so that the OpenSSH Service is not installed).

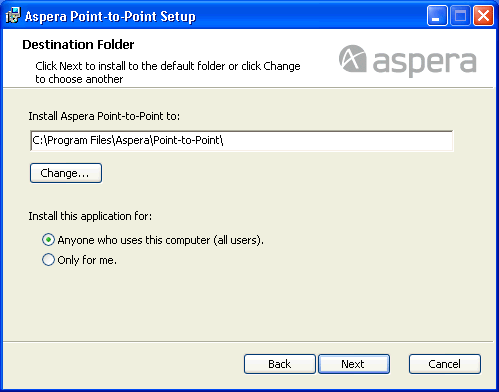
Select the destination folder for the installation. Under Install this application for:, choose between Anyone who uses this computer (all users) to allow access for all system users, or Only for me to allow only your user account to use the application.
-
Set up Aspera service account
On Windows Vista, 2003, 2008, and 7, the installer prompts you to create or update an Aspera service account that runs the services for Aspera products. These services include the following:
- Aspera Central
- OpenSSH Service (optional)
- Aspera NodeD
- Aspera Sync
By default, the user name is svcAspera. If your machine is not joined to a Windows domain, then a local user (such as the default svcAspera) is all that is required to run Aspera services. If your machine is already joined to a domain, or you need to support requirements #2 and/or #3 below, then the type of account specified will vary. Please refer to the following table:
No. Requirement Type of Service Account User 1 Provision local transfer users only. Local account. Domain account with local admin privileges can be used, but is not required. 2 Provision Active Directory accounts for transfer users (users who wish to transfer with your server are authenticated through Active Directory). Domain account with local admin privileges. 3 Transfer users store files on a remote file system (not on your server machine), such as an SMB file share. Domain account with local admin privileges. In some cases, additional actions are required to support this requirement. Please see the aspera knowledgebase or contact Aspera Technical Support for assistance. If the server is configured to accept the domain user login, use a domain account that has been added to the local administrator's group to run the services. You must create this domain account on your Domain Controller first.
If the local account does not already exist, enter new credentials and click Next. If the account already exists (for example, if created for the previous installation), enter the account password and click Next. If the existing user's password you have entered is incorrect, or you wish to change the Aspera service user, refer to Updating Aspera Service Account.
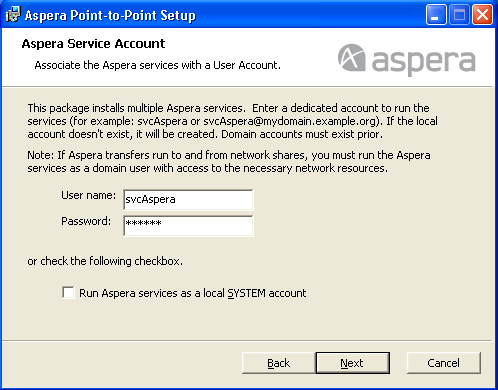
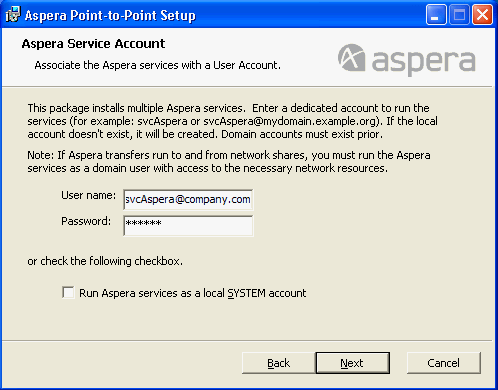
If you are entering details for a domain account, then the user name must be in the form "username@fully.qualified.domain.name." Please refer to the example below.
-
Install the license
When installation is finished, launch the application to add or update the license. Go to:
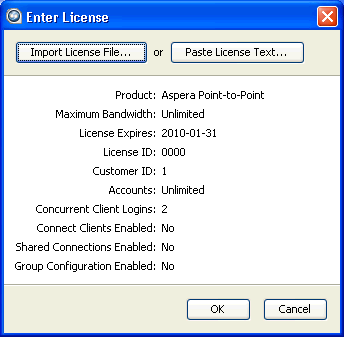
If this is a fresh install, an Enter License window appears. Either click Import License File and select the license file, or Paste License Text to copy-and-paste the license file's content. When finished, the license information appears in the window. Verify that it is correct and click Close.
/opt/aspera/etc/aspera-license
When finished, save and close the file. To verify the license info, run the following command:If you are updating your product license after the installation, see Updating the Product License.