Test client functionality by transferring to and from the Aspera Demo Server.
To make sure the software is working properly, follow these steps to test download and upload transfers between your system and the Aspera Demo Server:
-
Add the Demo Server in the Connection Manager
Launch the application: .
Then click Connections.
 Note:
Note:This topic shows a very basic configuration to establish a connection. For more detailed instructions about Connections, refer to Managing Connections.
In the Connection Manager, click
 to add a new connection, and enter the following info, leave other
options with default values or blank:
to add a new connection, and enter the following info, leave other
options with default values or blank:Field Value Host demo.asperasoft.com User aspera Authentication (Password) demoaspera 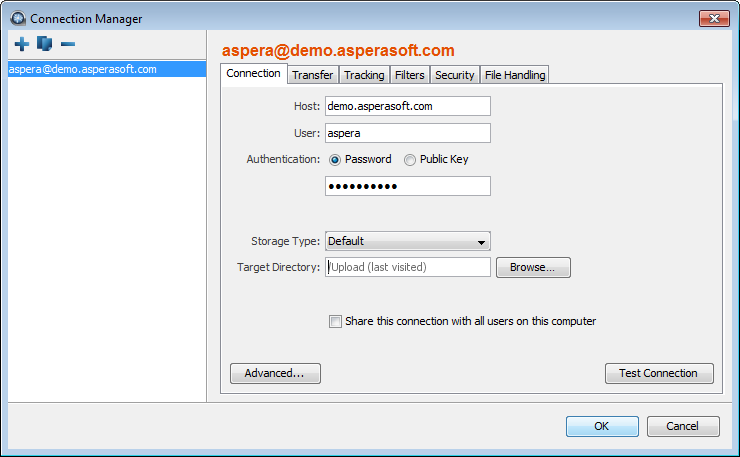
-
Connect to the Demo Server and download test files
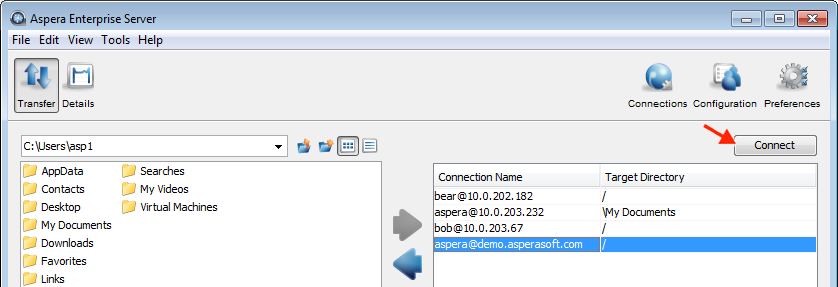
From the main window, select the demo server entry and click the Connect button.
On the server file browser (right panel), browse to the folder /aspera-test-dir-large, select the file 100MB, and click
 to download it to your local machine.
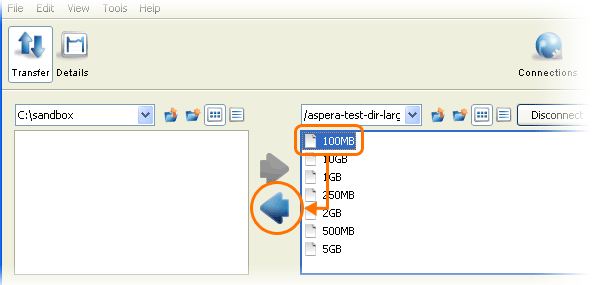
You should see the session appear in the Transfer tab.
-
Upload to the Demo Server
When downloaded, try uploading the same files back to the Demo Server. Select the same file (100MB) on the local file browser (left panel), navigate to the folder /Upload on the server, and click
 to upload it.