Go to Server > Configuration > Display Settings.
Important: You must click the Update button to save any
changes you make to the following settings.
Custom Logo
Click the Browse button to replace the default "aspera faspex server" logo in the menu bar with your logo. The default logo is 295x51 pixels.To remove the logo, click the Remove custom logo that appears if you have uploaded a custom logo.
Date Format
View or modify your server's date display format. The following list displays the available variables:| Variable | Description and Sample |
|---|---|
| %a | The abbreviated weekday name (for example, "Sun"). |
| %A | The weekday name (for example, "Sunday"). |
| %b | The abbreviated month name (for example, "Jan"). |
| %B | The month name (for example, "January"). |
| %d | Day of the month (for example, "01~31"). |
| %j | Day of the year (for example, "001~366"). |
| %m | Month of the year (for example, "01~12"). |
| %y | The abbreviated year (for example, "09"). |
| %Y | The year (for example, "2009"). |
Account display name format
The Account display name format option determines whether users see the login or the full name associated with an account when viewing package information. For example, given a user "jdoe" with full name "John Doe", Faspex displays "jdoe" if Username is selected and "John Doe" if Full Name is selected.Login Page
You can configure the login page text using the Login page header and Local login instructions field options. The header is the title of the login form and the instructions appear above the local login option. For example, in the picture below, the header has been changed to "My Company Login" and the instructions read "Your username is firstname@mycompany.com and your password is your personal ID number (for example, 5GH012)."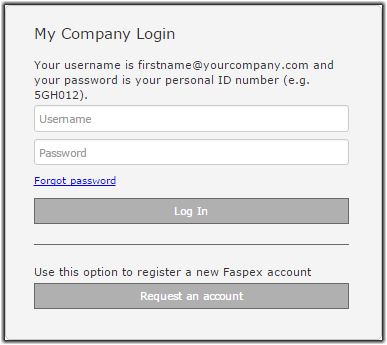
You can further customize the login page by adding an announcement or by customizing the login page with a CSS file. For more information, see Posting Announcements on the Login Page and Customize Faspex with the Custom CSS File.