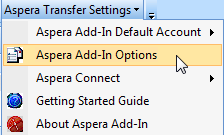
This topic explains how set up an account in the Aspera Add-in for MS Outlook using your Faspex credentials. Note that you can configure more than one Faspex account and identify the default for all new emails. Start by opening Microsoft Outlook and selecting .

The Aspera Add-in Options window will open, displaying your Account credentials tab.
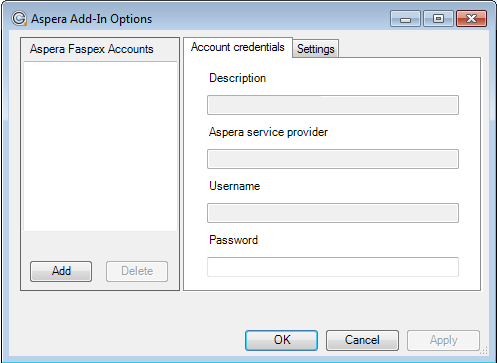
To add a Faspex account, click the  button and complete the fields within the
New Account Setup configuration window.
button and complete the fields within the
New Account Setup configuration window.
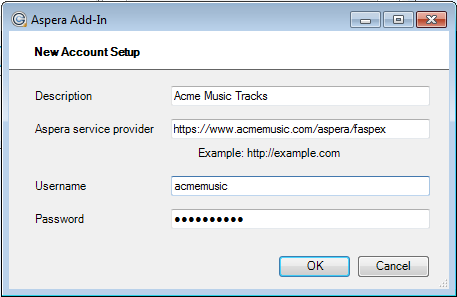
| Field | Description |
|---|---|
| Description | Input a description for your Aspera Faspex account. |
| Aspera service provider | Input the full web address of your Faspex Server (e.g. https://faspex.yourcompany.com or https://www.example.com/aspera/faspex). You must include http:// or https://. |
| Username | Input your Faspex username (i.e., Login ID). |
| Password | Input your Faspex password. |
Once you click the OK button, the Aspera add-in will attempt to validate your account information, including the Faspex web address, username and password. If your credentials are incorrect or if you are not connected to the Internet, you will receive an error message. If this validation passes, then your account will be listed in the Aspera Faspex Accounts list. Select the account to view your saved information.
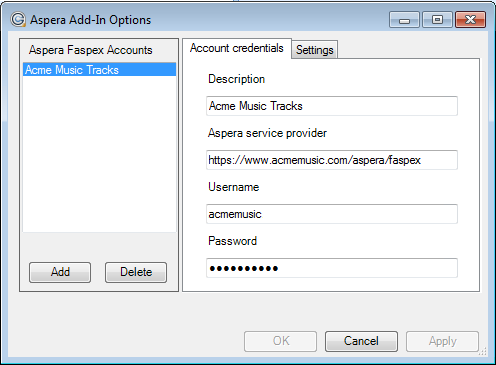
Once an account is selected, you can make changes to it by editing the field(s) and clicking the Apply button.