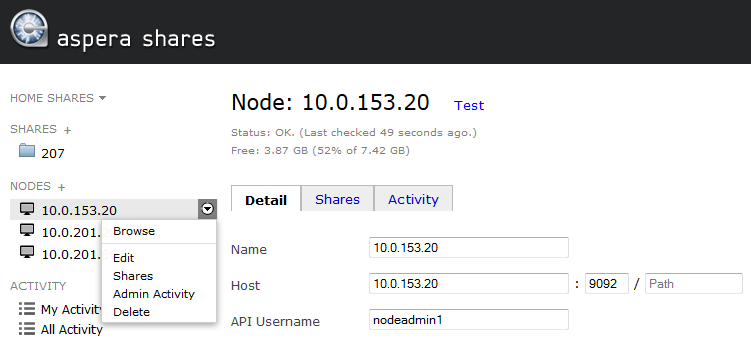
After you have created a node, it appears under the NODES section on your Home page.
Use the drop-down menu to the right of the node name to browse, edit, view shares, view administrative activities, or delete the node.
| Action | Description |
|---|---|
| Browse node | See Browsing Nodes. |
| Edit | Select Edit from the drop-down list to the right of the node's name. From the node's Detail view, you can check the node's status by performing a test, verify its free space, and delete the node. You can also change the details that you provided during the configuration step. See Adding Nodes for details. |
| Shares | Select Shares from the drop-down list to the right of the node's name. This is also accessible from the node's Detail view. You can view the name and directory for each of the node's shares and edit each share. When you click Edit, the share's detail page appears. See Modifying Shares. |
| Admin Activity | Select Admin Activity from the drop-down list to the right of the node's name. This is also accessible from the node's Detail view. You can view a list of all administrative activity that has occurred on the selected node. You can also search for activity based on tagged events or a date range. |
| Delete | Select Delete from the drop-down list to the right of the node's name to delete the node from Share. This is also accessible from the node's Detail view. |