There are two ways to edit configuration settings in Virtual Catcher: in the avc.yml file and in the UI (Dashboard > Virtual Catcher Config). A change made in the file or in the UI is automatically reflected in the other location.
Configuration File
C:\Program Files (x86)\Aspera\ Orchestrator\www\var\config\avc.yml
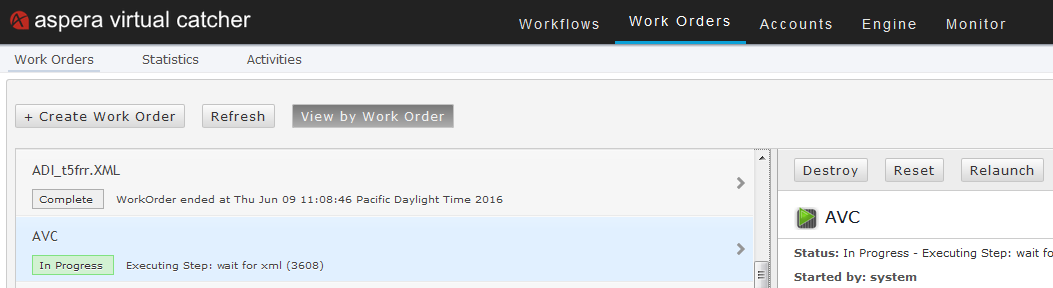
- Click Work Orders > Statistics, then click View by Work Order.
- In the left pane, click an instance of the AVC workflow. The details of the AVC workflow will appear in the right pane.
- Click Reset.
Configuration UI
The table below displays all of the available configuration options for Virtual Catcher. These can be edited in the UI (Dashboard > Virtual Catcher Config). Click Edit in the far-right column to change a default option and enter new information; click Save to set your changes.
| Delivery Mode | Concurrent Deliveries to CMS |
|---|---|
| FTP | 3 |
| SFTP | 3 |
| ASCP / FASP | 5 |
| CORBA | 1 |
This uptake limit optimizes package transfer by eliminating bottlenecks in the workflow.
| Configuration Parameter | Default Value | Details |
|---|---|---|
| AVC Delivery Mode Parameters | Select one of these parameters to specify how to deliver packages to your CMS or AMS. | |
| Delivery mode to use to supply assets to CMS. | FTP Push | Select one of the following: FTP Push, Local Copy,
Initiate CORBA Pull, or Aspera Copy (which deposits the package
files into a watchfolder interface to be picked up by the CMS). Note: This setting configures steps in the ToCMS workflow. |
| AVC Watch folders Parameters | Configures the directories where Virtual Catcher receives packages to process. Virtual Catcher will process packages from both the primary and secondary watchfolders (described below) according to the same workflows, moving them first to the staging folder for validation. | |
| Primary watch folder location. | /tmp/aspera/drop | The primary watchfolder location is the directory where packages arrive from content providers via Aspera transfer products. |
| Secondary watch folder location for alternate delivery method. | /tmp/alt/drop | The secondary watchfolder location is for packages coming in from a source other than Aspera transfer products. |
| Delivery via Aspera Parameters | Edit these parameters if you selected Aspera Copy as the delivery
mode. This option uses Aspera transfer technology for high-speed data transfer from the staging folder to the CMS drop folder. Besides high-speed transfer, this method also provides detailed logging. Note: If using the Aspera Copy option, the Aspera transfer software must be installed on the Virtual Catcher server. |
|
| The password of the system user provided below, to be used for transfer. | password | Enter the system user's password. |
| The username of a system user to be used for transfer. | root | Enter the system user's username. |
| Delivery via CORBA Pull Parameters | uploadhost.example.com | Edit these parameters if you selected Initiate Corba Pull as the delivery
mode. Note: To use this option, you must have an FTP server configured and co-located with the Virtual Catcher server. |
| Hostname or IP for the CORBA host. | 1210 | Enter the Hostname or IP address of the CMS. |
| Port to connect to for the CORBA call. | The CORBA API port number on the CMS. | |
| The FTP User home directory relative to the asset staging directory. | Enter the FTP user’s home account. Note: The Virtual Catcher staging folder must be accessible from the FTP user’s home account. For example, if the staging folder is located at /tmp/staging, the possible values for the this parameter are /, /tmp, /tmp/staging. |
|
| The FTP Username to be supplied in a CORBA call so it can fetch the asset via FTP. | username | Enter the username for the FTP account that CORBA uses to download packages from the staging folder. |
| The FTP password to be supplied in a CORBA call so it can fetch the asset via FTP. | password | The password for the FTP account. |
| The Hostname or IP of this server that will be passed to the CORBA host so it can fetch the asset via FTP. | thishost.example.com | The hostname or IP address of the Virtual Catcher server. |
| The factory name for the CORBA call. Usually it is set to Default. | Default | Enter the factory name to include in the CORBA call. |
| The name service for the CORBA call. Usually it is set to NameService. | NameService | Enter the name service to include in the CORBA call. |
| Delivery via FTP Parameters | Edit these parameters if you selected FTP Push as the delivery mode. | |
| Create folder on the FTP server with name as PackageID and drop files within it. | yes | If yes is selected, a unique folder with the name package-id is created during an FTP transfer of assets to the CMS and the assets are transferred into it. |
| If the ADI file name is not ADI.XML then rename it to ADI.XML during drop into PackageID directory. | yes | If yes is selected, XML files with the name package_id.xml
are automatically renamed ADI.xml before they are delivered to CMS with FTP.
Note: This parameter is only available if the Create folder on the FTP server parameter is also enabled. |
| Password of the FTP host to deliver assets to. | password | The password for the FTP user account. |
| Server Hostname or IP of the FTP host to deliver assets to. | thathost.example.com | The IP address or FQDN of the FTP server. |
| Server TCP port of the FTP server used for FTP delivery. | 1221 | The TCP port for the FTP server. |
| The directory of the FTP host to deliver assets to. | /home/avc | The directory on the FTP server to which files are sent from Virtual Catcher. |
| Username for FTP delivery. | avc | Enter the username of the FTP user account. |
| Delivery via Local Mount Parameters | Edit these parameters if you selected Local Copy as the delivery mode. | |
| If Local Copy delivery is used, this is the folder where files assets are delivered. | /export/transfer | Enter the directory location on the CMS where files should be sent. |
| Delivery via SFTP Parameters | Virtual Catcher offers a Safe FTP delivery option. | |
| Create folder on SFTP server with name as PackageID and drop files within it | yes | If yes is selected, a unique folder with the name package-id is created during an SFTP transfer of assets to the CMS and the assets are transferred into it. |
| If ADI file name is not ADI.XML then rename it to ADI.XML during drop into PackageID directory. | yes | If yes is selected, XML files with the name package_id.xml
are automatically renamed ADI.xml before they are delivered to CMS with FTP.
Note: This parameter is only available if the Create folder on SFTP server parameter is also enabled. |
| Password of the SFTP host to deliver assets to | password | The password for the SFTP user account. |
| Server Hostname or IP of the SFTP host to deliver assets to | thathost.example.com | The IP address or FQDN of the SFTP server. |
| Server TCP port of the SFTP server used for SFTP delivery | 1221 | The TCP port for the SFTP server. |
| The directory of the SFTP host to deliver assets to | /home/avc | The directory on the SFTP server to which files are sent from Virtual Catcher. |
| Username for SFTP delivery | avc | Enter the username of the SFTP user account. |
| Operational Parameters | ||
| HTTP Proxy if required for environment. Use none if you don't need it. | none | If required, enter a proxy hostname or IP address to use for sending notifications from Virtual Catcher to pitchers via the proxy.If not required, leave this parameter set to None. |
| Location for staging files. | /tmp/staging | Once packages are received from the pitcher, they are moved from the Watchfolders to the staging folder, where processing begins. Enter the location of the staging folder in this field. |
| Location where failed assets are moved | /tmp/fail | Enter the directory path for packages that fail ADI validation. Failed packages are moved from the staging folder to this folder. |
| Location where successful assets are moved | /tmp/success | Enter the directory path for packages that pass validation. Validated packages are moved from the staging folder to this folder. |
| Number of bytes that must remain free on the drive. Files will be purged to maintain this minimum. | 20000000 | Enter the number of bytes that must remain free on the drive that hosts the
staging, failure, and success folders. Note: If the free space on this drive falls below this threshold, Virtual Catcher initiates a cleanup process, which deletes packages according to the remaining parameters in this section. |
| Number of minutes files will be retained in the failure archive. | 60 | The oldest packages in the archive are deleted first, once file deletion begins. However, Virtual Catcher will not delete packages from the failure folder that have arrived more recently than the value, in minutes, that you configure here. |
| Number of minutes files will be retained in the success archive. | 60 | Virtual Catcher will not delete packages from the failure folder that have arrived more recently than the value, in minutes, that you configure here. |
| Number of minutes orphaned files are allowed to exist in any of the working folders. | 60 | Orphaned packages are incomplete in some way, so are not moved to either the success or failed directories. When clean up begins, Virtual Catcher will not delete any orphaned packages from the Watchfolders that have existed a shorter time than this parameter. |
| Number of simultaneous assets being processed. | 10 | Defines the number of packages to be processed simultaneously. The appropriate setting here depends on the power of your system and on other factors. Contact Technical Support if you need guidance. |
| Rate, in seconds, at which incoming assets need to be picked up. | 60 | The interval, in seconds, at which Virtual Catcher should poll the watchfolders for new packages. |
| Package Recipient Notification Parameters | These parameters control how Virtual Catcher sends notifications to users
and to content providers.
Note: If the pitcher is using thePlatform to track pitches, configure REST API settings. If not, configure email notifications. |
|
| Account number for the REST API. | 55555 | Enter the account number for the REST API (if using the REST API option). |
| Notification email address or distribution list. | test@example.com | If using the email notification option, enter one or more email addresses or distribution lists. |
| Notification mechanism. If using the Email option, SMTP configuration must be set up under Engine > Mailer Configuration for the email to work. | Rest_API | Select REST_API or Email. Note: If selecting the Email option, follow the procedure in Setting Up SMTP Configuration. |
| Password for the notification REST API |
Note: Enter the password used to authenticate the REST API user. |
|
| REST API URI to obtain auth token for Package receipient Notification. | none | Enter the REST API URI used to obtain an authorization token. |
| REST API URI to use for notifications. The authorization token is appended to this. | none | Enter the REST API URI to be used for notifications that packages have been received. The authorization token is appended to this URI. |
| The affiliate ID used in notification messages. | ABC123 | Also for REST API notifications, enter the affiliate ID to be used in notification messages. |
| Username for the REST API notifications. | Enter the username for REST API notifications. |