Creating a New Faspex User

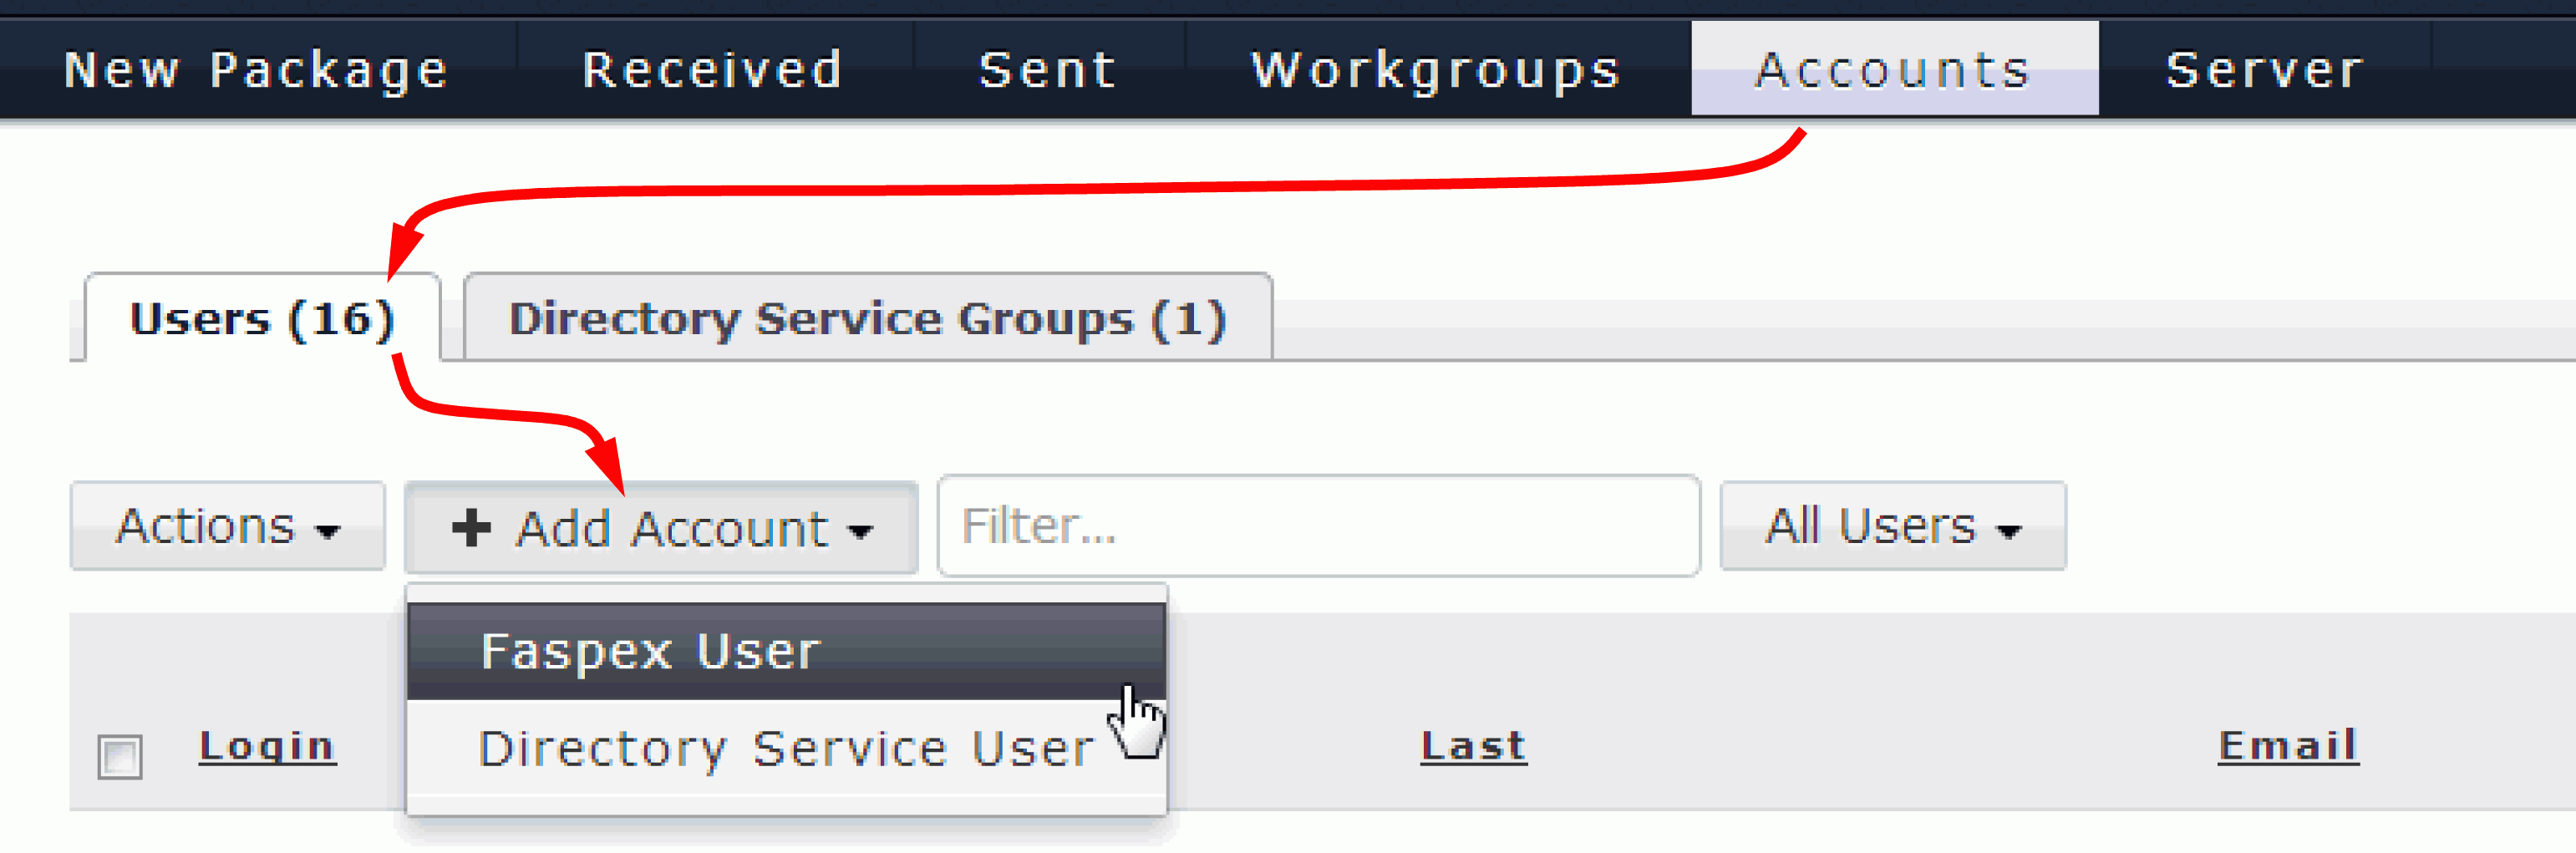
These instructions demonstrate how to create local, non-directory-service user accounts. For information on adding directory service users or groups, see the topic Working with Directory Services (DS).
  1. Click the Accounts tab and select Add Account > Faspex User.
  2. Fill out the New User form.
    On the New User Account page, enter the following information:
    Item Description
    Login The user account's login.
    Important: Usernames cannot contain semi-colons.
    Password The user account's password. Note that you can enforce the creation of strong passwords. Please refer to Configure Package Storage for additional information.
    Password confirmation: Confirm the user account's password.
    E-mail The user's email address (where Faspex Server notifications will be sent). Please refer to Configure Notifications if you would like instructions on modifying Faspex Server's email templates.
    First Name The user's first name.
    Last Name The user's last name.
    Note: You can also make certain fields required within the New User Account form. For details, see Customizing New-User-Account Form.
  3. (Optional) Edit Additional Permissions.
    Click the Edit Additional Permissions link at the bottom of the form to access additional user settings. These settings include the following:
    • Account Details
    • Permissions
    • Package Deletion
    • Advanced Transfer Settings
    • Welcome E-mail
    For more information on specific settings, see Appendix: Additional User Account Permissions.
  4. When finished with the configuration, click Create Account.