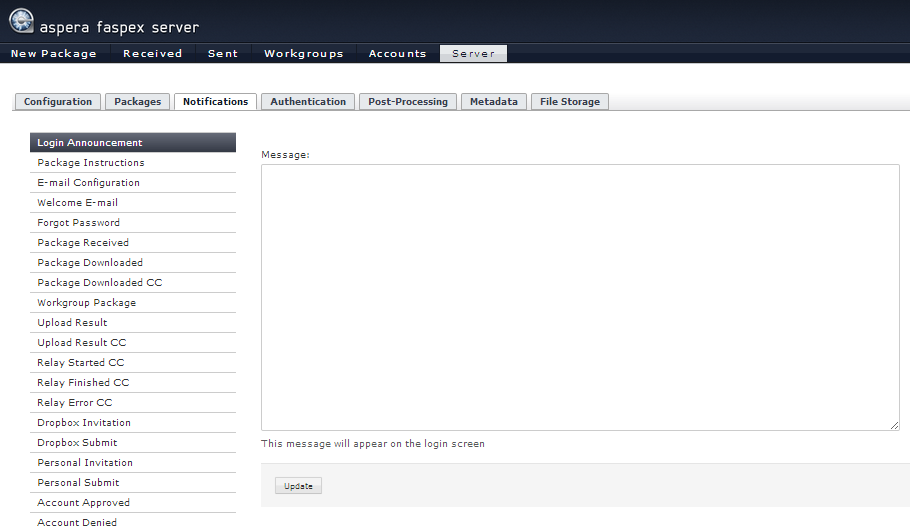
As an IBM Aspera Faspex on Demand Server Administrator, you can communicate with your users regarding various events using the "Notifications" feature. This topic describes the types of notifications available within Faspex. To get started, go to within the Faspex Web UI. The following notification options appear on the left-side of the screen:
- Login Announcement
- Package Instructions
- E-mail Configuration
- Welcome E-mail
- Forgot Package
- Package Received
- Package Downloaded
- Package Downloaded CC
- Workgroup Package
- Upload Result
- Upload Result CC
- Relay Started CC
- Relay Finished CC
- Relay Error CC
- Dropbox Invitation
- Dropbox Submit
- Personal Invitation
- Personal Submit
- Account Approved
- Account Denied
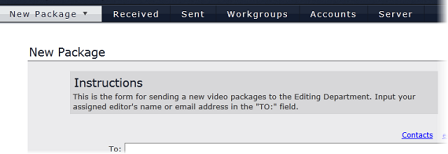
Package Instructions
Post instructions for users who are sending new, normal packages (i.e., NOT dropbox packages). Once saved, your instructions will appear on the Faspex normal "New Package" screen (example is shown below).
E-mail Configuration
Input your email (SMTP) server settings for sending notifications from Faspex. Settings include the following:
- SMTP Authentication: Open or login
- SMTP Mail Server
- Server Port
- Use TLS if available: Enable or disable. Please refer to the IMPORTANT NOTE below.
- Domain
- User: The email account that you are sending the notification from (be sure to include the domain).
- Password: The email account's password.
- Faspex "From" name: The "from" name that appears on Faspex-generated emails.
- Faspex "From" email: The "from" email address that appears on Faspex-generated emails.
- Packages received "From": Choose from Sender, Faspex, Sender via Faspex. If Sender is selected, package notifications will show as being received from "Sender's Name." If Faspex is selected, package notifications will show as being received from "Faspex." If Sender via Faspex is selected, package notifications will show as being received as the "Sender's Name via Faspex."
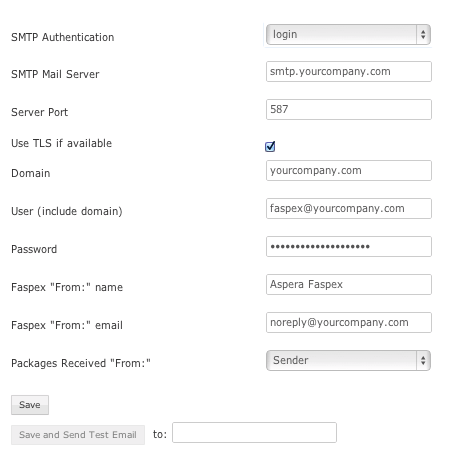
To debug your SMTP server settings, enter your email address in the Save and Send Test Email text field, and click the button to send a test email.
General Notes:
- If a sender of a package downloads the sent package, no users are notified.
- If a recipient downloads a package and is included on the CC list, he receives a download notification.
- If an admin downloads a package from the Server > Packages page, all download CC recipients are notified, even if the admin is not the sender or recipient of the package.
- If a private recipient downloads a package, all download CC recipients are notified, and the private recipient's name is thereby revealed.
- If a package is only partially downloaded, all download CC recipients are notified; however, the notification does not indicate that the download was partial.
For more information on each type of notification, please refer to Appendix: Notification Fields Reference.