| Configuring for Other Aspera Products | |
The steps below describe configuring IBM Aspera Enterprise Server as the transfer server for IBM Aspera Faspex.
The transfer server can be set up in either of the following configurations:
All steps must be performed as root.
The system user authenticates the actual ascp transfer and must be an operating system account. Run the following commands to: (1) create the group faspex; (2) create the system user faspex; and (3) configure it to use the Aspera secure shell, aspshell.
# /usr/sbin/groupadd -r faspex # /usr/sbin/useradd -r faspex -s /bin/aspshell-r -g faspex
Run the following commands to create the packages directory /home/faspex/faspex_packages:
# mkdir -p /home/faspex/faspex_packages # chown -R faspex:faspex /home/faspex/faspex_packages

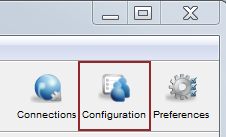
In Server Configuration, open the
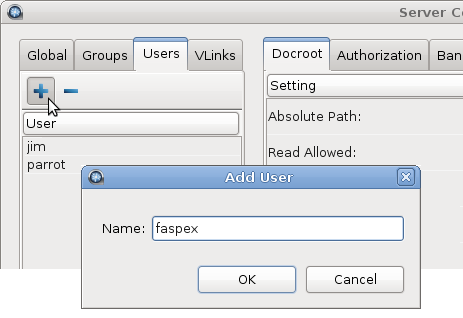
Users tab. Then click the
button.

In the Add User dialog that appears, fill in the name faspex and click OK. The faspex user is added to the user list.
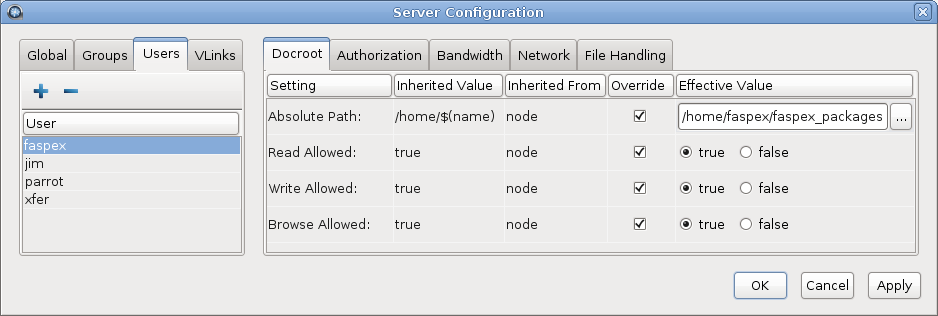
To specify a docroot, select faspex in the user list and click the Docroot tab in the right panel. For the Absolute Path setting, select the Override box, and under Effective Value fill in the following:
/home/faspex/faspex_packages
For the read, write, and browse settings, select the
Override boxes and select true.
You can also add and configure the faspex user for Enterprise Server by modifying aspera.conf, instead of using the application GUI. For details, see Setting Up Users.
# asconfigurator -x "set_server_data;server_name,server_ip_or_name" # asconfigurator -x "set_central_server_data;persistent_store,enable" # asconfigurator -x "set_user_data;username,faspex;dir_allowed,true"
# /etc/init.d/asperacentral restart
# /etc/init.d/asperanoded restart
# ascp -A
Enabled settings: connect, mobile, cargo, node, proxy, http_fallback_server,
group_configuration, shared_endpoints, desktop_gui
If the list includes connect and http_fallback_server, you have a Faspex-enabled server license.
If you update your Enterprise Server license (see Updating the Product License), you must reload the asperanoded service afterwards. Reload the asperanoded service by running the following command:
# /opt/aspera/bin/asnodeadmin --reload
# /opt/aspera/bin/asnodeadmin -a -u node-admin -p s3cur3_p433 -x faspex > asnodeadmin.exe --reload
/opt/aspera/var/aspera_tokenauth_id_rsa.pub
Create a .ssh folder (if it does not already exist) in the faspex user's home directory by running the following command:
# mkdir -p /home/faspex/.ssh
Run the following commands to create the keyfile authorized_keys (if it does not already exist), and append the key text to it:
# cat /opt/aspera/var/aspera_tokenauth_id_rsa.pub >> /home/faspex/.ssh/authorized_keys
Run the following commands to change the key directory and keyfile's ownership to the faspex user, to allow access by the faspex group, and to set permission bits:
# chown -R faspex:faspex /home/faspex/.ssh/authorized_keys # chmod 600 /home/faspex/.ssh/authorized_keys # chmod 700 /home/faspex # chmod 700 /home/faspex/.ssh