Adding and Editing Connections
To connect with cloud storage, you must meet the following prerequisites:
- You have permissions to access the cloud storage and the necessary authentication information.
- To transfer files with an S3 storage device using an S3 direct connection, the user must have a restriction rather than a docroot set on the server.
Once you create connections, you can export and import connection lists. For instructions, see Exporting and Importing Connections.
To create a new connection:
-
Start the application.
Click Start menu > All Programs > Aspera > Client > Client .
-
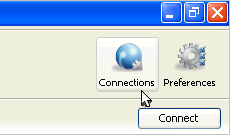
To open the Connection Manager, click
Connections.
-
Click
 to create a new connection.
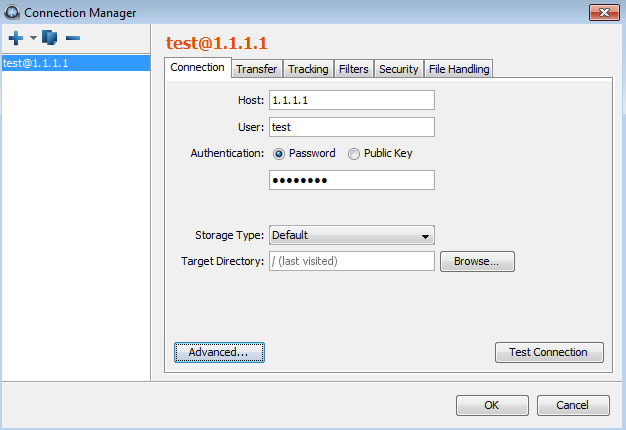
Click
 to duplicate a selected connection (to copy all information into a
new profile) and
to duplicate a selected connection (to copy all information into a
new profile) and  to delete a connection profile.
 -
In the Create Connection popup, select the type of
connection.
- Create a standard connection: Create a connection that does not use the Aspera Transfer Service (ATS) to connect to cloud storage.
- Create a connection with a new Aspera Transfer Service (ATS) Access Key: Create a connection to cloud storage and generate a new ATS access key to authenticate the connection. Select the storage type from the drop-down menu, and enter the required authentication information (depending on storage type). Entering a name is optional; it can be edited in the Connection Manager.
- Create a connection with an existing ATS Access Key: Create a connection to cloud storage with an existing Aspera access key. Enter the Aspera access key ID and secret. Entering a name is optional; it can be edited in the Connection Manager.
-
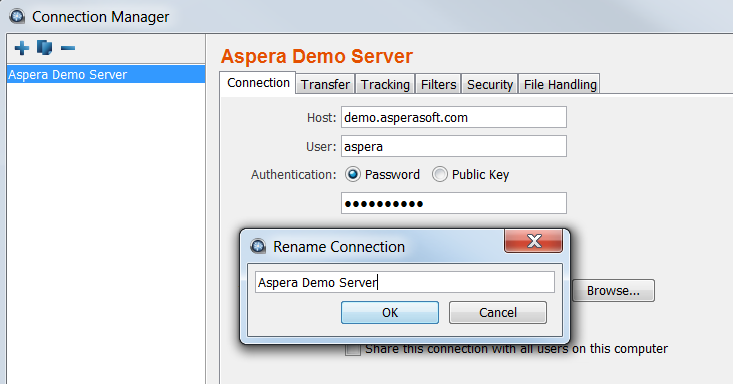
Configure the connection name, if desired.
By default, local connections are named username@host and ATS connections are named the host address.
To name or rename a connection, click the connection name and enter the new name in the popup. Click OK to save your changes.
-
Configure the required settings for the connection.
To activate a local or ATS connection, only Host, User, and Authentication are required.
To activate a connection to object storage, you must also select the type of storage for Storage Type and enter your credentials.
On the Connection tab, enter the following information:
Connection Option Description Host The server's address, such as 192.168.1.10 or companyname.com. For ATS connections, enter the URL for the ATS service and the port for the Node service, such as https://ats-aws-us-west-2.aspera.io:443. User The transfer user's username or, for ATS connections, the Aspera Access Key ID. Authentication For standard connections, choose password or public key authentication. To use public key-based authentication, see Creating SSH Keys in the GUI. For ATS connections, enter the Aspera Access Key secret in the Password field.
Storage Type The default option is local storage. Use the drop-down menu to configure object storage. Connecting to object storage requires an ALEE-enabled Aspera server on the remote storage. Supported object storages include the following:
- Akamai NetStorage
- Amazon S3: Requires your Access Id, Secret Access
Key, and bucket path. The local machine must be reasonably
time-synchronized in order to communicate with the Amazon
servers. You can also select the
Advanced button to modify the
following settings:
- Host: Amazon S3 hostname (default: s3.amazonaws.com).
- Port: Default is port 443.
- HTTPS connection for file browsing: Enable for secure browsing.
- Server-side file encryption: Enable for AES256 encryption.
- Reduced redundancy storage class: Assign objects to a to the "reduced redundancy" storage class (durability of 99.99%).
- Google Storage: Requires your Project Number and bucket path.
- Limelight: Requires your Account, Username, and Password.
- IBM Cloud Object Storage - Swift: Requires your User name, API Key (Password), and Authentication Endpoint.
- Rackspace Swift: Requires your Storage Account and Access Key.
- Windows Azure: Requires your Storage Account and
Access Key.
Azure storage is set to use the Azure block blob REST API by default. To specify the REST API for page blobs, enter your account credentials then click Advanced. Select PAGE from the dropdown menu next to Api and click OK.
- Windows Azure SAS: Requires your Shared URL.
- Azure Files: Requires your File service endpoint and password.
-
Configure other connection settings, if needed.
On the Connection tab, configure non-default connection settings by editing any of the following settings:
Connection Option Description Target Directory (or Bucket Path for most object storage) The default directory when connecting to this computer. When left blank, browsing the remote host brings up either the user's docroot or the last-visited folder. When a path is set, the connection opens to the exact directory. Advanced Settings > SSH Port (TCP) The TCP port for SSH connections. Default: 33001. If the application cannot connect on 33001, it automatically attempts a connection on port 22. If the connection on 22 succeeds, the setting is updated to 22. Advanced Settings > fasp Port (UDP) The UDP port for FASP transfers. Default: 33001. Advanced Settings > Connection Timeout Time out the connection attempt after the specified time. Test Connection Click to test the connection to the remote server with the settings you configured. -
Configure the connection's transfer settings, if needed.
On the Transfer tab, configure non-default transfer settings by editing any of the following settings:
Transfer Option Description Transfer Name Select from the following options: Automatically generate allows the user interface to generate the transfer name; Automatically generate and add prefix uses auto-generated name with a customizable prefix; Specify uses the user-specified name. Policy Select the FASP transfer policy. - high
- Adjust the transfer rate to fully utilize the available bandwidth up to the maximum rate. When congestion occurs, the transfer rate is twice as fast as a fair-policy transfer. The high policy requires maximum (target) and minimum transfer rates.
- fair
- Adjust the transfer rate to fully utilize the available bandwidth up to the maximum rate. When congestion occurs, bandwidth is shared fairly by transferring at an even rate. The fair policy requires maximum (target) and minimum transfer rates.
- low
- Adjust the transfer rate to use the available bandwidth up to the maximum rate. Similar to fair mode, but less aggressive when sharing bandwidth with other network traffic. When congestion occurs, the transfer rate is reduced to the minimum rate until other traffic decreases.
- fixed
- Attempt to transfer at the specified target rate, regardless of network or storage capacity. This can decrease transfer performance and cause problems on the target storage. Aspera discourages using the fixed policy except in specific contexts, such as bandwidth testing. The fixed policy requires a maximum (target) rate.
Speed Select Override default transfer rate settings to specify the transfer rate. The target rate is constrained by the global bandwidth settings; for more information, see Global Bandwidth Settings. Retry Select to automatically retry the transfer after a recoverable failure for a set amount of time, in seconds, minutes or hours. You may set the initial and maximum retry intervals by clicking the More Options button. - Initial interval: The first retry waits for the initial interval. Input in seconds, minutes or hours.
- Maximum interval: After the initial interval, the next interval doubles until the maximum interval is met, and then stops retrying after the retry time is reached. Input in seconds, minutes or hours.
For example, if the retry is set for 180 seconds, the initial interval is 10 seconds, and the maximum interval is 60 seconds, then the transfer will retry at 10, 30, 70, 130, and 180 seconds after the first try, such that the interval progression is 10, 20, 40, 60, 60, and 50 seconds. The last interval is not the maximum because the retry period ends with a final retry.
As another example, if the retry is set for 600 seconds, the initial interval is 30 seconds, and the maximum interval is 120 seconds, then the transfer will retry at 30, 90, 210, 330, 450, 570, and 600 seconds after the first try, such that the interval progression is 30, 60, 120, 120, 120, 120, and 30 seconds. Again, the last interval is not the maximum because the retry period ends with a final retry.
Show Advanced Settings Click Show Advanced Settings to edit the following options: - Specify FASP datagram size (MTU): By default, the detected path MTU is used. Select to specify a value between 296 and 10000 bytes.
- Disable calculation of source files size before transferring: Select to turn off job size calculation on the client side, if allowed by the server.
-
Configure tracking and email notifications, if needed.
On the Tracking Tab, configure non-default transfer settings by editing any of the following settings:
Tracking Option Description Generate delivery confirmation receipt Select to create a delivery receipt file in the specified location. Send email notifications Send email notifications based on specified events (start, complete, and error). See Using Transfer Notifications for more information. -
Configure filters to automatically exclude certain files from transfers with
this connection, if needed.
On the Filters tab, click Add and enter the pattern to exclude files or directories with the specified pattern in the transfer. The exclude pattern is compared with the whole path, not just the file name or directory name. Two special symbols can be used in the setting of patterns:
Filter Symbol Name Description *Asterisk Represents zero to many characters in a string, for example *.tmpmatches.tmpandabcde.tmp.?Question mark Represents one character, for example t?pmatchestmpbut nottemp.For more information on filter rule syntax, see Applying Filters to Include and Exclude Files.
-
Configure security settings, if needed.
On the Security tab, configure non-default transfer settings by editing any of the following settings:
Security Option Description Encryption Select the encryption cipher (AES-128, AES-192, or AES-256) to use for encrypting data in transit, or disable encryption by selecting none. Aspera strongly recommends using encryption. However, encryption may decrease performance, especially at higher transfer speeds and with slower computers.
Content Protection Select Encrypt uploaded files with a password to encrypt the uploaded files with the specified password (client-side encryption at rest). The protected file has the extension .aspera-envappended to the file name. Anyone downloading the file must have the password to decrypt it.Select Decrypt password-protected files downloaded to prompt for the decryption password when downloading encrypted files.
For more information about client-side encryption at rest, see Client-Side Encryption at Rest (EAR).
-
Configure file handling, if needed.
On the File Handling tab, configure non-default transfer settings by editing any of the following settings:
File Handling Option Description Resume Select Resume incomplete files to enable the resume feature. Select the file comparison method from the When checking files for differences dropdown menu: - Compare file attributes - Compares the sizes of the existing and original file. If they are the same, then the transfer resumes, otherwise the original file is transferred again.
- Compare sparse file checksums - Performs a sparse checksum on the existing file and resumes the transfer if the file matches the original, otherwise the original file is transferred again. (Default)
- Compare full file checksums - Performs a full checksum on the existing file and resumes the transfer if the file matches the original, otherwise the original file is transferred again.
Under When a complete file already exists at the destination, select an overwrite rule when the same file exists at the destination. By default, files on the destination are overwritten if different from the source.
File Attributes - Select Preserve Access Time to set the access time of the destination file to the same value as that of the source file.
- Select Preserve Modification Timeto set the modification time of the destination file to the same value as that of the source file.
- Select Preserve Source Access Time to keep the access time of the source file the same as its value before the transfer.
Note: Access, modification, and source access times cannot be preserved for node and Shares connections that are using cloud storage.Source Handling Select Automatically delete source files after transfer to delete the files that transferred successfully from the source. Select Automatically move uploaded source files to a directory after transfer and specify the location on the source machine to which they should be moved. Only a path to an existing location on the client can be specified.
Select Delete empty source subdirectories to remove empty subdirectories from the source once the files that they contain transfer successfully. This option is usually used to clean up the Hot Folder when source files are moved or deleted after transfer.
-
Click OK to save your changes.
Changes are not saved until you click OK. Selecting Cancel will discard any unsaved changes made in the Connection Manager, including the addition and removal of connections.
-
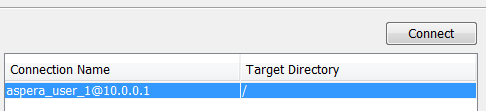
Connect to the remote host.
Double-click the connection name, or select it and click Connect.
Editing and Deleting Connections
Click Connections and select the connection you want to edit
or delete. Edit the settings or click to delete the connection. Deleting connections cannot be undone. When in
doubt, export the connections as a backup before deleting a connection.