Setting Up Groups

Note: These instructions describe how to set up transfer/user groups within the GUI. If you are configuring transfer/user groups within a Terminal, please refer to Setting Up Transfer Groups (Terminal).

You can set up transfer settings based on your system user groups. If users belong to a group and do not have individual transfer settings, then the group's transfer settings will be applied. System user groups must be created prior to being added to Enterprise Server, they cannot be created in the GUI. Follow the steps below to add user groups to Enterprise Server.

  1. Identify or create the user group(s) that you would like to add.
    For information on creating user groups, see your operating system documentation.
  2. Launch the Aspera server as root.
    Run the following command as root:
    # asperascp
  3. Click Configuration to open the configuration settings window.
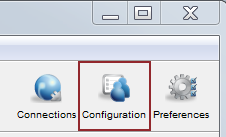
    Bring up the Server Configuration window

  4. Add the user group to your Aspera server.
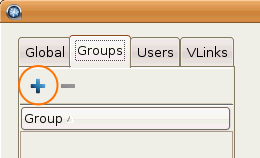
    In the Server Configuration window, click the Groups tab then click Add group and input the group's name. Add the group.
  5. Configure the group's transfer settings.
    These settings are located in the Docroot, Authorization, Bandwidth, Network, File Handling and Precedence tabs. Follow the hyperlinks in the table below for additional information.
    Category Description
    Docroot and File Permission Configuration The document root settings.
    Authorization Configuration Connection permissions, token key, and encryption requirements.
    Bandwidth Configuration Incoming and outgoing transfer bandwidth and policy settings.
    Network Configuration Network IP, port, and socket buffer settings.
    File Handling Configuration File handling settings, such as file block size, overwrite rules, and exclude pattern.
    Configuration Precedence When a user is a member of multiple groups, the precedence setting can be used to determine priority.