Node Drop-down List
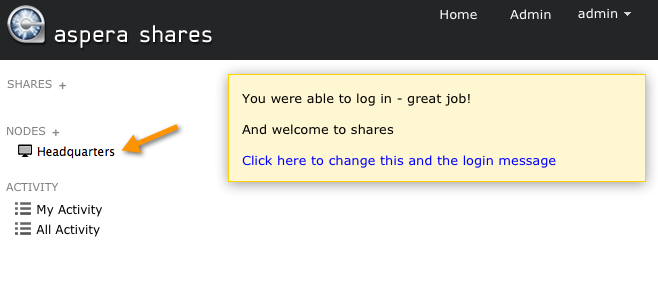
Once you have successfully created a node, it will appear under the NODES section on your Home page.
From here, you can perform multiple actions.
- Click the node's name to browse files on the node.
- Use the drop-down menu to the right of the node name to browse, edit, view shares, view admin activity or delete the node.
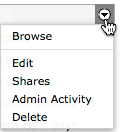
These drop-down options are described in detail below.
| Function | Description |
|---|---|
| Browse node | Please refer to the Section "Browsing a Node," below. |
| Edit | Select Edit from the drop-down list to the right of the node's name. From the node's Detail view, you can check the node's status by performing a test; verify its free space; and delete the node completely. You can also change the details that you provided during the configuration step (refer to "Node Configuration"). |
| Shares | Select Shares from the drop-down list to the right of the node's name. This is also accessible from the node's Detail view (second tab). Here, you can view the name and directory for each of the node's shares, as well as edit each share. When you click Edit, you will be taken to the share's detail page, the functions of which are described in this topic "Share Functions". |
| Admin Activity | Select Admin Activity from the drop-down list to the right of the node's name. This is also accessible from the node's Detail view (third tab). You will see a list of all admin activity that has occurred on the selected node. You may also search for activity based on tagged events or a date range. |
| Delete | Select Delete from the drop-down list to the right of the node's name. This is also accessible from the node's Detail view (link at the bottom of the page). This function deletes the node from the Shares application. |
Browsing a Node
When you browse a node, you will be able to see all directories that exist on that node.
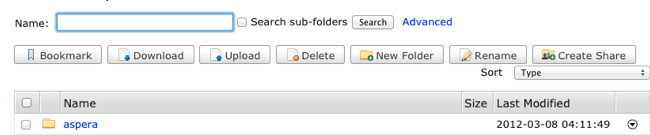
You can
also search for a directory name (using simple or advanced search) and sort the directory list. The following
buttons enable you to perform actions on a directory or directories.
- Bookmark: Create a shortcut to the selected (checkmarked) directory. If you do not check any directory, then the bookmark will be the node's root directory.
- Download: Download the selected (checkmarked) directory or directories using the Aspera Connect browser plugin.
- Upload: Upload a file or folder from another machine to this node using the Aspera Connect browser plugin.
- Delete: Delete the selected (checkmarked) directory or directories.
- New Folder: Create a new directory on the node.
- Rename: Rename an existing directory on the node.
- Create Share: Configure a new share for the selected directory (you can only select one directory at a time). Once you click the Create Share button, you will be taken to the New Share page, which will be pre-populated with the node and directory information. To complete the other fields, see the topic "Shares Configuration".